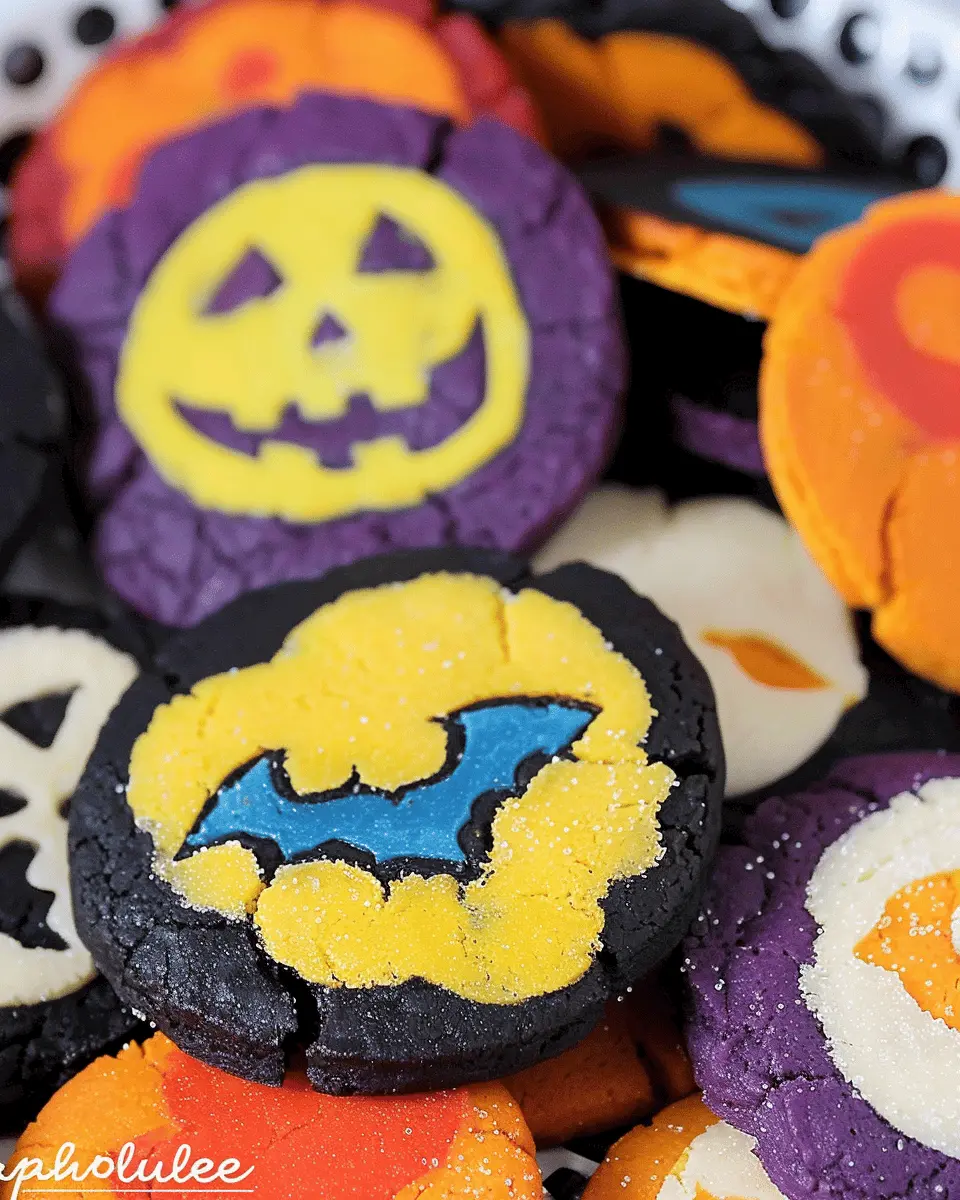
Introduction to Slice and Bake Halloween Cookies
As the leaves turn and the air gets a little crisper, it’s time to embrace the delightful season of Halloween! For young professionals balancing work-life commitments, slice and bake Halloween cookies offer the perfect solution to satisfy your sweet tooth without consuming your weekend. These cookies not only simplify the baking process but also deliver festive treats that can impress family and friends.
Why Slice and Bake Halloween Cookies Are Perfect for Young Professionals
Imagine coming home after a long day at the office. You might be tired, but the thought of indulging in a delicious Halloween-themed cookie can light up your mood. That’s where slice and bake cookies shine! Here are a few reasons why they’re an absolute must this season:
-
Time Efficiency: Unlike traditional cookie recipes that require mixing, rolling, and cutting, slice and bake allows you to prepare the dough ahead of time. Simply shape it into a log, chill it, and when you’re ready for a treat, just slice and pop them in the oven! This way, you maximize enjoyment and minimize effort.
-
Customization: The beauty of slice and bake Halloween cookies is their versatility. You can infuse your dough with flavors like pumpkin spice, chocolate, or caramel bits—perfectly tailored to your preferences. Looking for a ghoulish touch? Add a sprinkle of colored sugar or festive sprinkles to fit right in with the Halloween spirit!
-
Perfect for Entertaining: Hosting a Halloween party? No problem! Bake a batch of delicious cookies and serve them warm right out of the oven. Your guests will be wowed—not only by the flavors but also by your impressive ability to whip up a festive treat on short notice.
Plus, almost anyone can master this simple baking technique. If you’re new to baking, don’t hesitate to check out this guide on baking basics for tips that’ll help you feel more confident.
In a world where time is of the essence, slice and bake Halloween cookies provide the perfect blend of creativity and efficiency. So why not grab your favorite baking tools and immerse yourself in the spirit of the season?
Ingredients for Slice and Bake Halloween Cookies
Essential ingredients for your cookie dough
Creating delightful slice and bake Halloween cookies begins with the right base ingredients. Here’s what you need:
- Butter: 1 cup (softened to room temperature for easy creaming)
- Sugar: 1 cup (granulated works best for that perfect crunch)
- Brown Sugar: 1/2 cup (to add depth and moisture)
- Egg: 1 large (binds everything together beautifully)
- Vanilla Extract: 1 tsp (for that wonderful aromatic flavor)
- Flour: 2 3/4 cups (all-purpose flour is your best bet)
- Baking Soda: 1 tsp (to help the cookies rise)
- Salt: 1/2 tsp (to enhance the sweetness)
Ensure you have these essentials from your pantry or consider checking out helpful resources like Bon Appétit for tips on selecting quality ingredients.
Optional decorations and flavors for your Halloween theme
Once you’ve prepped your dough, let your creativity flow with some fun decorations and flavors!
- Food Coloring: Use gel colors to tint your dough orange, purple, or green.
- Sprinkles: Halloween-themed sprinkles add a festive touch.
- Chocolate Chips: Opt for dark or milk chocolate for a richer taste.
- Nuts: Chopped pecans or walnuts can add a delightful crunch (ensure none are allergic!).
- Frosting: A simple glaze or royal icing can transform your cookies into spooky masterpieces.
Did you know that incorporating unique flavors like orange zest or pumpkin spice can take your cookies to the next level? Experimenting is half the fun! So, gather your ingredients, unleash your creativity, and let’s bake some slice and bake Halloween cookies that will impress your friends and family.
Preparing Slice and Bake Halloween Cookies
Baking can be one of the most delightful ways to celebrate Halloween, and with these slice and bake Halloween cookies, you’ll find it’s not only easy but also a fun activity to share with friends or family. Get ready to don your apron and let’s dive into this spooky baking adventure!
Gather Your Ingredients and Tools
Before you start baking, it’s crucial to have everything at your fingertips. Here’s what you’ll need:
Ingredients:
- 2 ½ cups all-purpose flour
- 1 cup unsalted butter, softened
- 1 cup granulated sugar
- 1 egg
- 1 tsp vanilla extract
- ½ tsp baking powder
- A pinch of salt
- Food coloring (orange, black, green, etc.)
- Halloween-themed sprinkles or decorations
Tools:
- Mixing bowl
- Electric mixer or whisk
- Plastic wrap
- Baking sheet
- Parchment paper
- Sharp knife or dough cutter
Once you have everything ready, you’ll be excited to mix and create your cookie dough!
Make the Cookie Dough from Scratch
Creating cookie dough from scratch is incredibly satisfying and allows for customization. In a mixing bowl, cream together the softened butter and sugar until light and fluffy. This typically takes around 2-3 minutes with an electric mixer.
Next, add the egg and vanilla extract, mixing until fully combined. In another bowl, whisk together the flour, baking powder, and salt. Gradually add the dry ingredients to the wet mixture, mixing until just combined.
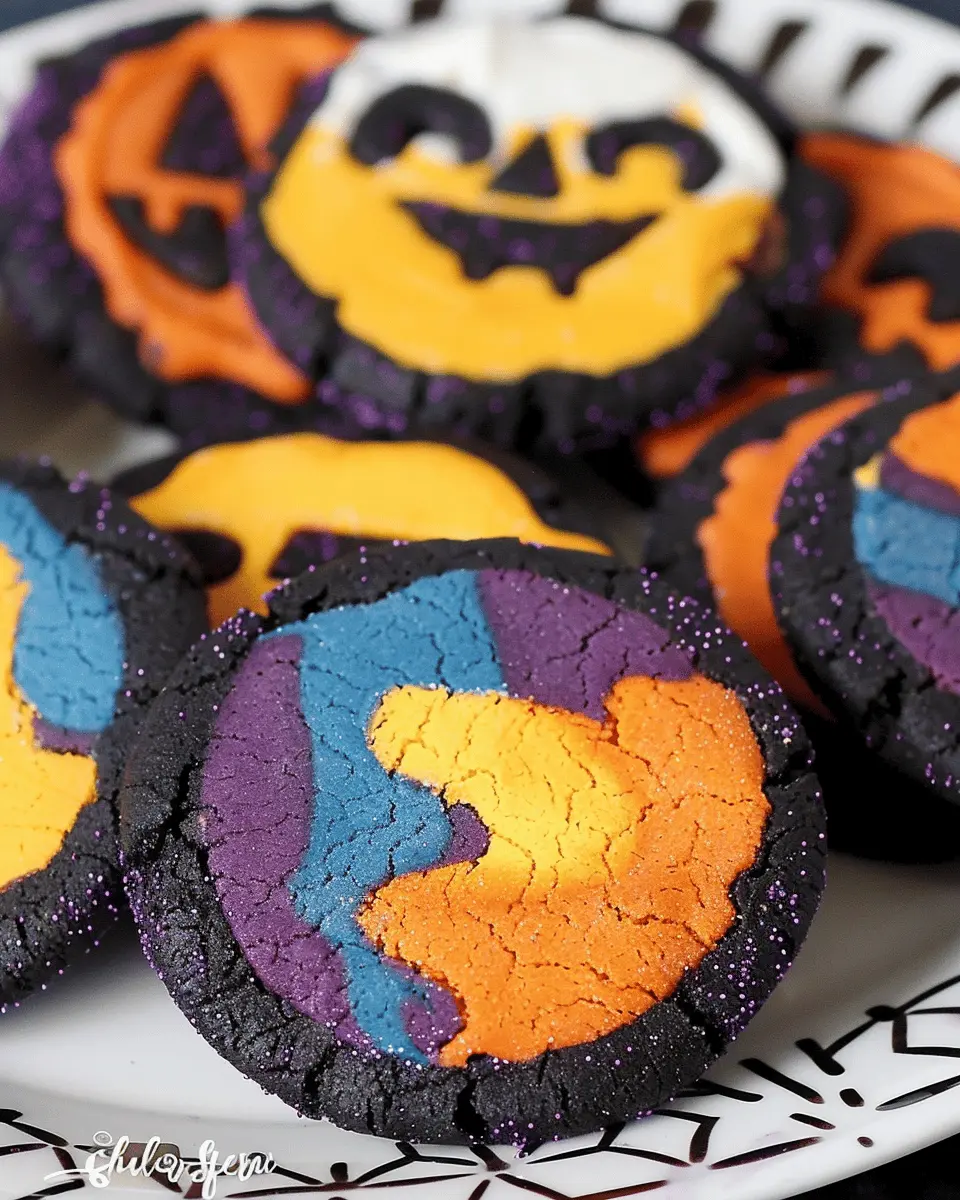
Now, here’s where the magic begins. Divide the dough into portions that you wish to color, and add a few drops of food coloring to each. Knead each portion lightly to achieve vibrant colors—think spooky orange for pumpkin cookies or deep black for bats!
Shape the Dough into a Log
Once your dough is beautifully colored, it’s time to shape it into logs. Lay the dough onto a large piece of plastic wrap and form it into a cylindrical log about 2 inches in diameter. Wrap the plastic tightly around the log, ensuring there are no air pockets. This will keep your dough fresh and ready to slice later.
As you’re shaping, you might want to channel your inner artist. Feel free to mix colors or create spirals for a fun effect. Besides, who said your slice and bake Halloween cookies had to be uniform?
Chill the Dough for Easy Slicing
Chilling your dough is a vital step that can’t be skipped. Place the wrapped logs into the refrigerator for at least 1-2 hours or overnight. This chilling process will firm up the dough, making it much easier to slice and ensuring your cookies hold their shape while baking.
If you’re short on time, a 30-minute chill in the freezer can work, but be careful not to freeze it completely.
Slice and Arrange the Cookies on a Baking Sheet
Once the dough is chilled and firm, it’s time to slice! Unwrap one of your dough logs and place it on a cutting board. Using a sharp knife, carefully slice cookies about ¼ to ½ inch thick. For added fun, consider using cookie cutters to create themed shapes!
Arrange the sliced cookies on a baking sheet lined with parchment paper, leaving some space in between each cookie for spreading.
Preheat your oven to 350°F (175°C) and bake the cookies for about 10-12 minutes or until the edges are golden. As they bake, your kitchen will smell absolutely divine, making it the perfect ambiance for fun Halloween festivities!
Once out of the oven, let them cool before decorating with icing or sprinkles. And there you have it—you’ve successfully prepared mouthwatering slice and bake Halloween cookies! Ready to impress your friends and enjoy the holiday spirit, one delicious bite at a time.
Variations on Slice and Bake Halloween Cookies
When it comes to slice and bake Halloween cookies, the creativity can be just as fun as the baking itself. Let’s explore some spooktacular variations that will charm both the kids and the adults at your Halloween gathering!
Spooky Chocolate Chip Halloween Cookies
What’s better than a classic chocolate chip cookie? A Halloween twist on the classic! For these spooky delights, simply prepare your favorite chocolate chip cookie dough. Before chilling, add in fun Halloween-themed sprinkles—think orange and black! Once ready, slice and bake, and you’ll have a soft, chewy treat that won’t last long on the table. Plus, they pair wonderfully with a hot cup of spiced apple cider or a creamy pumpkin latte.
Pumpkin Spice Slice and Bake Cookies
Get into the fall spirit with these pumpkin spice slice and bake cookies. Incorporate canned pumpkin and warm spices like cinnamon and nutmeg into your dough. The dough should then be divided and rolled into logs. After chilling, slice them into rounds and bake! These cookie bites will fill your kitchen with an irresistible autumn aroma. If you want to add a little flair, consider drizzling the cooled cookies with a simple glaze of powdered sugar and milk.
Ghostly Sugar Cookies with Icing
For a festive touch, try your hand at these adorable ghostly sugar cookies. Prepare your classic sugar cookie dough and roll it out. Use ghost-shaped cookie cutters for a fun shape that kids will love. After baking, let them cool and then decorate with royal icing. A fun tip: use chocolate chips for eyes to give your ghosts some character! Serve these alongside your favorite punch or hot chocolate, and you’ll create a sweet memory.
Feel free to explore these delightful variations and let your creativity shine this Halloween! For more fun cookie ideas, check out resources like Food Network for additional baking inspiration. Happy baking!
Baking Notes for Slice and Bake Halloween Cookies
When you’re ready to whip up some delightfully spooky slice and bake Halloween cookies, a few tips can make all the difference.
Perfecting the Bake Time
Getting the bake time just right is crucial. If you’re using a convection oven, start checking the cookies a couple of minutes earlier. Keep in mind that cookie baking times can vary based on the oven and the thickness of your dough, so go ahead and adjust as needed. Your cookies should be lightly golden around the edges but remain soft in the center. Remember, they’ll continue to cook a bit after you pull them out!
Ensuring Even Slicing for Uniform Cookies
The way you slice your dough affects not just appearance but also baking dynamics. For slice and bake Halloween cookies, aim for even thickness—around 1/4 inch works! Chilling the dough well makes it easier to achieve those neat slices. A sharp knife or a bench scraper can help you get clean cuts.
If you’re excited to explore more tips, websites like King Arthur Baking offer fantastic guides on baking techniques that could come in handy!
Serving Suggestions for Slice and Bake Halloween Cookies
Creative Halloween-themed presentations
When it comes to slice and bake Halloween cookies, presentation is key. Consider arranging your cookies on a festive platter adorned with miniature pumpkins and spooky decorations. You can also play with colors by using vibrant icing to decorate each cookie—think bright orange, green, and purple to give that classic Halloween vibe. Adding edible glitter or sprinkles can elevate your cookies from simple to sensational.
For a fun twist, package your cookies in spooky-themed bags tied with ribbon and give them away to co-workers or friends. Not only a sweet treat, but it’s a great way to share the Halloween spirit!
Pairing with festive beverages
The right beverages can level up your Halloween cookie experience. Consider serving your delicious slice and bake Halloween cookies alongside pumpkin spice lattes or hot apple cider. If you’re in the mood for something refreshing, a sparkling cranberry lemonade is not only festive but offers a delightful contrast to the sweetness of the cookies.
Such pairings will not only please your palate but also set the perfect tone for your Halloween festivities. If you’re curious about other drink options, you can explore ideas at sources like Food Network.
Remember, it’s the little details that make Halloween gatherings memorable, so get creative and enjoy the season!
Tips for Making Perfect Slice and Bake Halloween Cookies
How to Prevent Dough from Sticking
Creating slice and bake Halloween cookies can be a delightful experience, but sticky dough can be a real nuisance. Here are some strategies to keep your work surface and rolling pin in check:
- Chill Your Dough: After mixing, wrap your dough in plastic wrap and let it chill in the fridge for at least an hour. This makes handling far easier and helps prevent sticking.
- Use Parchment Paper: When rolling out the dough, use parchment paper on both sides. This reduces friction and makes it easier to lift the dough without tears.
- Lightly Flour Surfaces: If you’re rolling out your dough directly on the counter, sprinkle a light layer of flour. But be cautious—too much can alter the dough’s texture.
Best Practices for Decorating Your Cookies
Once your slice and bake Halloween cookies are perfectly baked, the fun of decorating begins! Here are some tips to make your cookies stand out:
- Use Royal Icing: This icing dries hard, making it ideal for detailed decorations. Give it a try—you might enjoy creating spooky designs!
- Experiment with Colors: Don’t shy away from using vibrant food coloring. The more colorful, the more festive your cookies will be. Check out resources like Wilton’s Color Chart for guidance.
- Add Edible Glitter: A sprinkle of edible glitter can transform ordinary cookies into eye-catching treats. Your friends will love the extra sparkle!
With these handy tips, your Halloween cookies will be the hit of the party! Happy baking!
Time Details for Slice and Bake Halloween Cookies
When it comes to baking up a spooky batch of slice and bake Halloween cookies, having a clear picture of the time involved is essential. Let’s break it down so you can get back to planning your Halloween festivities!
Preparation time
Getting your ingredients ready and mixing up that cookie dough will take around 20 minutes. It’s the perfect time to let your creativity shine—consider adding festive sprinkles or even a hint of orange zest for a zesty twist.
Chilling time
Chilling the dough is vital for perfect cookie slices. Allow at least 2 hours in the fridge. This step ensures that your cookies hold their shape while baking, providing a delightful texture.
Baking time
Once you’ve sliced your cookies, pop them in the oven for about 10-12 minutes. Keep an eye on them; you want a soft, chewy center with a slightly crisp edge.
Total time
All in, you’re looking at approximately 2 hours and 30 minutes from start to finish, mainly thanks to that chilling period. But remember, most of this is hands-off time, leaving you free to focus on other Halloween prep!
Looking for more baking tips or fun Halloween ideas? Check out resources like Allrecipes for even more delicious inspiration!
Nutritional Information for Slice and Bake Halloween Cookies
Calories per cookie
When indulging in these delightful slice and bake Halloween cookies, it’s good to know what you’re consuming. Each cookie typically contains around 100-120 calories, making them a sweet option for those festive gatherings, but it’s always wise to enjoy them in moderation.
Sugar and fat content
These cookies often feature about 8-10 grams of sugar and 5-7 grams of fat. While a little sweetness can brighten any occasion, be mindful of other sugary treats that might also be around.
Healthier ingredient swaps
Looking to make your holiday treats a little lighter? Consider these healthier ingredient swaps:
- Use whole wheat flour instead of all-purpose for added fiber.
- Substitute coconut oil or applesauce for butter to reduce saturated fat.
- Try natural sweeteners like honey or maple syrup in place of refined sugar.
For more ideas on healthier baking, check out resources from the American Heart Association or the USDA. Your taste buds will thank you, and your body will, too!
FAQs about Slice and Bake Halloween Cookies
Can I freeze the cookie dough for later use?
Absolutely! Freezing your slice and bake Halloween cookies dough is a smart way to save time. Simply wrap the dough logs tightly in plastic wrap and then place them in an airtight container or a freezer bag. You can store them for up to three months. When you’re ready to bake, just thaw the dough in the refrigerator overnight, slice, and pop them in the oven! It’s a hassle-free way to satisfy those spontaneous cookie cravings!
What if my cookie dough is too crumbly?
A crumbly dough can often be fixed with a simple addition! If you find your dough isn’t holding together, you might need to add a bit more moisture. Here’s what you can do:
- Gradually mix in one tablespoon of milk or melted butter until you reach the desired consistency.
- Ensure you’re using fresh ingredients; expired baking powder can lead to dryness, too.
If your dough remains stubbornly dry, check out this guide on cookie dough troubleshooting here.
How can I make these cookies more festive?
Turning your slice and bake Halloween cookies into a spooktacular treat is easier than you think! Here are a few fun ideas:
- Decorative Toppings: Use colorful sprinkles, edible glitter, or themed chocolate chips.
- Icing and Frosting: Whip up a simple royal icing to create creepy designs. Check out a basic royal icing recipe here.
- Cookie Shapes: Use Halloween-themed cookie cutters for added flair, shaping dough into ghosts, pumpkins, or bats before baking.
By adding a few creative touches, you’ll have a deliciously festive cookie platter that’s sure to impress! Happy baking!
Conclusion on Slice and Bake Halloween Cookies
Recap of the fun and flexibility of slice and bake cookies for Halloween
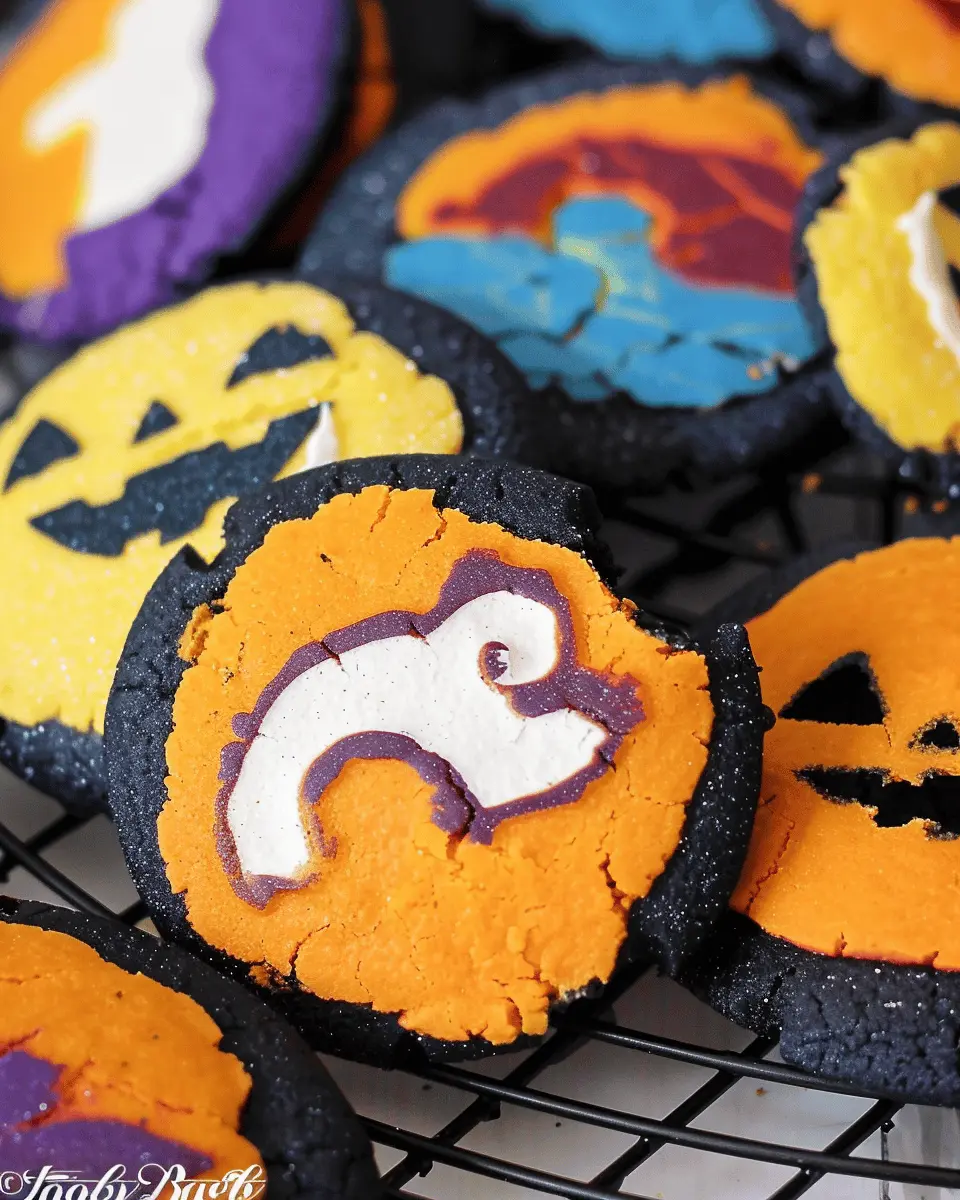
In wrapping up our delightful journey into slice and bake Halloween cookies, it’s clear these treats offer a unique blend of fun and convenience. Whether you’re hosting a spooky gathering or simply indulging in some festive baking, these cookies can easily adapt to your Halloween spirit.
With a variety of shapes, colors, and flavors, you can create a hauntingly beautiful display. Plus, the simplicity of slicing and baking means you can spend less time in the kitchen and more time enjoying the company of friends or perfecting that Halloween costume. For expert tips on cookie decorating, check out this guide that provides step-by-step instructions to elevate your creations.
So, grab your favorite sprinkles and get ready to bake some memories this Halloween!
PrintSlice and Bake Halloween Cookies: Easy Treats for Spooky Fun
These Slice and Bake Halloween Cookies are the perfect treat for spooky fun and easy to make!
- Prep Time: 30 minutes
- Cook Time: 12 minutes
- Total Time: 2 hours 42 minutes
- Yield: 24 cookies 1x
- Category: Dessert
- Method: Baking
- Cuisine: American
- Diet: Vegetarian
Ingredients
- 2 cups all-purpose flour
- 1 cup unsalted butter, softened
- 1 cup granulated sugar
- 1 large egg
- 1 teaspoon vanilla extract
- 1/2 teaspoon baking powder
- 1/4 teaspoon salt
- 1 cup Halloween sprinkles
Instructions
- In a mixing bowl, cream together the softened butter and granulated sugar until light and fluffy.
- Add the egg and vanilla extract, mixing until fully combined.
- In a separate bowl, whisk together the flour, baking powder, and salt.
- Gradually add the dry ingredients to the wet mixture, mixing until just combined.
- Fold in the Halloween sprinkles.
- Divide the dough into two logs, wrap in plastic wrap, and refrigerate for at least 2 hours.
- Preheat the oven to 350°F (175°C) and line a baking sheet with parchment paper.
- Slice the chilled logs into 1/4-inch thick slices, place on the prepared baking sheet.
- Bake for 10-12 minutes, or until the edges are lightly golden.
- Allow to cool before serving.
Notes
- For added flavor, try experimenting with almond or lemon extract.
- These cookies can be decorated with icing for an extra spooky touch.
Nutrition
- Serving Size: 2 cookies
- Calories: 150
- Sugar: 8g
- Sodium: 50mg
- Fat: 7g
- Saturated Fat: 4g
- Unsaturated Fat: 2g
- Trans Fat: 0g
- Carbohydrates: 20g
- Fiber: 0g
- Protein: 1g
- Cholesterol: 20mg
Keywords: Slice and Bake Halloween Cookies, Halloween treats, spooky cookies