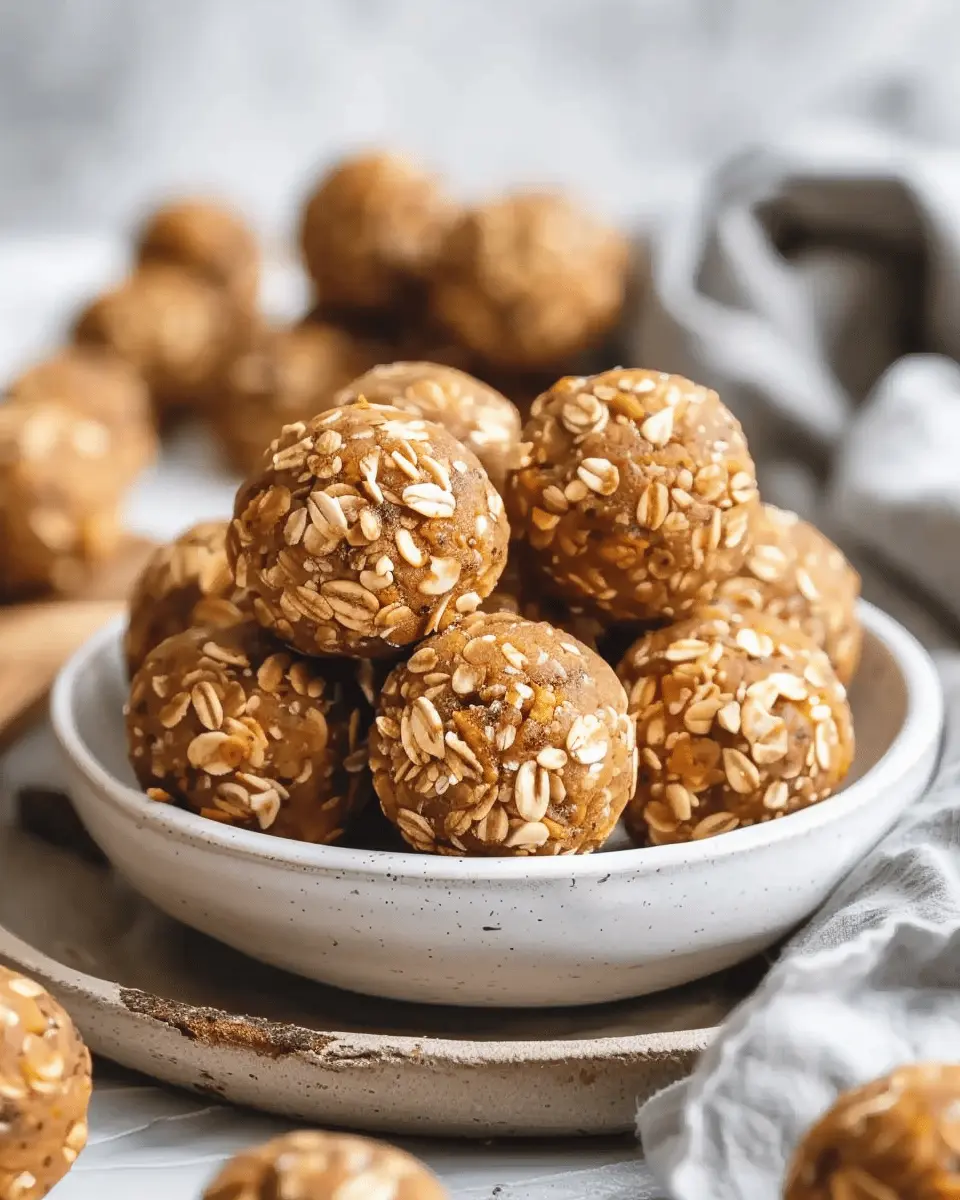
Introduction to No Bake Pumpkin Protein Balls
In a world where hustle and bustle have become the norm, finding quick and nutritious snacks can feel like an uphill battle. That’s where no bake pumpkin protein balls come into play! These little bites of goodness are not just delicious; they’re also loaded with protein, making them an ideal choice for busy young professionals. Imagine a snack that you can whip up in under 15 minutes, doesn’t require an oven, and provides you with energy to power through your day. What’s not to love?
Why choose no bake protein balls?
These no bake pumpkin protein balls offer a wealth of benefits that make them a smart choice for anyone looking to up their snack game:
-
Quick and Easy: With minimal prep time and no need for baking, they fit seamlessly into your busy lifestyle. Just mix the ingredients, roll them into balls, refrigerate, and you’re good to go!
-
Nutritious Ingredients: Pumpkin is rich in vitamins A and C, fiber, and antioxidants. Coupled with protein powder, oats, and nut butter, these balls are a powerhouse of nutrients that support both body and mind. Plus, if you want to elevate their nutrition, consider adding seeds or dried fruit for an extra boost.
-
Customizable: One of the best things about no bake pumpkin protein balls is their versatility. You can easily substitute almond butter for peanut butter or switch out spices based on your taste – think cinnamon, nutmeg, or even a hint of ginger.
-
Perfect Snack for Any Time: Whether you need a quick breakfast, a post-workout fuel, or an afternoon pick-me-up, these bites have you covered. Just grab one (or two!) for immediate energy without the crash that sugary snacks often bring.
By making your own no bake pumpkin protein balls, you can control the ingredients and avoid the hidden sugars and preservatives found in many store-bought snacks. Ready to dive into this quick recipe? Let’s get started and make snacking a bit healthier and a lot more fun! For more healthy ideas, check out articles from Healthline or Nutrition.gov.
Ingredients for No Bake Pumpkin Protein Balls
Creating your own no bake pumpkin protein balls is not only simple but also a fun way to incorporate nutritious ingredients into your diet. Here’s what you need to whip up this delightful treat!
Essential ingredients you’ll need
To get started, here are the basic ingredients you’ll want:
- Pumpkin Puree: A star ingredient that gives a warm flavor and a boost of nutrients.
- Protein Powder: Choose your favorite—whey or plant-based work well.
- Oats: Rolled oats provide a wholesome texture and energy-boosting carbs.
- Nut or Seed Butter: Almond butter or peanut butter adds creaminess and healthy fats.
- Honey or Maple Syrup: For a touch of sweetness and binding.
- Cinnamon: This brings that cozy fall taste.
By using these wholesome ingredients, you’ll not only enjoy the flavor but also reap the benefits of a protein-packed snack.
Optional add-ins for extra flavor
Want to elevate your no bake pumpkin protein balls? Consider these fun additions:
- Choc Chip: Dark or dairy-free chocolate chips for that sweet surprise.
- Nuts and Seeds: Walnuts or chia seeds can add a nice crunch.
- Dried Fruit: Cranberries or raisins for a chewy texture and additional sweetness.
- Spices: Nutmeg or pumpkin spice for an extra flavorful kick.
When you mix and match these optional ingredients, you create a custom treat that’s all your own! Plus, if you’re looking for more meal ideas, check out this comprehensive guide to high-protein snacks here. Enjoy making your no bake pumpkin protein balls!
Step-by-step Preparation of No Bake Pumpkin Protein Balls
As the crisp air of autumn sets in, there’s something incredibly comforting about whipping up a batch of no bake pumpkin protein balls. They’re not only delicious but also provide a quick boost of energy, making them a perfect snack for busy young professionals like you. So, let’s roll up our sleeves and dive into this simple and satisfying recipe together.
Gather your ingredients
First things first, gather all your ingredients! Having everything on hand makes the entire process smoother and more enjoyable. Here’s what you’ll need:
- 1 cup of rolled oats: Provides a wholesome base that’s perfect for energy.
- 1/2 cup of almond butter or peanut butter: Acts as the binding agent and adds a creamy texture.
- 1/2 cup of pumpkin puree: The star ingredient, bringing moisture and flavor.
- 1/4 cup of honey or maple syrup: Adds just the right sweetness.
- 1/2 cup of protein powder: Choose your favorite—whey, pea, or any other kind.
- 1 teaspoon of pumpkin pie spice: Infuses that classic fall flavor.
- Optional add-ins: Dark chocolate chips or chopped nuts can add extra texture and fun!
Once you have all these goodies lined up, you’re ready to mix things up!
Mix the base ingredients
In a large mixing bowl, combine the rolled oats and your choice of nut butter. I usually prefer almond butter for its mild flavor, but peanut butter provides that nostalgic comfort many love. Stirring these two together creates a solid and satisfying base for your no bake pumpkin protein balls.
For a fuss-free mixing experience, using a spatula works wonders. It’s like giving a hug to all the ingredients—make sure they’re well combined and feeling cozy together!
Add the pumpkin puree
Time for the pumpkin! Gently fold in the pumpkin puree you’ve gathered. Pumpkin not only enhances the flavor profile but also adds a fantastic nutritional punch—think fiber and vitamins while also making your protein balls wonderfully moist.
Make sure you mix until there are no dry spots left. You want this mixture to be as homogenous as a cozy fall evening. It’s easy to get carried away here; the vibrant color can be quite mesmerizing!
Incorporate protein powder and spices
Next up, sprinkle in the protein powder and pumpkin pie spice. The protein powder will enhance the nutritional content of your no bake pumpkin protein balls, making them a guilt-free snack. You can choose to use a flavored protein powder for an extra kick!
Stir this mixture thoroughly; the spices can be subtle but will deliver that autumnal aroma. If you close your eyes, pay attention, and breathe deeply, you can almost sense the orange leaves falling outside your window.
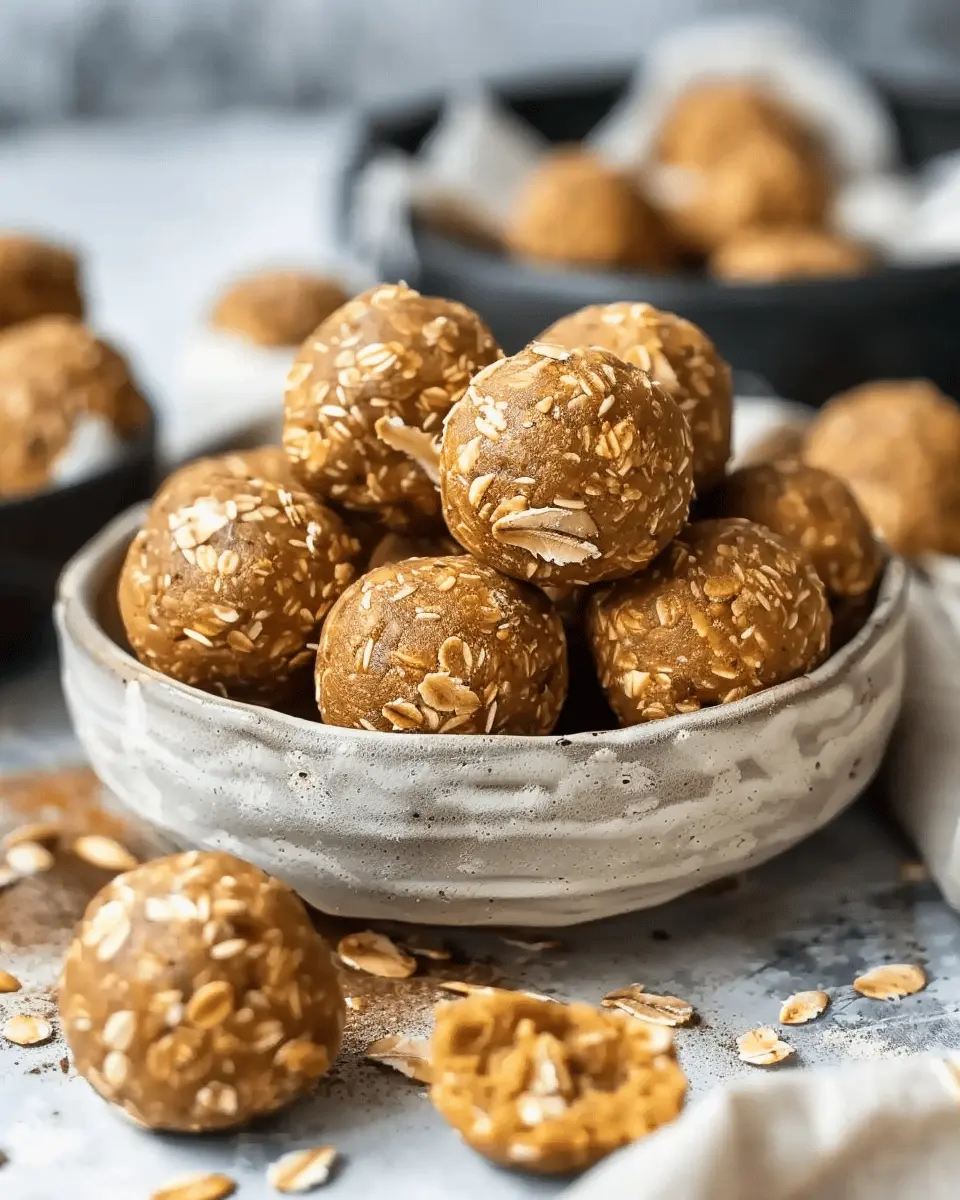
Form the protein balls
This is where the magic happens! Take small amounts of your mixture (about a tablespoon at a time) and roll them into balls between your palms. Don’t worry if they’re not perfectly uniform; the beauty lies in their homemade allure.
As you roll each ball, think about how you’ll share these with friends or keep them stashed for your own afternoon snack cravings. Clearly, they’re perfect for meal prep!
Refrigerate to set
After rolling out your no bake pumpkin protein balls, arrange them on a baking tray lined with parchment paper. Now, place them in the refrigerator for about 30 minutes to an hour. This step allows them to firm up and makes them easier to eat. While you wait, maybe brew a cup of your favorite herbal tea or coffee—after all, a nice drink pairs perfectly with these delights!
Once chilled, you can store your protein balls in an airtight container, and they’ll keep well in the fridge for about a week.
So there you have it—your step-by-step guide to making no bake pumpkin protein balls! These snacks are perfect to power you through busy days and delightful for sharing with friends. Give this recipe a try, and you won’t be disappointed! For more healthful snacking ideas, check out Healthline’s nutritious snack options.

Variations on No Bake Pumpkin Protein Balls
Chocolate Chip Pumpkin Protein Balls
Who doesn’t love a good chocolate chip treat? By adding semi-sweet chocolate chips to your no bake pumpkin protein balls, you not only enhance the flavor but also give in to that sweet tooth without veering too far off your healthy eating path. Just stir in a handful of chocolate chips into your mixture before forming the balls. For an extra twist, you could even experiment with dark chocolate chips to amplify those rich flavors.
- Use a ratio of 1/4 cup of chocolate chips for every cup of protein mixture.
- You can also substitute some of the oats with a chocolate-flavored protein powder for an indulgent twist.
Nutty Pumpkin Protein Balls
If you’re looking for a nuttier flavor profile, nutty pumpkin protein balls are the way to go! Chopped almonds, walnuts, or pecans can add a satisfying crunch and extra protein. Feel free to mix and match your favorite nuts to create a custom blend.
- Consider adding 1/4 cup of nut butter (like almond or peanut) for creaminess.
- For an appealing twist, sprinkle in some chia or flax seeds for added health benefits, making these treats even more protein-packed.
When you explore these variations, you not only cater to your cravings but also keep your snacks exciting. The beauty of no bake pumpkin protein balls lies in their versatility—whether you’re in the mood for something sweet or nutty, there’s a variation out there for everyone. For more tips on protein-packed snacks, you might want to check out Healthline’s guide on protein sources. Happy snacking!
Cooking Tips and Notes for No Bake Pumpkin Protein Balls
How to Avoid Stickiness
Getting your no bake pumpkin protein balls to hold together without turning into a gooey mess can be tricky. Here’s how to tackle that:
- Choose the Right Nut Butter: Opt for a creamy almond or peanut butter as they provide better adhesion compared to chunkier varieties.
- Chill First: After mixing your ingredients, let the mixture chill in the fridge for about 30 minutes before rolling into balls. This makes them easier to handle and less sticky.
Tips for Achieving the Perfect Texture
A balanced texture can make all the difference when creating these tasty bites. Here’s what to keep in mind:
- Oats Matter: Use old-fashioned oats instead of quick oats for a heartier texture. They add a satisfying chew.
- Flavor Additions: Consider adding a dash of cinnamon or nutmeg for a warm autumn flavor. These spices not only enhance taste but can also seemingly lighten overall density!
- Don’t Rush: When mixing, take your time until the ingredients are fully integrated. This ensures a delightful bite every time.
Remember, the process is just as enjoyable as the end result! For more guidance, check out this resource on nut butter types, which dives deeper into their textures and flavors. Happy cooking!

Serving Suggestions for No Bake Pumpkin Protein Balls
Great pairings for your protein balls
These no bake pumpkin protein balls are versatile snacks, perfect for any occasion. For a balanced treat, try pairing them with:
- Greek Yogurt: Adding a dollop of creamy Greek yogurt can enhance the flavor and boost protein intake.
- Nut Butter: A spread of almond or peanut butter can take your snack to the next level, adding moisture and richness.
- Turkey Bacon: Crumble crispy turkey bacon on top or alongside for a savory crunch that contrasts beautifully with the sweetness of the pumpkin.
Additionally, a scoop of cottage cheese or a handful of dried fruits like cranberries makes a delightful complement to your protein-packed bites.
Creative presentation ideas
Make your no bake pumpkin protein balls visually appealing! Here are a few ideas to elevate your serving game:
- Snack Charcuterie Board: Arrange your protein balls on a rustic wooden board alongside fruits, nuts, and cheeses for an inviting spread.
- Mason Jars: Layer them in clear jars with yogurt or mousse for a stunning, grab-and-go option.
- Party Favors: Package your protein balls in cute bags tied with twine for a thoughtful addition to any gathering.
These small touches can turn a simple snack into an Instagram-worthy treat while impressing your friends. If you’re looking for more inspiration, check out Food Network for creative ideas!
Time Breakdown for No Bake Pumpkin Protein Balls
Preparation Time
Making no bake pumpkin protein balls is a breeze! You’ll need about 10–15 minutes to gather your ingredients and mix everything together. It’s the perfect opportunity to unwind after a long day—just throw on your favorite playlist while you whip up these tasty treats.
Setting Time
Once you’ve formed your protein balls, pop them in the fridge for about 30 minutes. This helps them firm up and ensures that they hold together when you’re ready to enjoy. Perfect time for a quick workout or catching up on a podcast!
Total Time
In total, you’re looking at around 45 minutes from start to finish. That means in less than an hour, you can have a delicious, healthy snack ready to go! If you’re looking for more quick recipes, check out these easy no bake energy bites.
So, what are you waiting for? Dive into this delightful culinary adventure!
Nutritional Facts for No Bake Pumpkin Protein Balls
When you’re on the hunt for a healthy snack, no bake pumpkin protein balls might just become your new go-to! Let’s break down the nutritional profile of these delightful treats.
Calories per ball
Each no bake pumpkin protein ball contains approximately 100 calories. This makes them an energizing snack option that won’t derail your daily calorie count.
Protein content
Packed with protein, these balls deliver about 5 grams per serving. This makes them perfect for post-workout recovery or a satiating afternoon snack.
Sugar content
With around 2 grams of sugar per ball, these treats are super low in sugar. You’ll find all the autumn flavor without any guilt, allowing you to savor the taste of pumpkin goodness.
For more about healthy snacking, check out Healthline which offers great insights on nutritious choices!
FAQs about No Bake Pumpkin Protein Balls
Can I make these gluten-free?
Absolutely! To make your no bake pumpkin protein balls gluten-free, simply choose certified gluten-free oats. Many brands provide options that are safe for those with gluten sensitivities or celiac disease. Always check labels to ensure they meet your dietary needs.
How long do they last in the fridge?
When stored in an airtight container in the fridge, your no bake pumpkin protein balls can last up to one week. You can also freeze them for extended storage. Just make sure to separate them with parchment paper to prevent sticking. They can stay good for about three months in the freezer, making them a fantastic grab-and-go snack for your busy week!
What can I substitute for protein powder?
If you don’t have protein powder on hand or prefer to avoid it, there are several alternatives you can use:
- Nut butters: Almond, peanut, or cashew butter can add creaminess and protein.
- Chia seeds or flaxseeds: These offer healthy fats and additional fiber.
- Ground oats: Just blend them into a fine powder for a wholesome option.
Feel free to get creative! Each substitute can give your no bake pumpkin protein balls a unique flavor and texture.
By the way, if you’re curious about the nutritional benefits of pumpkin or other ingredients, check out this article on Superfood Benefits of Pumpkin for more information.
Don’t hesitate to drop any more questions in the comments! We’d love to hear how your no bake pumpkin protein balls turn out!
Conclusion on No Bake Pumpkin Protein Balls
When it comes to snacking, nothing beats the satisfaction of homemade treats like no bake pumpkin protein balls. By making your own snacks, you gain full control over the ingredients, ensuring they’re not only healthy but also delicious.
The Perks of Homemade Snacks
- Nutritional Control: You can select wholesome ingredients that suit your dietary preferences.
- Cost-Effective: Homemade snacks often cost less than store-bought options.
- Customizable Flavors: Experiment with different spices or add-ins for a personalized touch.
If you’re looking to invigorate your snack game, consider whipping up these delightful no bake pumpkin protein balls. You’ll enjoy the rich flavor of pumpkin along with a boost of protein, making them perfect for a post-gym treat or a mid-afternoon pick-me-up. So, why not give it a try? Learn more about the benefits of homemade snacks through Healthline.
Incorporating these protein-packed balls into your routine can make healthy eating fun and genuinely enjoyable!
PrintNo Bake Pumpkin Protein Balls: Easy and Healthy Fall Snack
A delicious and nutritious fall snack that’s easy to make and perfect for on-the-go.
- Prep Time: 10 minutes
- Cook Time: 0 minutes
- Total Time: 40 minutes
- Yield: 24 balls 1x
- Category: snacks
- Method: no bake
- Cuisine: American
- Diet: vegetarian
Ingredients
- 1 cup pumpkin puree
- 1/2 cup peanut butter
- 1/4 cup honey
- 1 cup oats
- 1/2 cup protein powder
- 1 tsp cinnamon
- 1/2 tsp nutmeg
- 1/4 cup chocolate chips
Instructions
- In a mixing bowl, combine pumpkin puree, peanut butter, and honey.
- Add oats, protein powder, cinnamon, and nutmeg. Mix until well combined.
- Stir in chocolate chips.
- Form the mixture into balls and refrigerate for at least 30 minutes before serving.
Notes
- For a different flavor, try adding a pinch of salt or vanilla extract.
- These snacks can be stored in the fridge for up to one week.
Nutrition
- Serving Size: 2 balls
- Calories: 150
- Sugar: 8g
- Sodium: 5mg
- Fat: 6g
- Saturated Fat: 1g
- Unsaturated Fat: 4g
- Trans Fat: 0g
- Carbohydrates: 22g
- Fiber: 3g
- Protein: 6g
- Cholesterol: 0mg
Keywords: No Bake Pumpkin Protein Balls, healthy snacks, fall recipes