Introduction to Graveyard Brownies
If you’ve ever found yourself at a Halloween party or autumn gathering, you might have come across the delightful and spooky graveyard brownies. These fun, chocolatey treats are not only a feast for the eyes, but they also hit the sweet spot for flavor and creativity. So, what exactly are graveyard brownies, and why do they become the star of every event?
What are Graveyard Brownies?
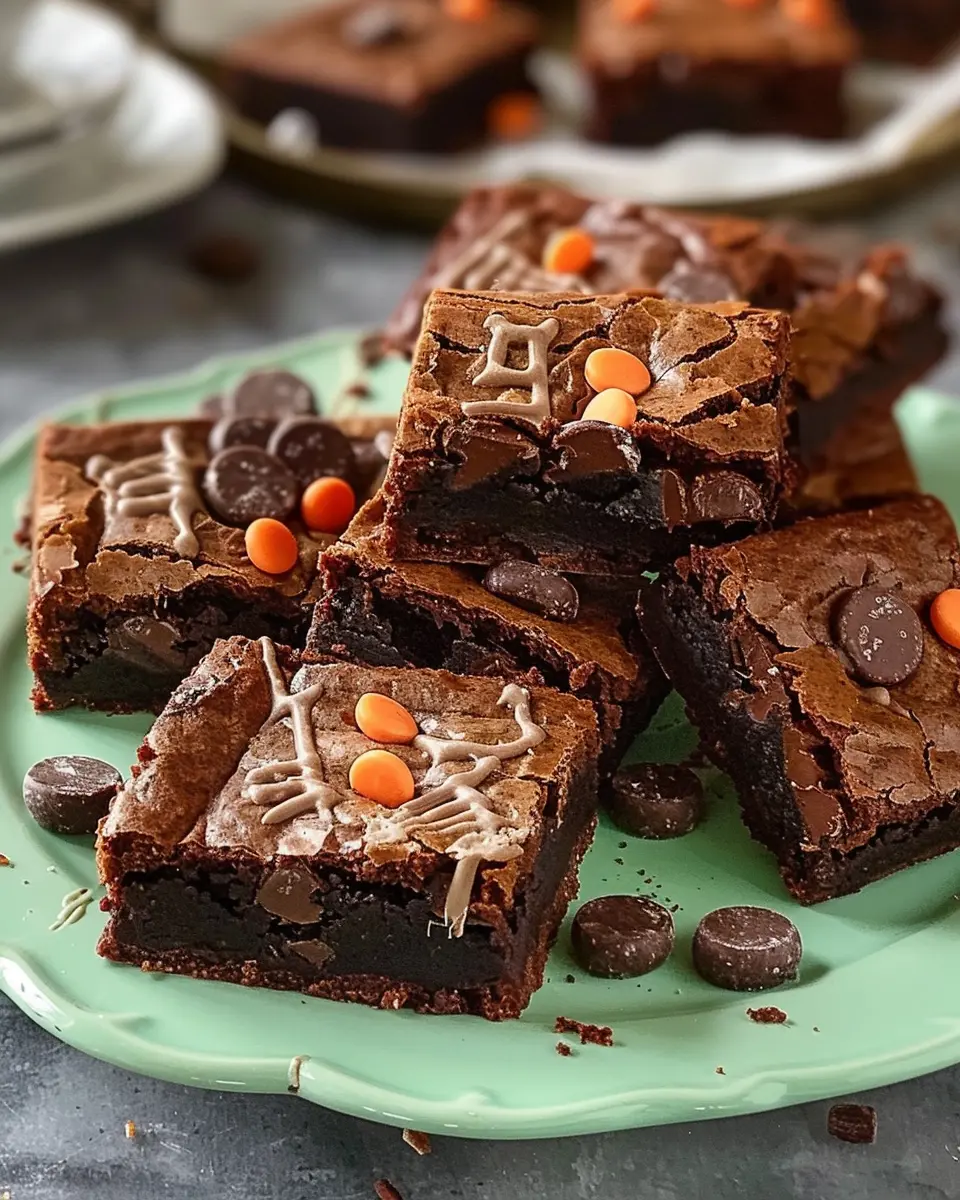
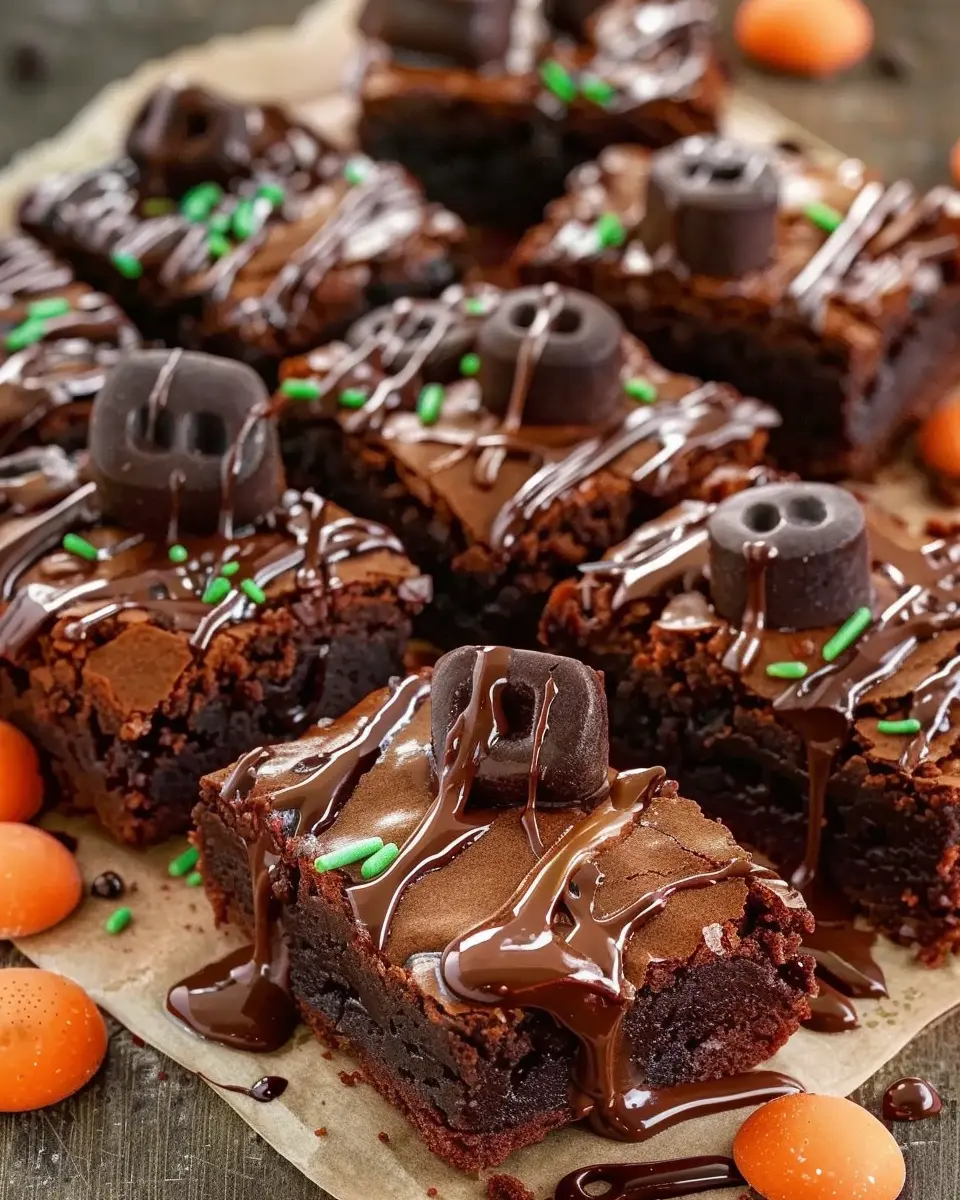
Graveyard brownies are fudgy brownies that have been playfully transformed into an edible graveyard scene. Imagine a rich chocolate brownie adorned with crumbled cookie “dirt,” gummy worms, and an assortment of spooky décor like candy tombstones. This whimsical combination makes them the perfect dessert for any Halloween-themed event, kids’ parties, or potlucks where you want to add a touch of festive flair.
Here’s why they’re a hit:
- Visual Appeal: The gothic, playful presentation captivates guests and makes dessert a conversation starter. Who wouldn’t want to Instagram a delicious graveyard scene?
- Creativity: Decorating your brownies allows for limitless creativity. You can customize the “gravestones” and toppings to fit your party theme perfectly.
- Deliciousness: Beyond just looks, these brownies deliver a rich chocolate flavor that keeps guests coming back for seconds—or thirds. You can use quality ingredients to elevate the taste further.
One of my favorite moments was at a recent gathering, where we had a graveyard brownies contest. Each participant brought their own spin, from adding pumpkin spice to including pumpkin-flavored frosting. Not only did we bond over baking, but we also discovered just how versatile these brownies can be!
As you prepare your very own batch, remember that the fun lies in personalizing them to match your style and flavor preferences. They’re not just desserts; they’re a way to express your creativity while tantalizing taste buds. For more ideas on assembling a perfect treat table, check out This Article on dessert presentation tips.
So, are you ready to create some spooky enchantment in your kitchen with these graveyard brownies? Let’s dive into the recipe that will have everyone raving!
Ingredients for Graveyard Brownies
When it comes to making graveyard brownies, the key is to gather the right ingredients that will not only give your brownies a rich, fudgy base but also help create that spooky, Halloween vibe. Let’s dive into the essentials!
Essential ingredients you’ll need
To whip up a batch of delectable graveyard brownies, here’s a straightforward list of ingredients:
- 1 cup unsalted butter: The foundation for a moist brownie.
- 2 cups granulated sugar: For that perfect balance of sweetness.
- 1 cup brown sugar: Adds depth of flavor and chewiness.
- 4 large eggs: Essential for binding and adding richness.
- 1 cup all-purpose flour: The structure of your brownies.
- 1 cup cocoa powder: The star ingredient for that deep chocolate flavor.
- 1 teaspoon vanilla extract: A hint of warmth to elevate the taste.
- 1/2 teaspoon salt: To enhance all those sweet flavors.
Looking for alternatives? Check out these resources from King Arthur Baking and Serious Eats for great substitutes and tips!
Optional decorations to take it up a notch
Now, let’s get creative! Here are some fun options to customize your graveyard brownies:
- Crushed Oreos: Sprinkle on top to give a dirt-like appearance.
- Gummy worms: Place a few to create an eerie effect.
- Chocolate tombstones: Use store-bought or DIY chocolates molded into graveyard shapes.
- Royal icing: Pipe fun messages or designs for a spooky touch.
With these ingredients and decorations, your graveyard brownies will be the perfect treat for your Halloween festivities! Happy baking!
Step-by-Step Preparation of Graveyard Brownies
Getting ready for a Halloween bash or a spooky gathering? These graveyard brownies are the perfect treat to impress your guests while also satisfying those sweet cravings. So let’s dive into the step-by-step preparation process to create these festive delights, ensuring both fun and ease in your kitchen.
Gather Your Supplies
Before you start baking, it’s essential to gather all your ingredients and supplies. Here’s what you need:
-
For the Brownies:
-
1 cup (2 sticks) of unsalted butter
-
2 cups granulated sugar
-
4 large eggs
-
1 teaspoon vanilla extract
-
1 cup all-purpose flour
-
1 cup unsweetened cocoa powder
-
1/2 teaspoon salt
-
1/2 teaspoon baking powder
-
For the Decoration:
-
Chocolate cookies (like Oreos)
-
Tombstone-shaped candy or edible markers
-
Crushed graham crackers (for the “dirt”)
-
Ghost-shaped marshmallows or meringue cookies
-
Edible eyes (optional)
Make sure to have a baking dish, mixing bowls, and a whisk or spatula handy. Having everything organized will help streamline the process and keep your kitchen chaos-free!
Prepare the Brownie Mixture
Now that you have everything set, it’s time to whip up the brownie mixture.
-
Melt the Butter: Start by preheating your oven to 350°F (175°C). In a saucepan over medium heat, melt the butter. Once completely melted, remove it from heat and let it cool slightly.
-
Mix Sugar and Eggs: In a large mixing bowl, combine the melted butter with granulated sugar, whisking it vigorously. Then, add the eggs one at a time, mixing well after each addition. Stir in the vanilla extract.
-
Incorporate Dry Ingredients: Gradually mix in the flour, cocoa powder, salt, and baking powder. Be careful not to overmix—just ensure everything is well combined for a fudgy texture.
Bake the Brownies to Perfection
Transfer your brownie batter into the prepared baking dish. Be sure to spread it evenly for consistent baking.
- Bake Time: Pop it in the preheated oven and bake for about 20-25 minutes. Keep an eye on them; you want the edges firm but the center slightly gooey. Using a toothpick, test for doneness; it should come out with a few moist crumbs.
Cool and Cut the Brownies
Once you’ve baked your graveyard brownies, take them out of the oven and let them cool in the baking dish for about 10-15 minutes.
-
Cooling is Key: Allow them to cool completely before cutting them into squares. This prevents them from crumbling and keeps your toppings intact.
-
Cutting the Brownies: Use a sharp knife to slice them into equal squares. Aim for large enough pieces to support your eerie decorations later.
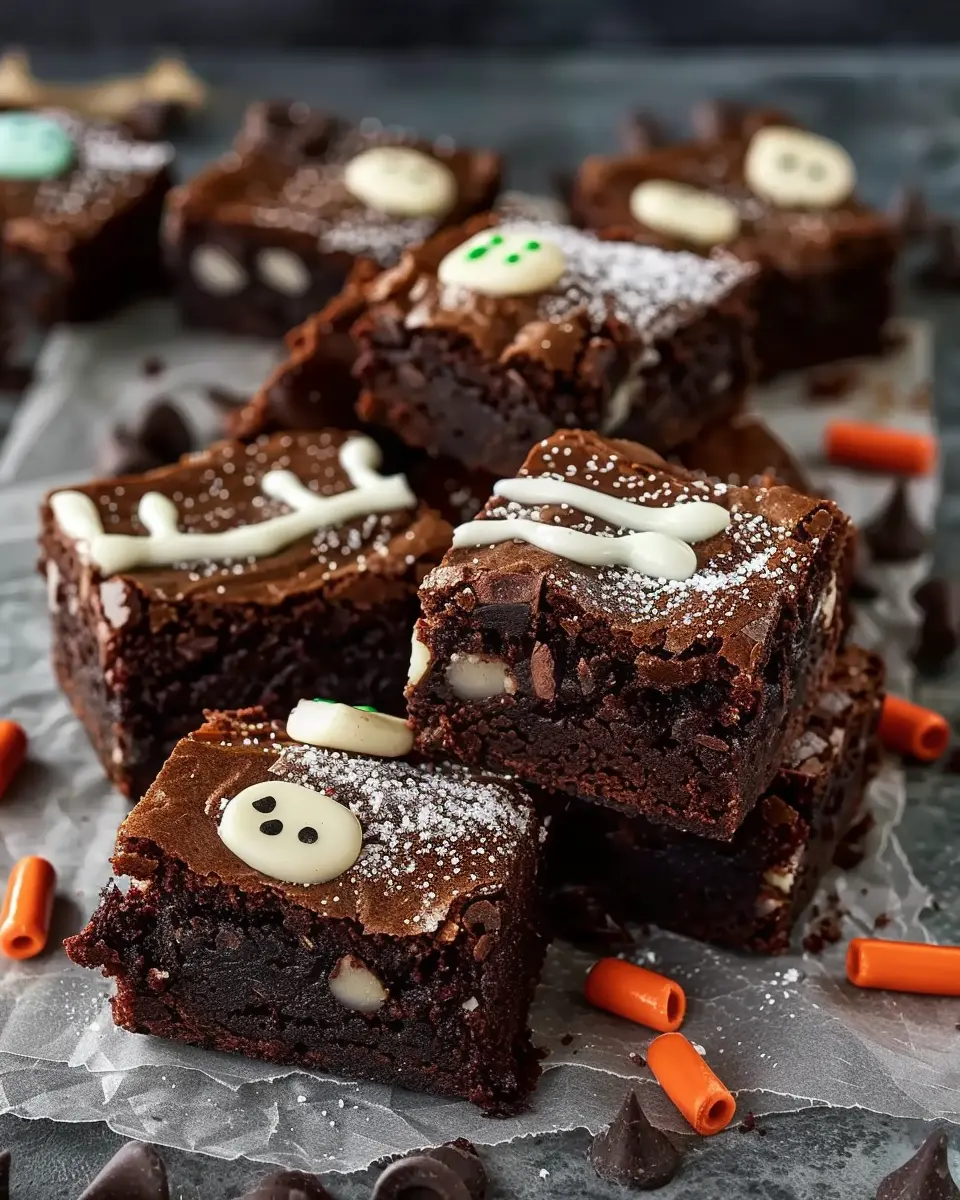
Decorate for the Spooky Effect
Now comes the most fun part: decorating your graveyard brownies!
-
Create the “Dirt”: Use crushed graham crackers to cover the surface of the brownies. This creates a nice dirt layer that sets the spooky theme.
-
Add Tombstones: Break chocolate cookies in half and place them upright into the brownies to resemble gravestones. You can use edible markers to write fun messages or names on them.
-
Final Touches: Scatter ghost-shaped marshmallows around and add edible eyes for an extra scare factor. Now you have a graveyard scene right on your dessert!
These graveyard brownies are not just a treat; they’re an experience—a perfect party centerpiece that’ll leave your guests raving. Serve them at your next spooky celebration and watch everyone dig in! For more baking tips, check out this excellent source for creative ideas. Happy baking!
Variations on Graveyard Brownies
Vegan Graveyard Brownies
Craving those rich and fudgy graveyard brownies but want to keep it totally plant-based? No problem! You can easily craft vegan-friendly versions using simple substitutes. For the base, replace the eggs with flaxseed meal—just mix one tablespoon of flaxseed with three tablespoons of water, let it sit for a few minutes, and voila! You have your egg replacement.
Opt for dairy-free chocolate in your recipe, ensuring a luxurious, rich flavor without sacrificing any taste. To sweeten, consider using maple syrup or agave nectar for a natural touch. A great resource for vegan baking is Oh She Glows, which offers fantastic tips and ideas that you can adapt to your graveyard brownies.
Gluten-Free Graveyard Brownies
For those who are gluten-sensitive, turning your graveyard brownies into a gluten-free delight is simpler than you’d imagine. You can use almond flour or a trusty gluten-free all-purpose blend as a direct substitution for regular flour. Both options will maintain the moisture and fudginess that makes brownies irresistible.
Don’t forget to check your chocolate for gluten, as some brands can contain hidden gluten ingredients. Using certified gluten-free chocolate is a safe bet. Want to go a step further? Explore recipes from sources like Serious Eats for even more inspiration.
No matter which variation you choose, these brownies are bound to impress your friends at your next gathering, keeping the spooky spirit alive in every bite! What’s your favorite twist on traditional brownies?
Cooking Tips and Notes for Graveyard Brownies
Tips for a Fudgy Texture
Achieving that perfect fudgy texture in your graveyard brownies is an art. Here are some ways to get it just right:
- Use good quality chocolate: Opt for high-percentage cocoa chocolate for a richer flavor.
- Don’t overmix: When incorporating the dry ingredients, mix until just combined. Overmixing can lead to a cakey texture, which we want to avoid!
- Add more fat: A tablespoon or two of melted butter or a dash of vegetable oil can enhance the richness.
For more on how to achieve the right brownie texture, you might want to check out this guide from Serious Eats for a deeper dive.
Notes on Customizing Your Decorations
Personalization is where graveyard brownies can really shine! Consider these decorating ideas:
- Edible decorations: Use crushed cookies for dirt, gummy worms, or… chocolate tombstones that you can make from melted chocolate.
- Theme it up: Align your decorations with a specific theme—perhaps spooky skeletons or cute ghosts. The opportunities are endless!
- Make it interactive: Invite friends over for a decorating party. A little competition for the spookiest graveyard can spark fun conversations!
With these tips, your graveyard brownies will be not just a treat but a delicious centerpiece for any gathering. Enjoy the creative process, and don’t hesitate to experiment!
Serving Suggestions for Graveyard Brownies
Creative Presentation Ideas
When it comes to graveyard brownies, the presentation is half the fun! Consider serving your brownies on a platter decorated with edible grass (green coconut or crushed pistachios add a fun touch), and place candy tombstones around them. You could also use Halloween-themed cupcake liners for individual servings. Add some gummy worms emerging from the brownies for an added spook factor—it’s a sure conversation starter!
Pairing Suggestions for Beverages
To complement your decadent graveyard brownies, why not pair them with a spooky drink? Options like hot cocoa, pumpkin spice lattes, or a refreshing apple cider can enhance the overall experience. If you’re planning a gathering, consider serving a non-alcoholic punch made with sparkling water and seasonal fruits. These delightful sips will balance the rich flavors of your brownies and make your dessert spread even more inviting. For ideas on how to make an eye-catching punch, check out this guide.
By putting a little thought into how you serve your brownies, you’re sure to leave a lasting impression at your next Halloween gathering!
Time Breakdown for Graveyard Brownies
When you’re ready to whip up some festive graveyard brownies for your next gathering, it’s helpful to know the time you’ll need. Here’s a quick breakdown:
Preparation time
Getting those ingredients together and mixing the brownie batter will take about 20 minutes. It’s a great time to put on your favorite playlist and get into that baking zone!
Cooking time
After pouring the batter into your greased pan, let it bake for 25 to 30 minutes. It’s always a good idea to check for that perfect fudgy texture with a toothpick.
Total time
In total, you’re looking at roughly 50 to 60 minutes from start to finish. Doesn’t sound too bad, right? And what’s more, once you take those brownies out of the oven, you’ll have a delicious treat to impress your friends!
For more baking tips, you might find this baking basics guide useful. And if you’re curious about decorating your brownies with an eerie twist, feel free to explore this article on creative Halloween desserts.
Nutritional Facts for Graveyard Brownies
When indulging in these delightful graveyard brownies, it’s good to know what you’re treating yourself to. Here’s a quick breakdown to satisfy your curiosity:
Calories per serving
Each serving of these fudgy delights usually contains around 200-250 calories. It’s a sweet treat, but moderation is key!
Sugar content
You can expect about 20 grams of sugar per brownie. While it adds to the delicious sweetness, keeping your sugar intake in check is always wise.
Protein and fat breakdown
On the protein front, each brownie packs approximately 3 grams, coupled with around 10-15 grams of fat. The blend of ingredients ensures a rich flavor while still offering a satisfying bite.
For more information on managing your nutritional intake, check out the USDA’s Dietary Guidelines. Enjoy your spooky treats while staying informed about what they offer!
FAQ about Graveyard Brownies
How can I store leftover brownies?
If you find yourself with extra graveyard brownies after a spooky gathering, don’t worry! You can keep those delicious treats fresh and tasty. Simply store your brownies in an airtight container at room temperature for up to five days. If you want them to last longer, consider refrigerating them, where they can stay good for about a week. For even longer storage, you can freeze them! Slice the brownies and wrap them individually in plastic wrap, then place them in a freezer-safe bag. They can last for up to three months in the freezer. Just thaw at room temperature when you’re ready to indulge again!
Can I make graveyard brownies ahead of time?
Absolutely! Preparing your graveyard brownies a day or two in advance can save you time and stress, especially if you’re hosting a Halloween bash. Just bake, cool, and store them as suggested above. When it’s time to serve, you can add your spooky decorations, like gummy worms or chocolate tombstones, to give them that extra eerie vibe. Because who doesn’t love a treat that looks as good as it tastes?
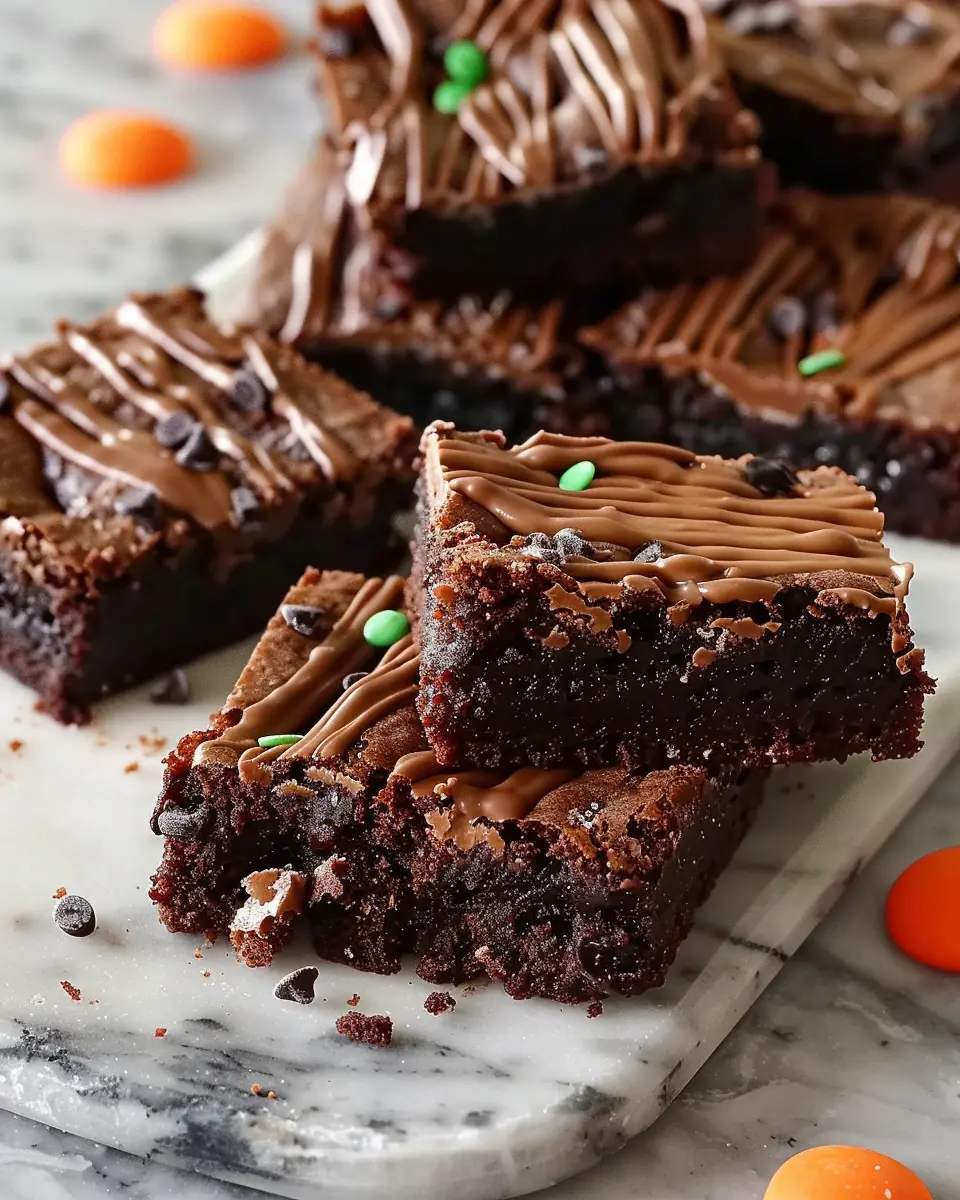
Creative twists on traditional brownie recipes
If you’re feeling adventurous, why not experiment with some fun twists on the classic brownie? Here are a few ideas to try:
- Nutty Flavor: Incorporate chopped nuts like walnuts or pecans for an extra crunch.
- Candy Infusion: Mix in some chocolate chips or your favorite candy bars before baking.
- Savory Sweetness: Add a dash of potato chips for an unexpected salty contrast.
- Spice it Up: Include a hint of cinnamon or espresso powder for a rich flavor boost.
For additional inspiration, check out this Brownies Recipe page for more ideas!
Conclusion on Graveyard Brownies
Why you should try making these delightful treats!
Graveyard brownies are not just a spooky dessert; they are a fun and engaging way to celebrate any Halloween gathering. Imagine how impressed your friends will be when you present these whimsical treats that perfectly blend indulgent chocolate with a playful twist.
These brownies are simple to make and offer an opportunity for creativity; you can customize them with different toppings to personalize your spooky scene. Whether you’re hosting a party or looking for a festive treat for yourself, these billowy brownies will surely satisfy your sweet tooth.
Plus, baking is an excellent way to unwind and enjoy a moment of mindfulness—an essential practice for young professionals balancing busy lives. Dive into this delicious adventure and share the fun with loved ones. You’ll be glad you did!
For more delicious recipes and baking tips, check out Serious Eats or The Kitchn!
PrintGraveyard Brownies: Indulgent Treats for Spooky Celebrations
Deliciously spooky brownies perfect for Halloween parties and celebrations.
- Prep Time: 15 minutes
- Cook Time: 30 minutes
- Total Time: 45 minutes
- Yield: 12 servings 1x
- Category: Desserts
- Method: Baking
- Cuisine: American
- Diet: Vegetarian
Ingredients
- 1 cup unsalted butter
- 2 cups granulated sugar
- 4 large eggs
- 1 teaspoon vanilla extract
- 1 cup all-purpose flour
- 1 cup unsweetened cocoa powder
- 1 teaspoon baking powder
- 1/2 teaspoon salt
- 1 cup chocolate chips
- 1 package gummy worms
- 1 package crushed Oreo cookies
Instructions
- Preheat your oven to 350°F (175°C) and grease a 9×13 inch baking pan.
- In a large mixing bowl, melt the butter and stir in the sugar until well combined.
- Add the eggs one at a time, mixing well after each addition. Stir in the vanilla extract.
- In another bowl, whisk together the flour, cocoa powder, baking powder, and salt.
- Gradually add the dry ingredients to the wet mixture, mixing until just combined.
- Fold in the chocolate chips.
- Pour the batter into the prepared baking pan and spread evenly.
- Bake for 25-30 minutes or until a toothpick inserted in the center comes out clean.
- Let the brownies cool before decorating with crushed Oreos and gummy worms to create a graveyard effect.
Notes
- For a more intense chocolate flavor, use dark cocoa powder.
- Add Halloween-themed decorations for extra spookiness.
Nutrition
- Serving Size: 1 brownie
- Calories: 250
- Sugar: 20g
- Sodium: 150mg
- Fat: 12g
- Saturated Fat: 7g
- Unsaturated Fat: 4g
- Trans Fat: 0g
- Carbohydrates: 30g
- Fiber: 2g
- Protein: 3g
- Cholesterol: 100mg
Keywords: Graveyard Brownies, Halloween, spooky treats, brownies