Introduction to Artisan Bread
If you’ve ever walked into a bakery and been wowed by the heavenly scent of freshly baked bread, you know that artisan bread has a charm all its own. But what makes it so special, and is it really worth the effort? Let’s dive in.
Why Artisan Bread is Worth the Effort
Making artisan bread at home is a delightful experience that offers far more than just the end product. Here are some reasons why you might find it worth getting your hands floury:
-
Flavor and Texture: Unlike store-bought bread, artisan bread boasts a complex flavor profile, thanks largely to the fermentation process. Sourdough, for instance, delivers a tangy bite that’ll have your taste buds dancing with joy.
-
Ingredient Control: When you bake at home, you decide what goes into your loaves. This means you can skip preservatives and focus on wholesome ingredients. Leaning towards organic or specialty flours can also enhance the nutritional value of your creation. The Bread Lab at Washington State University emphasizes the nutritional benefits of freshly milled flour—check it out for some fantastic insights.
-
A Sense of Accomplishment: There’s an unmatched satisfaction that comes from crafting something with your own hands. The first time you pull a perfectly crusted loaf from the oven, you’ll feel an immense sense of pride. It’s a rewarding experience that can turn a simple evening into a memorable one.
-
Creative Expression: Baking is not just a chore; it can be a canvas for your creativity. Experimenting with different flours, toppings, and flavors allows you to make the bread that suits your taste perfectly—no two loaves are ever the same!
A Gathering of Friends
Making artisan bread can be even more enjoyable when shared. Consider hosting a bread-baking evening with friends or family. Not only will you enjoy warm bread together, but you’ll also create lasting memories (and delicious leftovers!).
Whether you’re an experienced baker or a complete novice, embarking on the journey of making artisan bread is worthwhile. It’s a wonderful way to unwind, connect with your food, and impress everyone who gets to indulge in your tasty creations. So grab your apron, and let’s bake some magic!
Ingredients for Artisan Bread
Essential ingredients for homemade artisan bread
Creating delicious Artisan Bread starts with a few fundamental ingredients that can yield amazing results. Here’s what you’ll need:
- Flour: All-purpose or bread flour is ideal for that lovely chewy texture.
- Water: Use lukewarm water to help activate the yeast.
- Yeast: Active dry yeast or instant yeast will give your bread that perfect rise.
- Salt: Not just for flavor; it strengthens the dough’s structure.
Finding high-quality ingredients can significantly affect the flavor and texture of your bread. Consider reading up on flour types at the King Arthur Baking website for more insights.
Optional ingredients for flavor enhancement
To take your Artisan Bread to the next level, you might consider including:
- Herbs: Fresh or dried rosemary or thyme can add a fragrant note.
- Seeds: Pumpkin or sunflower seeds for a delightful crunch and nutrition.
- Cheese: A bit of grated Parmesan can introduce a savory depth of flavor.
Experimenting with these optional ingredients can make your homemade Artisan Bread uniquely yours, so feel free to mix and match! What flavor combinations do you think would excite your palate?
Preparing Artisan Bread
Making your own artisan bread at home is not just an enticing culinary adventure; it’s a deeply satisfying experience. With a crusty exterior and a soft, flavorful interior, there’s something magical about the aroma wafting through your kitchen as the bread bakes. Following this step-by-step guide will help you master the art of bread making in no time.
Activate the yeast
To kick off your artisan bread journey, you’ll need to start with the yeast. Use active dry yeast, which is readily available in most grocery stores. Here’s how to activate it:
- In a small bowl, combine 1 packet of active dry yeast (about 2¼ teaspoons) with ¼ cup of warm water (about 110°F).
- Add 1 teaspoon of sugar to the mixture. The sugar feeds the yeast, helping it bloom.
- Let this sit for about 5-10 minutes until it becomes frothy. If there are no bubbles after this time, your yeast may be inactive—time to start over with fresh yeast!
Assemble the dough
Now that your yeast is activated, it’s time to bring everything together. Grab a large mixing bowl and follow these steps:
- Pour the foamy yeast mixture into the bowl.
- Add 2 cups of all-purpose flour and 1 teaspoon of salt. Remember that salt can inhibit yeast growth, so it’s crucial to keep them separate until they’re mixed together.
- Gradually add 1 cup of room temperature water while mixing with a wooden spoon or your hands until a shaggy dough forms.
Knead the dough
Kneading is essential for developing gluten, giving your artisan bread its characteristic texture. Here’s how to do it:
- Turn the dough onto a lightly floured surface.
- With your hands, knead the dough for about 8-10 minutes. Use the heel of your hand to push the dough away from you, then fold it back over itself and rotate it.
- You’ll know it’s done when the dough is smooth and elastic. If it feels sticky, add a bit of flour as needed.
First rise
Once your dough is kneaded, it’s time for the first rise, also known as fermentation.
- Place your dough ball in a lightly greased bowl, cover it with a damp cloth, and set it in a warm place.
- Let it rise for about 1-2 hours or until it has doubled in size. You can check this by gently pressing two fingers into the dough; if the indentation remains, it’s ready!
Shape the dough
After your dough has risen, it’s showtime! Shaping is crucial for the structure of your artisan bread.
- Gently punch down the dough to release the air and turn it out onto a floured surface.
- Shape it into a tight ball or an oval loaf. To do this, fold the edges towards the center, then flip it over and gently roll it into a nice shape.
Second rise
Your bread needs a second chance to rise—this will enhance its flavor and texture:
- Place the shaped loaf on a parchment-lined baking sheet or a well-floured proofing basket.
- Cover it again with a damp cloth and let it rise for another 30-60 minutes. This time, it may not double, but it should puff up nicely.
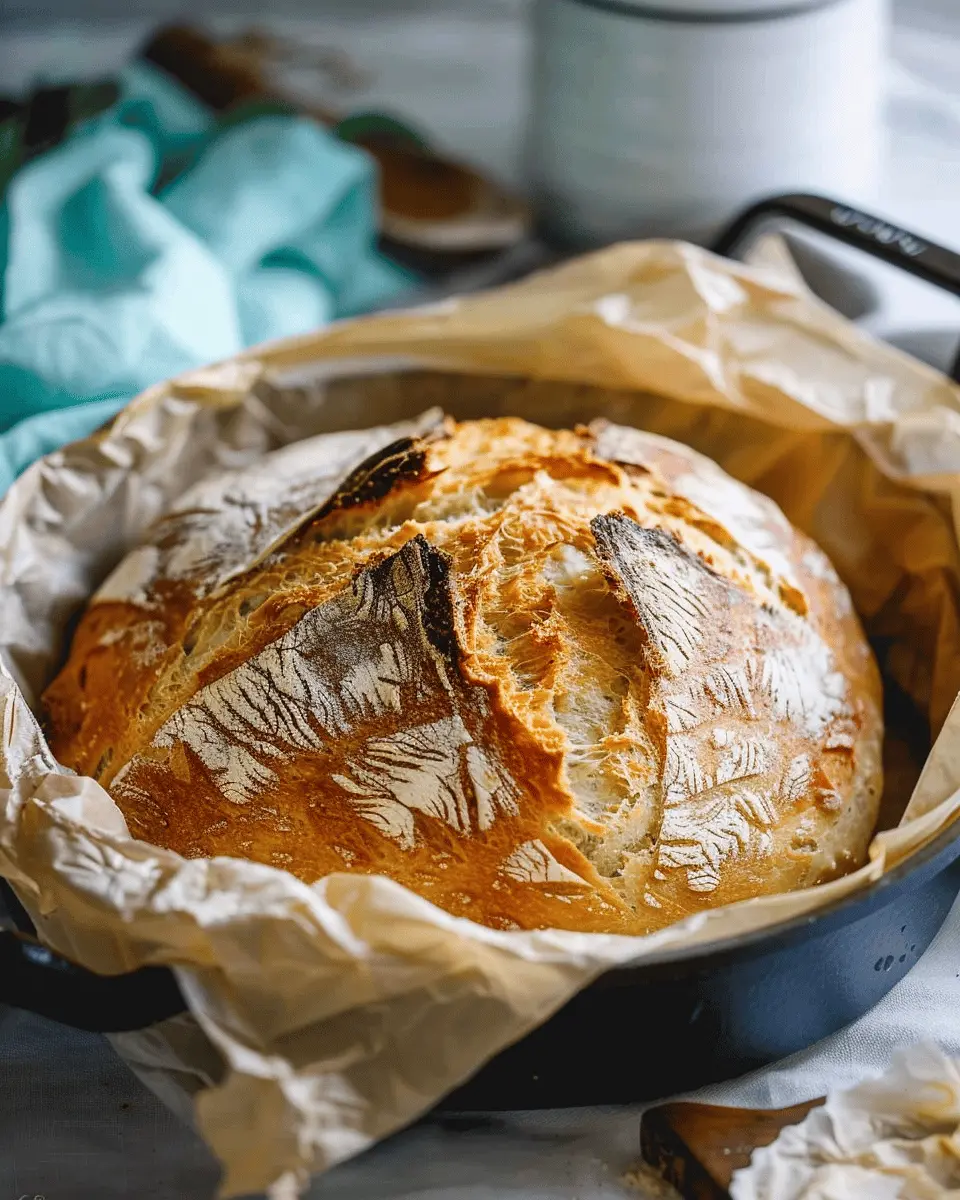
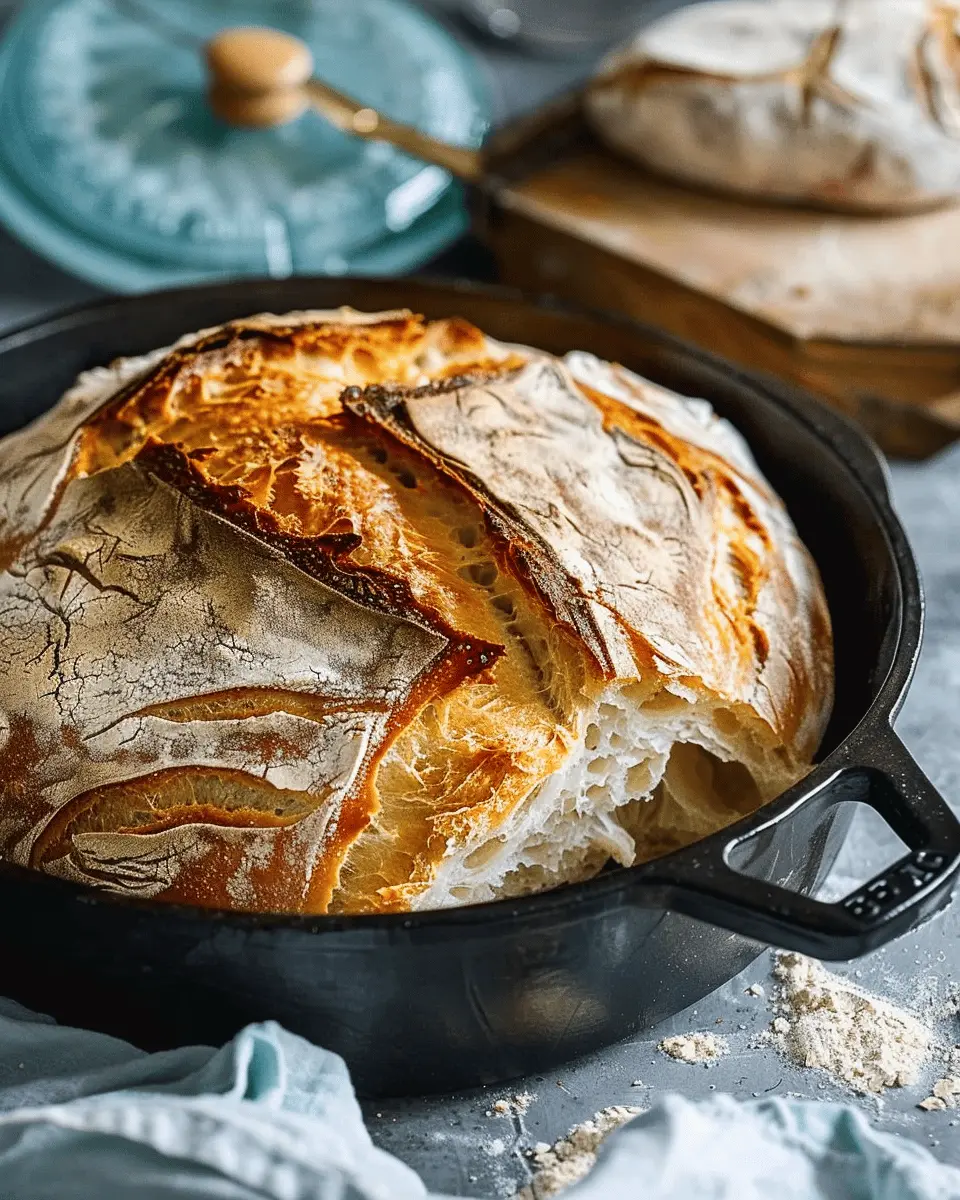
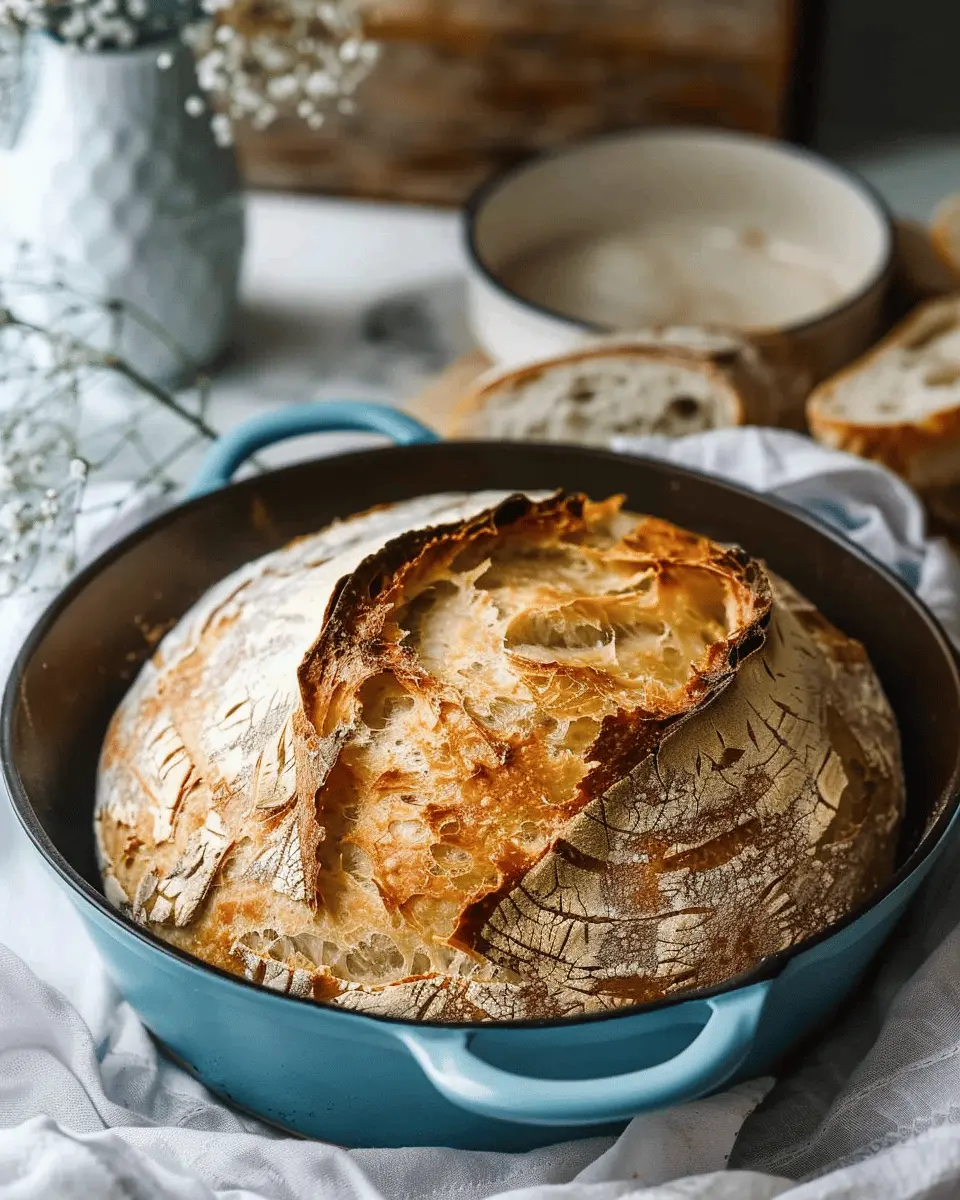
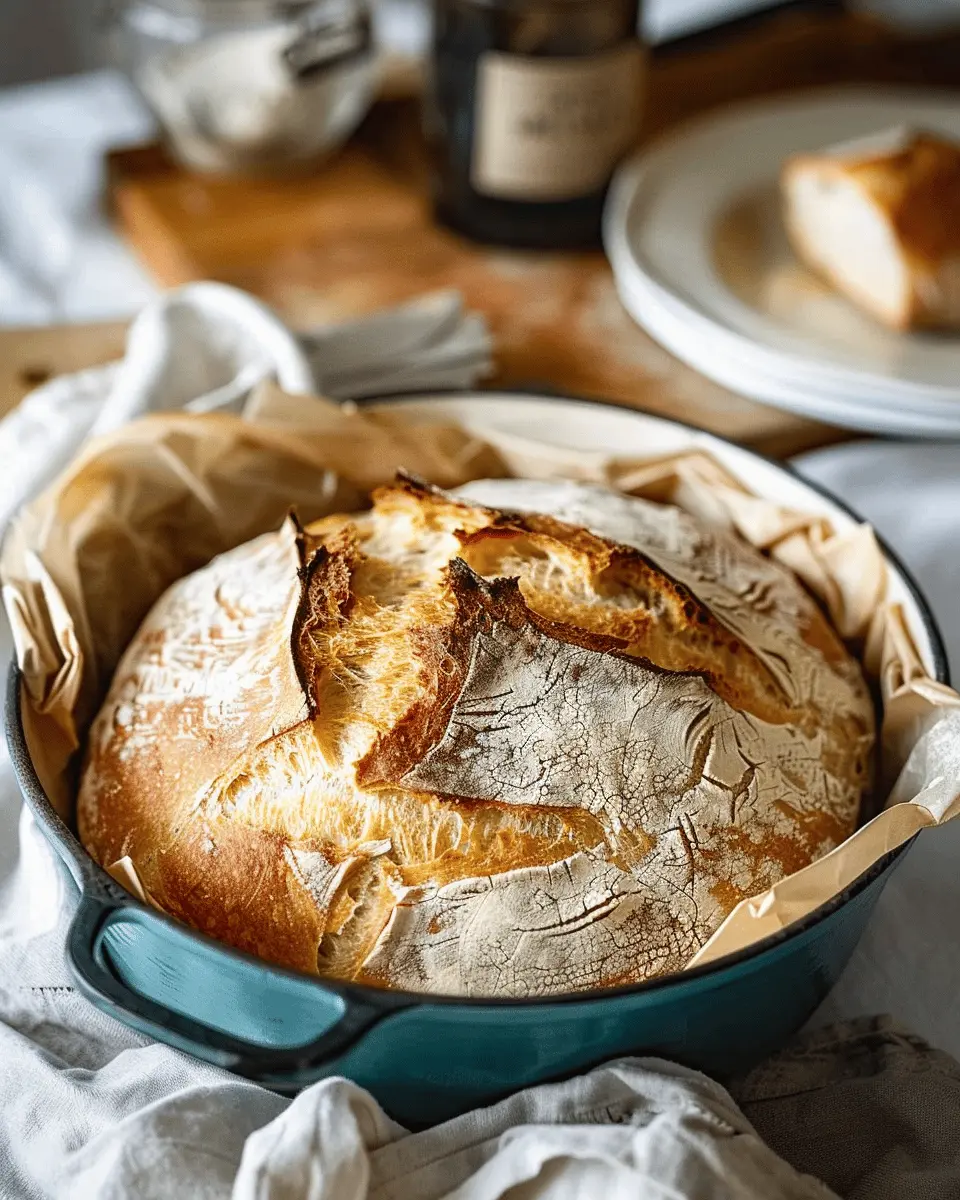
Score and bake
Finally, it’s time for the moment of truth—the baking!
- Preheat your oven to 450°F (232°C). For a perfect crust, consider placing a shallow pan with water at the bottom of the oven.
- Once preheated, use a sharp knife or bread lame to score the top of your bread. This helps the steam escape and creates a beautiful pattern.
- Bake your loaf for 25-30 minutes or until it has a golden-brown crust. The internal temperature of the loaf should read around 190°F (88°C).
Now that your artisan bread is out of the oven, let it cool on a wire rack before slicing. Enjoy the fruits of your labor with a dollop of butter or alongside your favorite dips. Happy baking!
For more tips on bread making, you might want to check out resources like King Arthur Baking Company or The Bread Lab. They provide an abundance of information tailored for aspiring bakers like you!
Variations on Artisan Bread
When it comes to artisan bread, the possibilities are truly endless! Whether you want to infuse a burst of flavor or experiment with healthier options, these variations will inspire you to get creative in the kitchen.
Herb and Garlic Artisan Bread
Imagine walking into your home, greeted by the mouthwatering aroma of herbs mingling with garlic. It’s as satisfying to make as it is to eat! Simply mix in fresh herbs like rosemary or thyme and add minced garlic to your dough. This variation pairs beautifully with soups and salads, making it a fantastic complement to any meal. For a helpful guide on herb pairings, check out this culinary herb guide.
Whole Grain Artisan Bread
If you’re looking for a heartier option, whole grain artisan bread is where it’s at. Not only does it have a denser texture, but it’s also packed with nutrients and fiber. Opt for whole wheat, spelt, or even rye flour for a fantastic taste. You can also experiment by adding seeds like flax or sunflower for extra crunch! Whole grain bread often provides a lower glycemic index, helping with blood sugar stability—perfect for those busy workdays.
Sweet Artisan Bread with Fruits
Looking to satisfy your sweet tooth? Consider crafting a sweet version of artisan bread with dried fruits like cranberries or apricots. A hint of cinnamon could take it to the next level, making it a delightful breakfast or afternoon snack. Pair it with a cup of your favorite herbal tea for the ultimate cozy experience. If you want to dive deep into sweet bread ideas, visit Baker’s Illustrated.
No matter which variation you choose, artisan bread is sure to bring warmth and satisfaction to your kitchen!
Cooking Tips and Notes for Artisan Bread
Common Pitfalls and How to Avoid Them
Making Artisan Bread can be a rewarding experience, but it isn’t without its challenges. Here are a few common pitfalls:
- Overproofing: This can lead to a flat loaf. Keep an eye on your dough—when it has doubled in size, it’s time to bake.
- Insufficient kneading: While some recipes call for minimal handling, a good mix helps create gluten structure. Aim for about 8-10 minutes of kneading.
- Too much flour: It’s easy to get carried away, but adding flour can yield a dense loaf. Flour should only be added when necessary to prevent sticking.
Tools and Equipment for Perfect Bread
The right tools can make all the difference in achieving that golden crust and airy crumb you desire in your Artisan Bread.
- Digital Scale: Precise measurements are key. A scale helps you maintain accuracy, especially when it comes to flour and water.
- Dough Scraper: This handy tool allows for easy handling and portioning of your dough.
- Dutch Oven or Baking Stone: Both create a steamy environment that mimics professional ovens, leading to a beautifully baked loaf.
For further details on professional baking gear, consider checking out resources like King Arthur Baking. Happy baking!
Serving suggestions for Artisan Bread
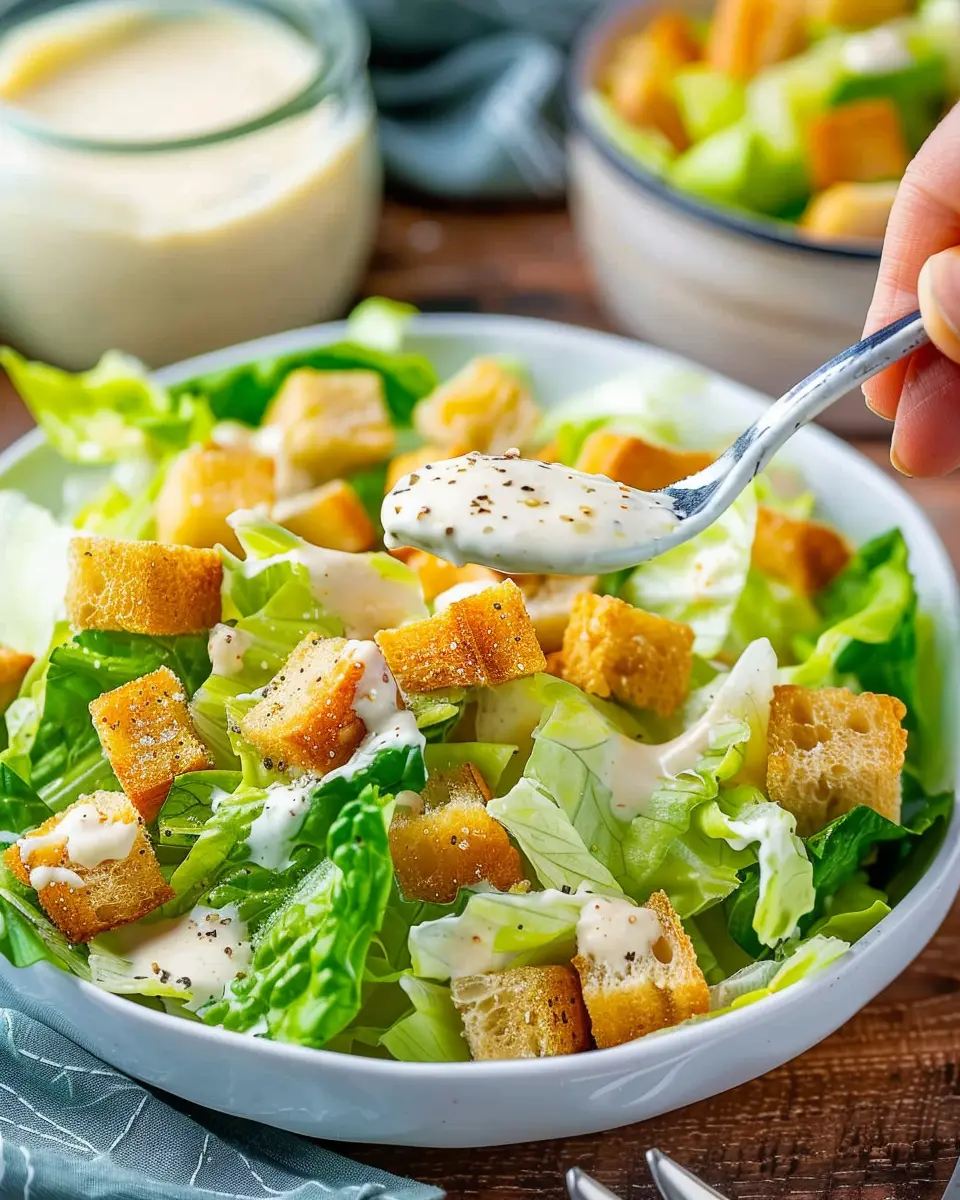
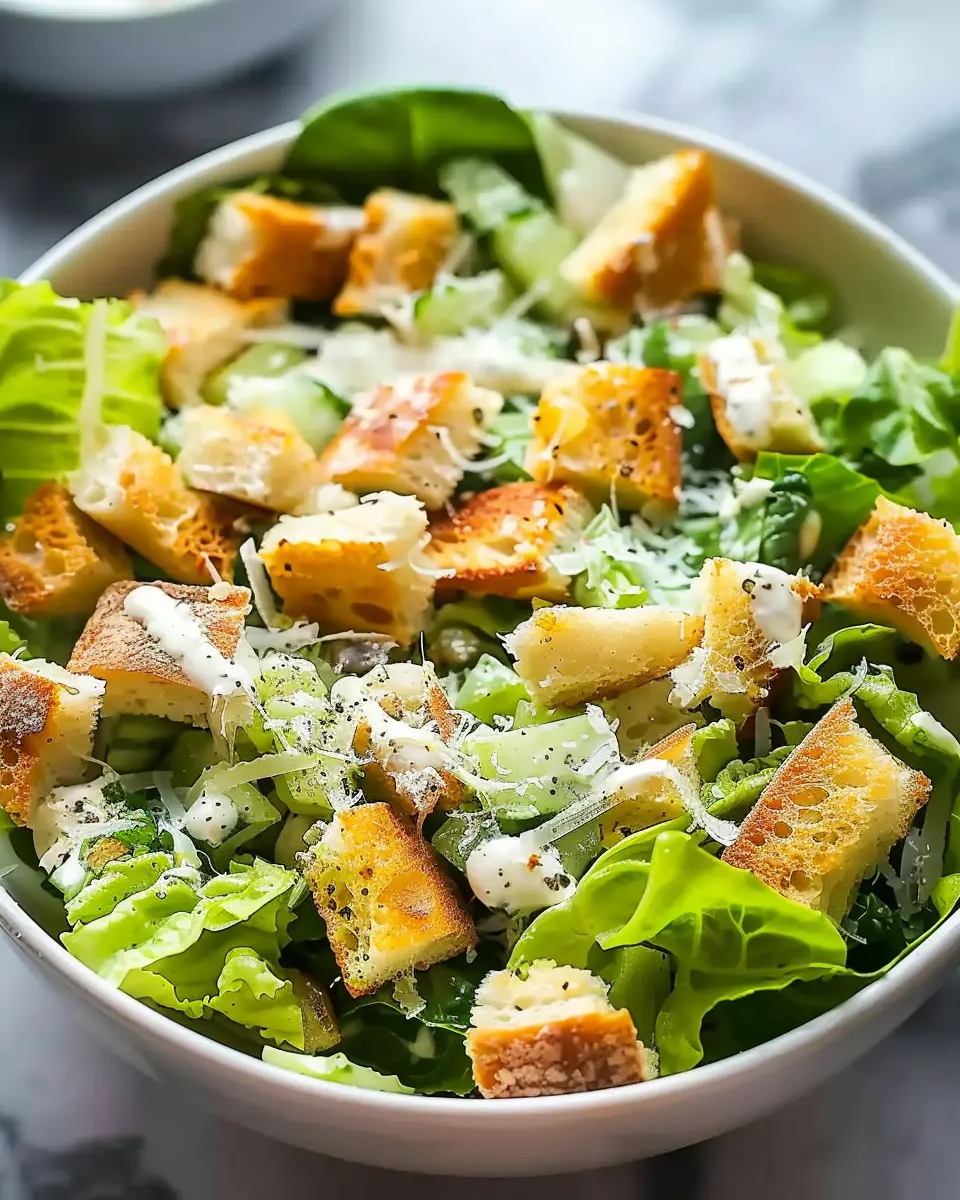
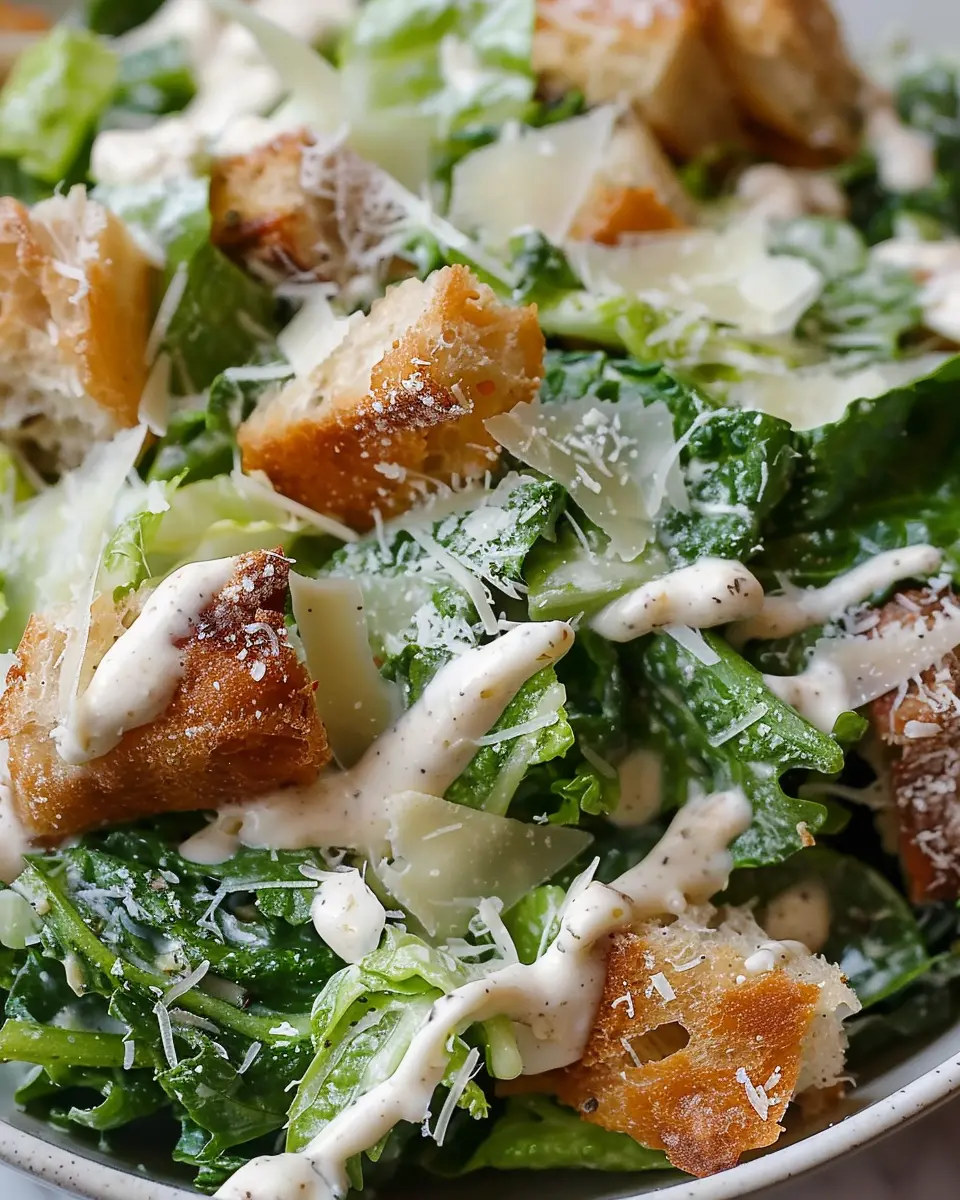
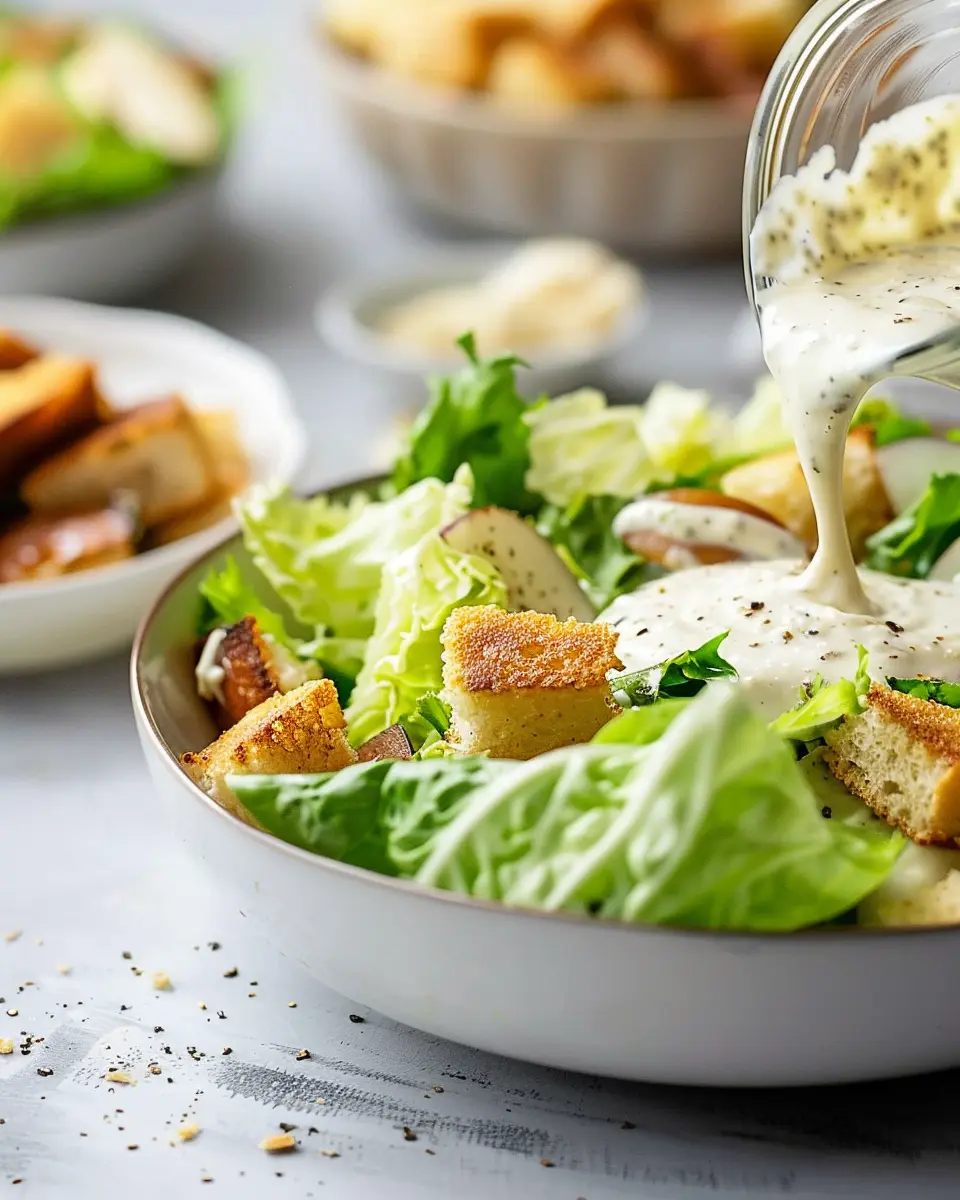
Pairing with Fresh Salads
Artisan bread is the perfect companion for fresh salads. Imagine a vibrant, crisp garden salad adorned with ripe tomatoes, cucumbers, and a zesty vinaigrette. A thick slice of your homemade artisan bread adds a satisfying crunch and absorbs those delightful dressing flavors. Consider topping your bread with a dollop of hummus or a light spread of avocado; it takes the meal to a new level. For a delightful twist, try this pairing with an in-season salad that features ingredients from your local farmers’ market. You can find tips on seasonal produce from The Kitchn.
Delicious Sandwiches with Turkey Bacon and Chicken Ham
Elevate your lunchtime game with sandwiches made from fresh artisan bread. Imagine a hearty piece of bread, stacked high with crispy turkey bacon and tender chicken ham. It’s a taste sensation enhanced by fresh veggies like crunchy lettuce and sweet bell peppers. Don’t forget a dash of mustard or aioli to make it even more delicious. Not only does the texture of artisan bread hold up well, but it also keeps all those juicy flavors intact.
With these tasty serving suggestions, your artisan bread will shine at mealtime, making every bite memorable!
Time breakdown for Artisan Bread
When you’re diving into the world of Artisan Bread, understanding the time commitment involved can help you plan your baking adventure just right. Here’s a quick breakdown:
Preparation time
Getting started is a breeze! You’ll spend about 20-30 minutes mixing your ingredients and kneading the dough. It’s the perfect time to crank up your favorite tunes and enjoy the process.
Rising time
Now, here’s where the magic happens. Let your dough rise for 6-12 hours, depending on your schedule. This slow rise is crucial for developing that wonderful flavor and texture – it’s essentially the heart of Artisan Bread.
Baking time
The final step is baking. Preheat your oven and pop in the dough for 30-40 minutes. You’ll know it’s done when it’s beautifully golden brown, and your kitchen smells divine!
Total time
In total, you’re looking at around 6-12 hours and 30-40 minutes. The rising period takes the longest, but don’t worry — you can use this time to relax or prepare your favorite sides.
Baking Artisan Bread is not just about the time; it’s about creating something special. For tips on flavor pairings, check out this great article that dives deeper into the joys of homemade bread. Happy baking!
Nutritional facts for Artisan Bread
When diving into the delicious world of Artisan Bread, it’s essential to understand its nutritional profile to pair it wisely with your meals. Here’s a quick breakdown of what you can expect in each slice:
Calories per slice
Typically, one slice of Artisan Bread has around 80-100 calories. This makes it a great base for nutritious toppings or paired with soups and salads.
Sodium content
In general, a slice contains about 200 mg of sodium. It’s always wise to check specific brands or recipes, especially if you’re managing dietary sodium intake.
Carbohydrates and protein
Each slice generally packs around 15-20 grams of carbohydrates and 3-4 grams of protein. This balance makes Artisan Bread an excellent choice for a sustaining meal or snack, especially when complemented with a spread like avocado or a slice of turkey bacon.
For a deeper understanding, you might also explore educational resources like The American Heart Association for more on nutrition. How do you prefer to enjoy your Artisan Bread? Let me know in the comments!
FAQs about Artisan Bread
Baking your own artisan bread is a rewarding experience, but it often comes with a few questions along the way. Let’s dive into some common queries to help ensure your bread-making journey is smooth and enjoyable.
How do I know when my bread is done baking?
The aroma of freshly baked artisan bread is hard to resist, but how do you really know when it’s ready? Here are a few tips:
- Color: The crust should be a deep golden brown.
- Tapping Test: Gently tap the bottom of the loaf; a hollow sound indicates it’s done.
- Internal Temp: If you have a thermometer, the internal temperature should reach about 190-210°F (88-99°C).
These indicators will help ensure your bread has that perfect crust and texture.
Can artisan bread be frozen?
Absolutely! Freezing is a fantastic way to preserve your artisan bread. Here’s how to do it:
- Cool Completely: Ensure your bread is fully cooled before freezing, which prevents sogginess.
- Wrap Properly: Use plastic wrap or aluminum foil, then place it in a freezer bag. This helps maintain its freshness.
- Thawing: When you’re ready to enjoy it, simply let it thaw at room temperature, or pop it in the oven for a few minutes to restore its crust.
For more tips, check out the resources from the Bread Bakers Guild of America.
What’s the best way to store artisan bread?
To keep your artisan bread fresh for longer, consider these storage tips:
- Bread Box: A traditional bread box is excellent for maintaining moisture while allowing airflow.
- Paper vs. Plastic: Store in a paper bag rather than plastic to avoid mold. Plastic can trap moisture.
- Slice and Freeze: If you have leftover slices, freezing them individually can make for convenient toast on busy mornings!
Incorporate these practices, and you’ll enjoy the delightful taste of homemade artisan bread long after baking day. Enjoy experimenting, and happy baking! If you want more baking tips and recipes, check out resources from King Arthur Baking.
Conclusion on Artisan Bread
Recap the joy of homemade artisan bread
Making artisan bread is not just about baking; it’s a wonderful journey that combines creativity, patience, and the satisfaction of crafting something delicious from scratch. Remember how the aroma fills your kitchen, creating a warm, inviting atmosphere? That’s the magic of homemade bread!
- Feel accomplished: There’s a unique pride in mastering a skill that nourishes.
- Healthier ingredients: You have control over what goes into your loaf.
- Versatility: Enjoy it plain, toasted, as a base for your favorite sandwiches, or paired with soups.
So why not grab that apron and embark on your artisan bread adventure today? Check out resources like King Arthur Baking for more tips and variations to make this experience even richer. Happy baking!
PrintArtisan Bread: Easy Homemade Loaves to Delight Your Senses
Learn how to make delicious artisan bread at home with easy-to-follow instructions.
- Prep Time: 15 minutes
- Cook Time: 45 minutes
- Total Time: 18 hours
- Yield: 1 loaf 1x
- Category: Bread
- Method: Baking
- Cuisine: American
- Diet: Vegetarian
Ingredients
- 4 cups all-purpose flour
- 1.5 cups warm water
- 1 packet yeast
- 2 teaspoons salt
Instructions
- In a large bowl, mix flour, yeast, and salt.
- Add warm water and stir until combined.
- Cover and let rise for 12 to 18 hours.
- Preheat the oven to 450°F (232°C).
- Place a Dutch oven inside the oven to heat up.
- Shape the dough into a ball and let it rest on a floured surface.
- Transfer the dough to the hot Dutch oven and bake for 30 minutes.
- Remove the lid and bake for an additional 15 minutes until golden brown.
Notes
- For a crusty loaf, do not skip the preheating step.
- Experiment with herbs and spices for added flavor.
Nutrition
- Serving Size: 1 slice
- Calories: 120
- Sugar: 0.5g
- Sodium: 200mg
- Fat: 1g
- Saturated Fat: 0g
- Unsaturated Fat: 0.5g
- Trans Fat: 0g
- Carbohydrates: 24g
- Fiber: 1g
- Protein: 4g
- Cholesterol: 0mg
Keywords: Artisan Bread, Homemade Bread, Baking Bread