Introduction to Simple Soft Sandwich Bread
Have you ever come home after a long day at work, only to realize that your pantry essentials are running low? As a young professional, finding the time to cook can feel more like a chore than a joy. Enter simple soft sandwich bread. This no-knead recipe is not just easy; it’s a game changer for those bustling between meetings and social events.
Why Homemade Bread is a Game Changer for Young Professionals
There’s something truly rewarding about sliding a freshly baked loaf out of the oven. Homemade bread isn’t just about elevating your lunch game—it’s a way to invest in your well-being. Did you know that baking bread at home can save you money and allow you to control ingredients? Many store-bought options are laden with preservatives you may want to avoid. Making your own bread means you can customize it to your taste and dietary needs.
Imagine crafting a delicious turkey bacon and cheese sandwich on soft, fluffy bread that you made from scratch. Not only does it taste better, but it also feels genuinely fulfilling to serve something wholesome. Plus, studies show that planning and preparing meals can significantly reduce stress levels for young professionals, enabling you to embrace a healthier lifestyle.
The Beauty of No-Knead Bread
If you’re worried about time and effort, I have great news: this simple soft sandwich bread recipe requires no intensive kneading. You mix the ingredients together, let it rise, and then bake. The result? A perfectly textured bread, soft enough to complement whatever fillings you choose, from turkey bacon to chicken ham.
An ongoing trend in culinary culture is savoring the benefits of home-cooked meals—whether it’s for health, taste, or sheer satisfaction. You can even invite friends over for a bread-making night. After all, sharing is part of what makes cooking fun. To start your journey, check out resources from experts like King Arthur Baking or Food52 that provide in-depth baking guides to support you.
In summary, if you’re in search of a delightful and easy way to enhance your meals, homemade simple soft sandwich bread just might be the answer you’ve been looking for. Stay tuned for the full recipe that makes this delicious bread achievable for any busy schedule!
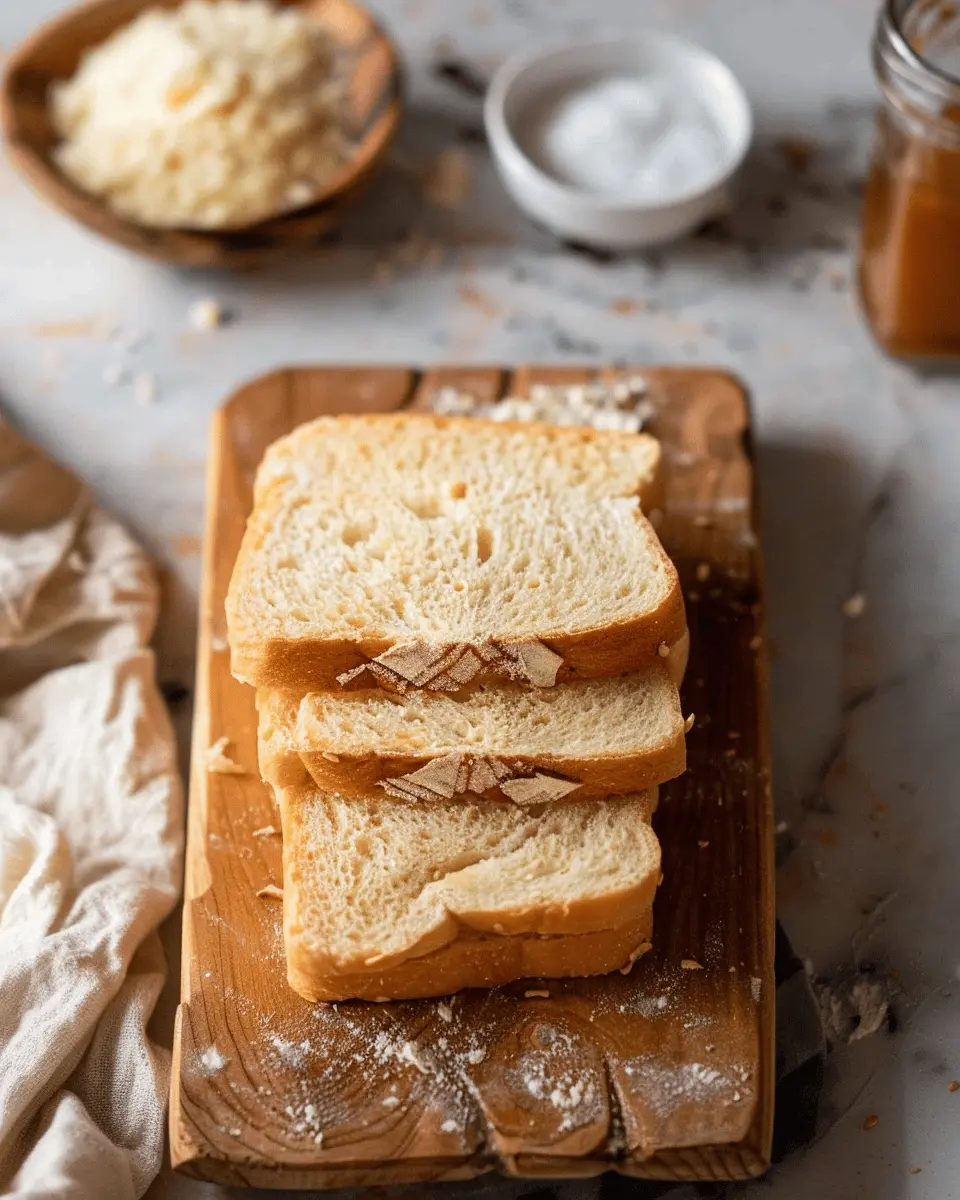
Ingredients for Simple Soft Sandwich Bread
Essential ingredients for a soft sandwich bread
Creating the perfect simple soft sandwich bread at home is straightforward if you gather the right ingredients. Here’s what you’ll need:
- All-purpose flour: This is the backbone of your bread, providing structure and softness.
- Active dry yeast: A must for that airy rise, helping your bread become light and fluffy.
- Warm water: Activates the yeast and hydrates the flour; just make sure it’s not too hot!
- Granulated sugar: This sweetener nourishes the yeast and enhances the flavor.
- Salt: Essential for taste and controlling yeast activity.
- Oil or melted butter: Adds moisture and tenderness to the bread.
These ingredients come together to create a deliciously soft loaf perfect for any sandwich!
Optional add-ins and alternatives
Want to customize your simple soft sandwich bread? Here are some great suggestions:
- Whole wheat flour: Swap a portion of all-purpose flour for whole wheat for added nutrition.
- Honey or maple syrup: Use these natural sweeteners instead of granulated sugar for a distinct flavor.
- Seeds or nuts: Add sunflower seeds or walnuts for a delightful crunch!
- Herbs or spices: A dash of garlic powder or dried herbs can elevate your bread’s taste.
Feel free to explore, and don’t hesitate to ask your favorite local baker or check out reliable resources like King Arthur Baking for more tips. Happy baking!
Step-by-step Preparation of Simple Soft Sandwich Bread
Making simple soft sandwich bread at home is an incredibly rewarding experience. You’ll soon discover that with just a few basic ingredients and some patience, you can create a delicious, fluffy loaf that’s perfect for your sandwiches or toast. Let’s dive into the steps to whip up this delightful bread.
Gather and Measure Your Ingredients
First things first—let’s ensure you have everything you need. Gather the following ingredients:
- 4 cups all-purpose flour (plus extra for dusting)
- 2 teaspoons sugar
- 1 tablespoon salt
- 1 packet (2 ¼ teaspoons) active dry yeast
- 1 ½ cups warm water (about 110°F or 43°C)
- 2 tablespoons unsalted butter, melted
It’s vital to measure accurately. A kitchen scale can be your best friend for precise measurements, especially with flour. Did you know that too much or too little flour can significantly alter the texture of your bread?
Activating the Yeast for Perfect Rise
The next step is about coaxing your yeast to life. In a small bowl, combine the warm water and sugar, then sprinkle the yeast over the top. Let it sit for about 5-10 minutes until it becomes frothy. If it doesn’t foam up, your yeast may be inactive—time to get a fresh packet! According to the Bread Lab, yeast is the powerhouse of your dough, responsible for the rise and delightful texture.
Mixing and Kneading the Dough
In a large mixing bowl, combine the flour and salt. Once your yeast mixture is foamy, add it to the flour mix along with the melted butter. Stir until the dough starts to come together. Here’s the beauty of no-knead bread—you really don’t have to get your hands messy just yet!
Once combined, cover the bowl with a damp cloth and let it rest for about 10 minutes. This resting phase allows the flour to hydrate, making it easier to mix.
First Rise – What to Look For
After resting, it’s time to give your dough a quick mix. You’ll notice how the dough is sticky—that’s a good sign! Cover it again and let it rise in a warm spot for about 1 to 2 hours, or until it has doubled in size. Keep an eye out: the dough should be smooth and slightly domed on top.
Shaping the Loaf
Once your dough has risen, it’s time to shape it. Lightly flour your work surface, then gently turn out the dough. Using your hands, flatten it into a rectangle. Fold the sides inward and roll it up tightly from the short end into a loaf shape. Pinch the seams to seal.
Place the shaped loaf seam-side down into a greased 9×5-inch loaf pan. A well-shaped loaf not only looks good but also helps create uniform slices for your sandwiches. Have you ever noticed how much better homemade bread slices look? It’s those small details!
Second Rise and Preparing for Baking
Cover your shaped loaf with a kitchen towel and let it rise again for about 30-60 minutes, or until it has doubled in size again. During this rise, preheat your oven to 350°F (175°C). For an extra-soft crust, you can brush the top with some melted butter before baking.
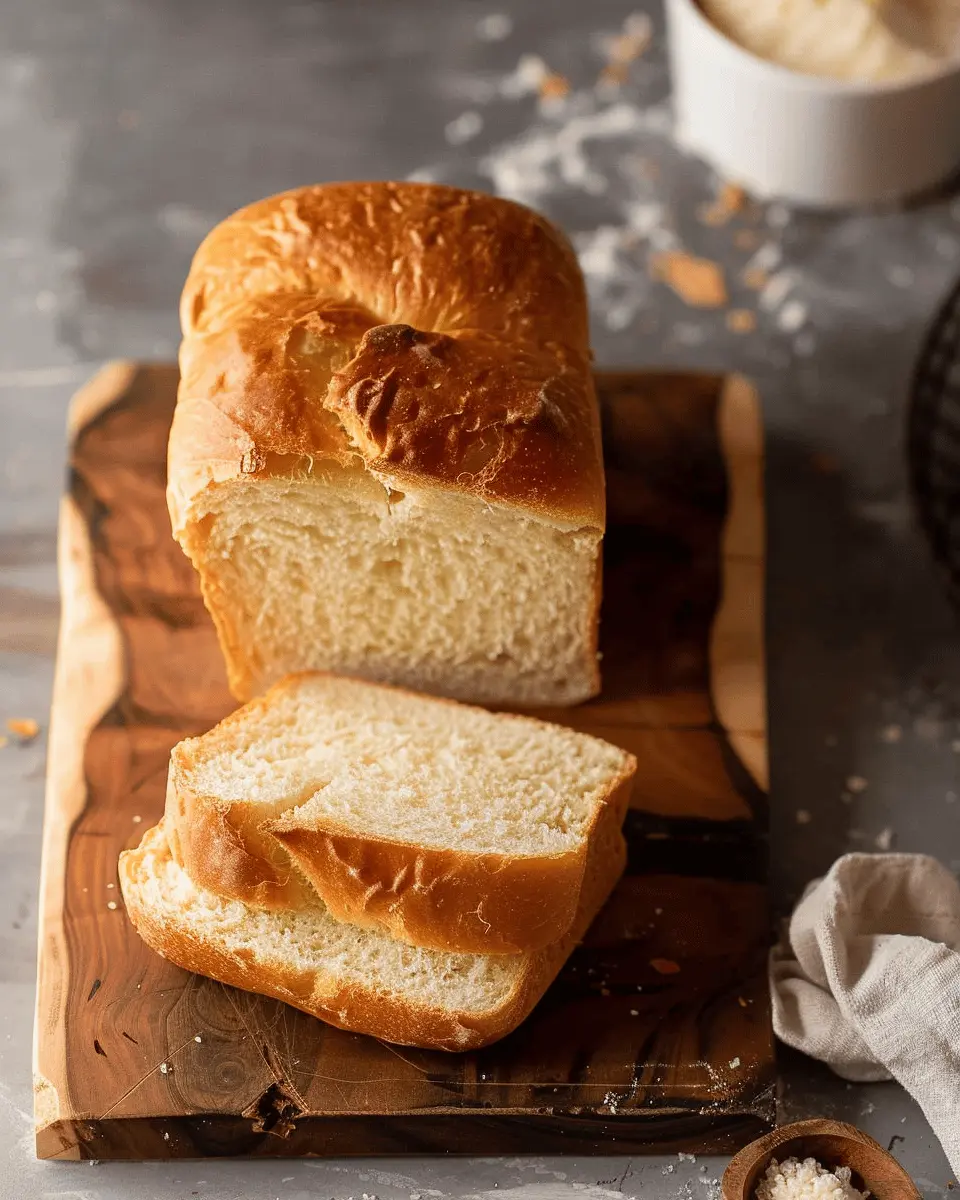
Baking Your Soft Sandwich Bread
When ready, pop your loaf in the oven and bake for about 30-35 minutes. You’ll know it’s ready when it’s golden brown and sounds hollow when tapped on the bottom. Let it cool in the pan for 10 minutes before transferring it to a wire rack to cool completely.
Homemade simple soft sandwich bread is best enjoyed fresh, but it can also be stored in an airtight container for several days. Slice it up and have it ready for turkey bacon, chicken ham, or whichever fillings you crave!
The beauty of baking bread lies in its simplicity and the joy of sharing your creations. Why not experiment with different add-ins, like seeds or herbs, to make it uniquely yours? Happy baking!

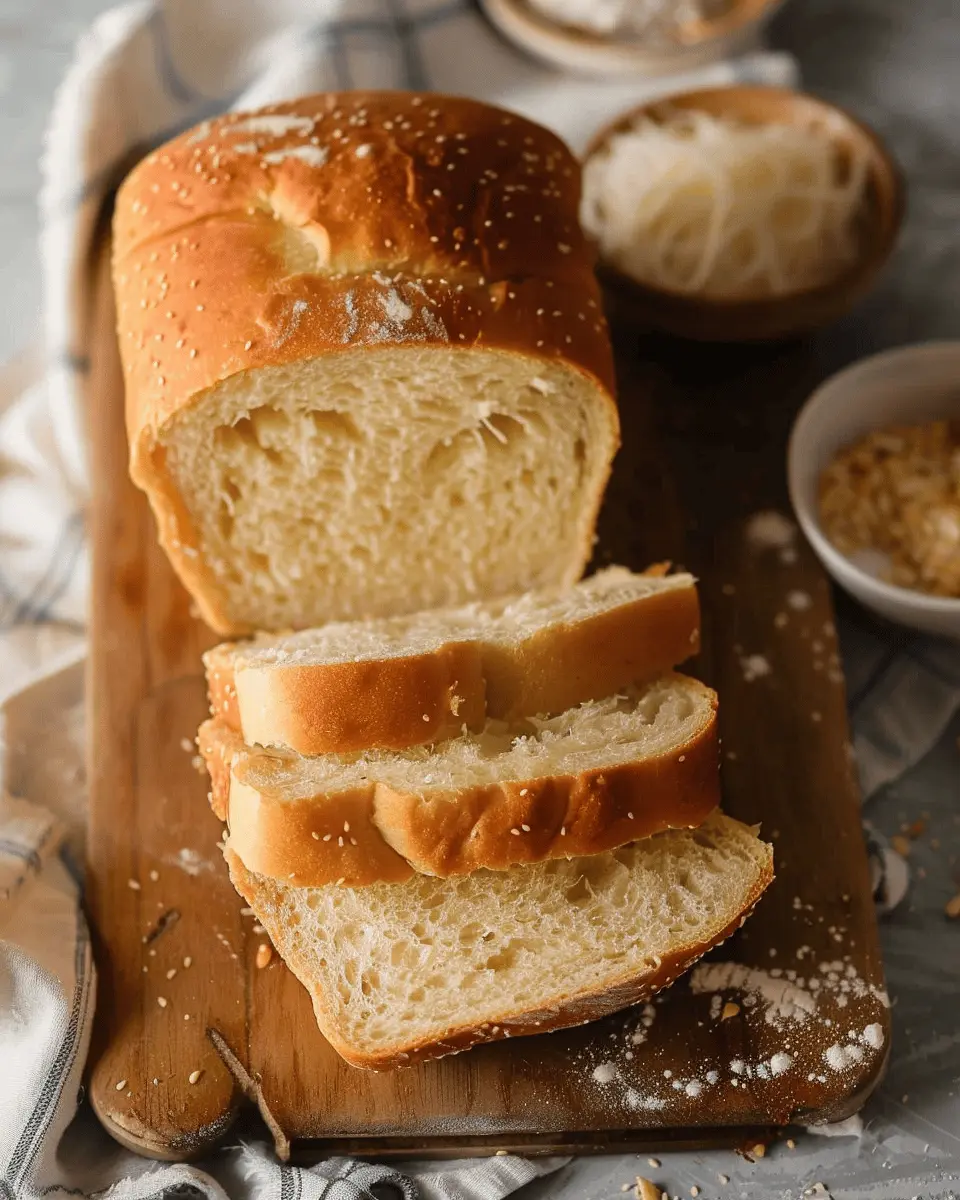
Variations of Simple Soft Sandwich Bread
When it comes to making the simple soft sandwich bread, variations can elevate your loaves from ordinary to extraordinary. Let’s explore some delightful options!
Adding Herbs and Spices for Flavor
One of the easiest ways to enhance your simple soft sandwich bread is by incorporating fresh herbs or spices. Imagine a loaf infused with rosemary or thyme—perfect for pairing with Turkey Bacon or Chicken Ham. Here are some ideas to get you started:
- Garlic powder for an aromatic kick.
- Basil or oregano for an Italian twist.
- Cinnamon for a hint of sweetness—great for breakfast sandwiches!
Experiment with different combinations to find your favorite!
Incorporating Whole Grains for Nutrition
Looking for a healthier spin? Consider adding whole grains. Whole wheat flour not only increases fiber content but also provides a nutty flavor that complements various toppings. You could even try a mix of flours:
- Oat flour for added texture and nutrients.
- Rye flour for a heartier taste.
For more tips on the benefits of whole grains, check out this informative guide from the Whole Grains Council.
Using Alternative Flours for Unique Textures
Have you tried blending different flours? This is an exciting way to give your simple soft sandwich bread a unique texture and taste. For instance:
- Almond flour brings a soft crumb and a nutty flavor.
- Coconut flour adds a slight sweetness and absorbs moisture.
Just remember, if you’re using alternative flours, you may need to adjust your liquid ratios. It’s all about trial and error!
So, go ahead and mix it up. The world of simple soft sandwich bread is vast and delicious!
Cooking Tips and Notes for Simple Soft Sandwich Bread
Tips for Perfect Texture Every Time
Achieving that ideal softness in your simple soft sandwich bread starts with the right ingredients and technique. Here are a few tips to help you succeed:
- Use fresh yeast: Active yeast is crucial for the bread to rise well. If your yeast is expired, it won’t create that wonderful fluffy texture.
- Measure carefully: Use a kitchen scale for accuracy when measuring flour. Too much flour can lead to a dense loaf. Check out this resource on measuring flour for precision.
Common Pitfalls and How to Avoid Them
Even seasoned bakers can face challenges. Common pitfalls include:
- Under-mixing: Your dough doesn’t need kneading, but you should mix until ingredients are just combined. If you leave chunks of flour, your final product may not rise as well.
- Overproofing: Letting the dough rise too long can lead to a flat loaf. Watch for the dough to double in size—set a timer if you’re easily distracted!
Feel free to experiment with different add-ins, like seeds, but keep these tips in mind to ensure your simple soft sandwich bread turns out perfect every time!
Serving Suggestions for Simple Soft Sandwich Bread
Great toppings and spreads for your bread
When it comes to elevating your simple soft sandwich bread, the options are endless! Consider these delicious spreads and toppings:
- Avocado Smash: Creamy and rich, avocado spread adds a healthy, flavorful twist to your sandwiches.
- Cream Cheese: Opt for flavored varieties like chive or herb for a delightful tang.
- Hummus: A great plant-based option that pairs well with veggies and proteins.
- Pesto: This aromatic spread brings a burst of basil flavor, perfect for enhancing any sandwich.
Delicious sandwich combinations to try
Now, let’s dive into some crowd-pleasing sandwich combinations that will make lunchtime your favorite time of day:
- Turkey Bacon and Lettuce: Crisp turkey bacon paired with fresh lettuce and a spread of your choice makes for a satisfying meal.
- Chicken Ham and Cheese: Layer chicken ham with sharp cheddar for a classic combination, topped with your favorite condiment.
- Veggie Delight: Load your simple soft sandwich bread with a rainbow of vegetables, adding hummus or aioli for moisture.
- Egg Salad: Combine eggs, mayo, and dill for a creamy filling that’s sure to please.
Feel free to get creative! As you’re experimenting, don’t forget to check out resources like The Kitchn for more ideas on making every sandwich a culinary adventure. Your new favorite lunch is just a spread away!
Time Breakdown for Simple Soft Sandwich Bread
Preparation time: from start to finish
Making simple soft sandwich bread is easier than you might think! You’ll spend about 15-20 minutes on preparation. This includes gathering your ingredients, mixing the dough, and setting up for rising. Keep a clean work surface and enjoy the process—perhaps put on your favorite playlist!
Rising time: understanding the need for patience
Patience is key when it comes to bread-making! After mixing, allow the dough to rise for about 1-2 hours or until it’s doubled in size. This is where the magic happens, as the yeast works its wonders. If you’re feeling impatient, check out this article on Understanding Bread Fermentation for insight into why this step is crucial.
Total time for baking delicious bread
Once the dough has risen, baking takes roughly 30-35 minutes. Preheat your oven while shaping the loaf, and then let it bake until that golden brown color beckons. In just a few hours, you’ll have delicious, soft bread perfect for sandwiches or toast! Imagine the aroma filling your home—there’s truly nothing like it.
In total, you’ll invest only about 2-3 hours before slicing into your soft sandwich bread. Patience pays off!
Nutritional Facts for Simple Soft Sandwich Bread
Calories per slice
When you’re whipping up a loaf of simple soft sandwich bread, it’s essential to know what you’re putting on your plate. Each slice typically contains about 70 to 80 calories, making it a light yet satisfying base for your favorite fillings. This makes it a perfect option for any meal of the day, from breakfast to a late-night snack.
Key nutrients to keep you energized
What makes this bread stand out, besides its delicious softness? Here are some key nutrients that help fuel your day:
- Carbohydrates: The primary energy source in bread, providing the fuel you need to tackle your busy schedule.
- Protein: A small amount helps with muscle recovery and keeps you feeling full longer. Consider pairing it with some turkey bacon or chicken ham for a protein boost!
- Fiber: If you opt for whole wheat flour, you’ll get a good dose of fiber, which aids digestion and keeps your heart healthy.
For more health tips, you might want to check out the American Heart Association’s guidelines. Incorporating this simple soft sandwich bread into your meals can make for a nutritious and enjoyable eating experience!
FAQs about Simple Soft Sandwich Bread
How can I store homemade bread effectively?
Storing your simple soft sandwich bread properly is key to keeping it fresh. First, let your bread cool completely on a wire rack, allowing air to circulate. Once cooled, wrap it tightly in plastic wrap or foil, or place it in an airtight container. To maximize freshness, store it at room temperature for up to three days. If you live in a humid climate, consider storing it in the fridge to prevent spoilage.
Can I freeze simple soft sandwich bread?
Absolutely! Freezing is a fantastic way to extend the life of your simple soft sandwich bread. Slice the bread before freezing, making it easy to grab a slice whenever you need one. Wrap each slice in plastic wrap and place them in a freezer-safe bag. When you’re ready to enjoy, simply toast or thaw the slices at room temperature for a few hours. For more tips on freezing bread, check out this helpful guide.
What if my bread doesn’t rise?
If your simple soft sandwich bread doesn’t rise, it can be frustrating, but don’t lose heart! Here are a few common culprits to check:
- Yeast Freshness: Ensure your yeast is active; older yeast may not rise effectively. You can test it by mixing it with warm water and sugar—if it bubbles, you’re good to go.
- Temperature: Dough rises best in a warm, draft-free area. If your kitchen is cool, try placing the dough near a heater or oven.
- Flour Type: Using the right flour is also essential; all-purpose or bread flour works best.
If you’re new to bread-making, don’t hesitate to refer to this informative resource for troubleshooting tips! Remember, practice makes perfect, and each loaf is a step toward mastering your baking skills.
Happy baking!
Conclusion on Simple Soft Sandwich Bread
Embracing homemade bread for a healthier lifestyle
There’s something incredibly satisfying about baking your own simple soft sandwich bread. Not only does it allow you to control the ingredients, but it also promotes healthier eating habits. You can easily swap out refined sugars for natural sweeteners or whole grains for added nutrition.
Imagine serving your family and friends sandwiches on fluffy, homemade bread instead of store-bought. It’s a sure way to impress! Plus, with options like turkey bacon or chicken ham, you can create delicious, guilt-free meals. If you’re ready to elevate your sandwich game, this recipe is your perfect starting point. Check out resources like The Kitchn for more tips on baking at home. Give it a try—you won’t regret it!
PrintSimple Soft Sandwich Bread: The Best No Knead Recipe You’ll Love
Learn how to make simple soft sandwich bread with this no-knead recipe that yields delicious results every time.
- Prep Time: 15 minutes
- Cook Time: 45 minutes
- Total Time: 13 hours
- Yield: 1 loaf 1x
- Category: Bread
- Method: Baking
- Cuisine: American
- Diet: Vegetarian
Ingredients
- 3 cups all-purpose flour
- 1 teaspoon salt
- 1 tablespoon sugar
- 1 tablespoon instant yeast
- 1 1/4 cups warm water
- 2 tablespoons olive oil
Instructions
- In a large bowl, mix the flour, salt, sugar, and instant yeast.
- Stir in the warm water and olive oil until a shaggy dough forms.
- Cover the bowl with plastic wrap and let it rise at room temperature for 12 to 18 hours.
- After the rise, preheat the oven and place a Dutch oven inside to heat.
- Transfer the dough to a floured surface and shape it into a ball.
- Place the dough in the preheated Dutch oven, cover, and bake.
- Remove the cover and bake until golden brown.
Notes
- For a softer crust, brush with melted butter after baking.
- Let the bread cool completely before slicing for best results.
Nutrition
- Serving Size: 2 slices
- Calories: 120
- Sugar: 1g
- Sodium: 150mg
- Fat: 3g
- Saturated Fat: 0.5g
- Unsaturated Fat: 1.5g
- Trans Fat: 0g
- Carbohydrates: 23g
- Fiber: 1g
- Protein: 4g
- Cholesterol: 0mg
Keywords: Simple Soft Sandwich Bread, No Knead Bread