Introduction to Rustic Italian Crusty Bread
Why rustic Italian bread is a kitchen essential?
If you’ve ever sunk your teeth into a loaf of rustic Italian crusty bread, you already know why it holds a special place in many kitchens. This bread is not just a side dish; it’s an experience. With its crispy exterior and soft, chewy interior, it elevates any meal, from soups and stews to hearty sandwiches. But why should you consider baking this bread at home?
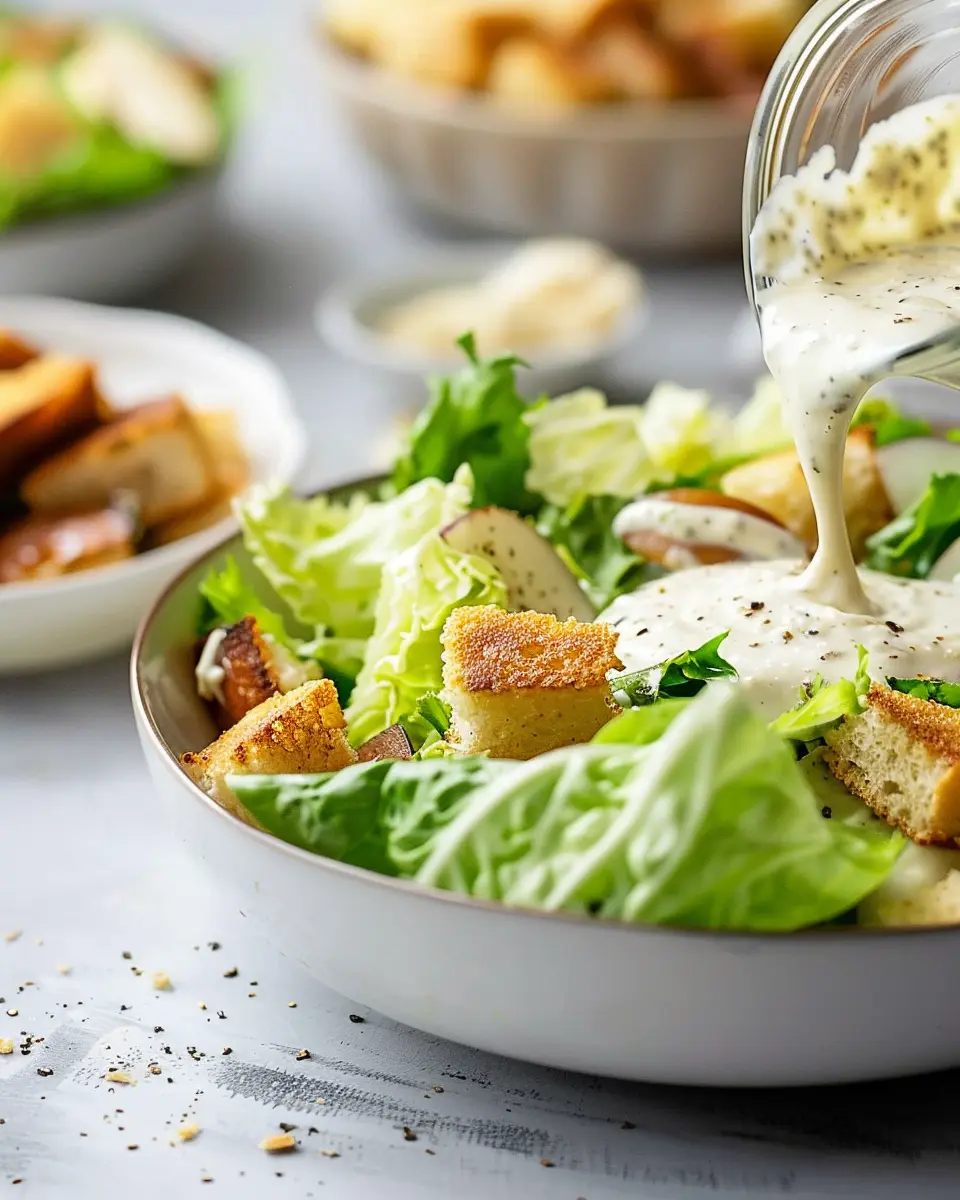
- Versatility: Use it for bruschetta, or enjoy it alongside your favorite dip at game night. You can even layer it with Turkey Bacon and Chicken Ham for a delightful twist on classic sandwiches.
- Nutrition: Homemade bread can be healthier than store-bought options, as you can control the ingredients. Whole grains can easily be integrated to boost fiber content.
- Artisanal Quality: Baking your own bread means you can create something subtly unique in flavor and texture, making it a joyful endeavor.
Rustic Italian crusty bread represents simplicity and tradition, connecting you with generations of bakers who have perfected this craft. For more insights into the nutritional benefits of bread, check out this article from the Whole Grains Council.
Cooking with love: A personal story
Growing up, my grandmother would often bake her version of rustic Italian bread every Sunday. The smell that filled the house was a comforting embrace, signaling that family time was about to begin. We’d gather around the table, slathering the warm bread with fresh butter or using it to mop up sauces from the Sunday gravy. My grandfather used to say that the secret ingredient was always love, and he was right.
Every loaf tells a story, don’t you think? As you knead the dough and shape it, you’re not just creating a product; you’re infusing it with your own memories, hopes, and dreams. So, when you embark on this baking journey, remember that it’s not just about the ingredients—it’s about the love and creativity you pour into it.
Ready to give it a try? Stick around for my rustic Italian crusty bread recipe video that will guide you step by step through this rewarding process.

Ingredients for Rustic Italian Crusty Bread
Essential ingredients for the perfect loaf
Making the rustic Italian crusty bread you’ve always dreamed of starts with high-quality ingredients. Here’s what you’ll need:
- Flour: Opt for bread flour for that perfect structure. It provides higher protein content compared to all-purpose flour, leading to a chewier texture.
- Water: Use warm water, around 100°F (38°C), which helps activate the yeast better.
- Yeast: Instant yeast is my go-to; it doesn’t need to be proofed and works wonders!
- Salt: Sea salt enhances the flavor and strengthens the dough.
- Olive oil: A splash of good-quality olive oil adds richness and improves the crust.
These simple ingredients create a delicious base for your bread.
Suggested tools for baking bread
Baking bread is easier with the right tools, so don’t forget to have these on hand:
- Mixing bowl: A large bowl for kneading your dough.
- Kitchen scale: For precise measurements, ensuring consistency.
- Dutch oven: For that perfect crusty finish, it creates a steam environment in the oven.
Ready to bake? Your rustic Italian crusty bread is just a mix and knead away! For more detailed information on ingredient choices, check out this guide on choosing flour.
Step-by-step preparation of Rustic Italian Crusty Bread
Gather your ingredients
Before diving into the world of baking rustic Italian crusty bread, it’s crucial to have all your ingredients on hand. This not only streamlines the process but also makes baking more enjoyable. Here’s what you’ll need:
- Flour: 4 cups of all-purpose flour or bread flour
- Water: 1 ½ cups, at room temperature
- Yeast: 2 teaspoons active dry yeast
- Salt: 2 teaspoons, preferably sea salt
Feel free to explore using whole wheat flour for a healthier twist; it will add a nutty flavor and a delightful texture. Remember, the quality of your ingredients can make a significant difference in the end product. If you’re looking for great tips on selecting quality flour, check out this comprehensive guide from King Arthur Baking.
Mix the dry ingredients
Once your ingredients are gathered, it’s time to blend the dry elements. In a large mixing bowl, combine the flour, yeast, and salt. Make sure to mix these well with a whisk or a fork to ensure that the yeast and salt are evenly distributed throughout the flour. This step is vital since you want the yeast to activate properly during the fermentation process.
For those skeptical about using active dry yeast, know that it must be in contact with water to come to life. If you’re using instant yeast, you can include it directly with your flour mixture. Curious about the different types of yeasts? You can read more about it in this detailed article.
Combine with water and knead
With your dry ingredients mixed, it’s time to bring everything together. Slowly pour the water into the flour mixture, mixing with a spatula or wooden spoon until it forms a shaggy, sticky dough. Don’t be alarmed by the sticky texture; that’s a good sign!
Now comes the kneading part! Transfer the dough onto a lightly floured surface and knead for about 10 minutes. The dough should become smoother and more elastic over time. Remember, kneading is not just a workout for your arms; it’s essential for developing gluten, which will give your rustic Italian crusty bread its structure.
The fermentation process
After kneading, place your dough in a large, greased bowl, and cover it with a clean kitchen towel or plastic wrap. This will keep it warm and help it rise, which is vital for developing flavor. Allow the dough to ferment for about 1 to 2 hours, or until it has doubled in size.
During this time, consider this a good moment to reflect on your baking journey. Did you know that a longer fermentation time not only enhances flavors but also improves the bread’s nutritional benefits? Fermentation breaks down gluten and makes the nutrients more accessible!
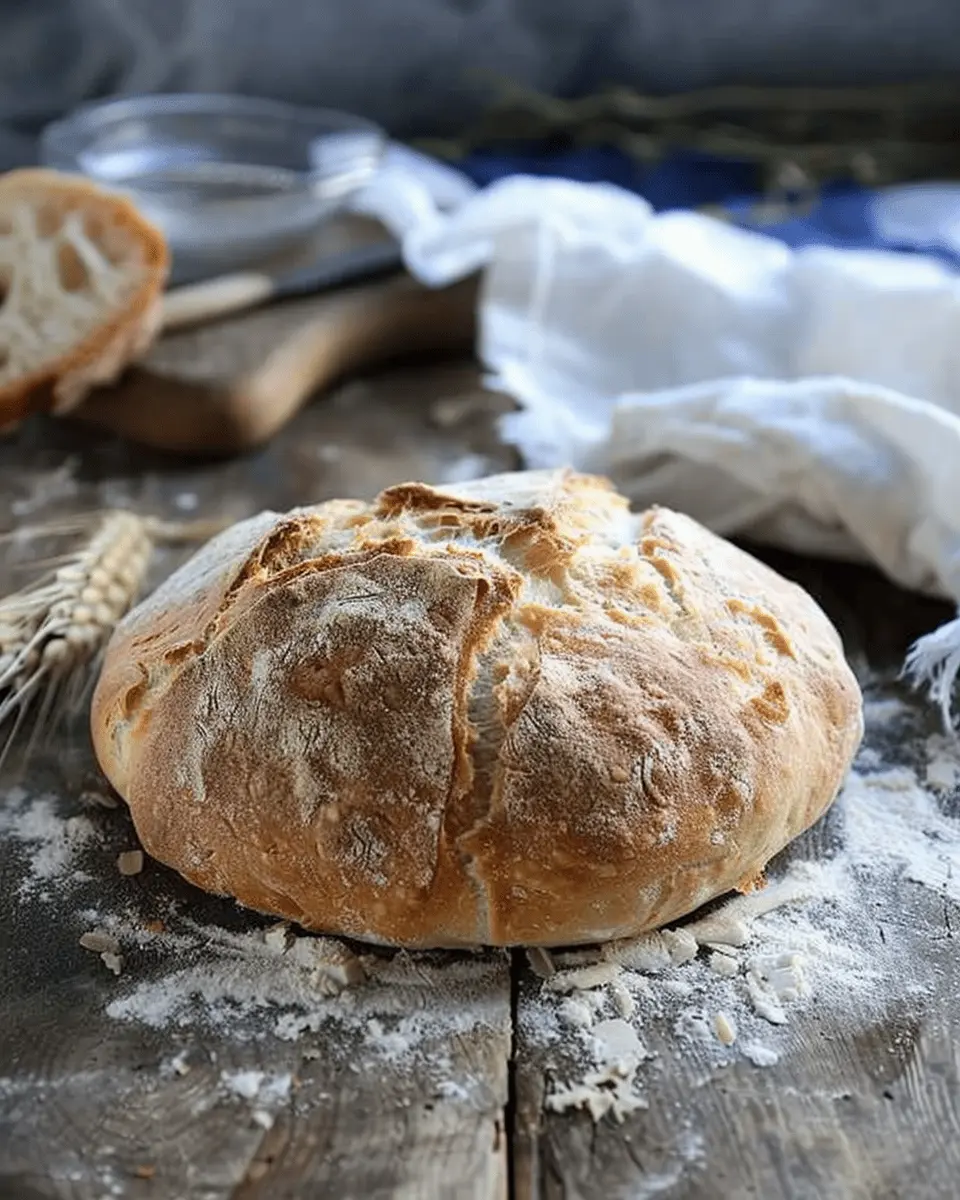
Shape the loaf
After the dough has risen, gently punch it down to release the air. Then, turn it out onto a floured surface again. Form the dough into a round or oval shape, depending on your preference. Cover it lightly and let it rest again for another 30 minutes. This second resting period allows the gluten to relax, making it easier to shape and perfect for that rustic appearance you’re aiming for.
Baking your rustic bread
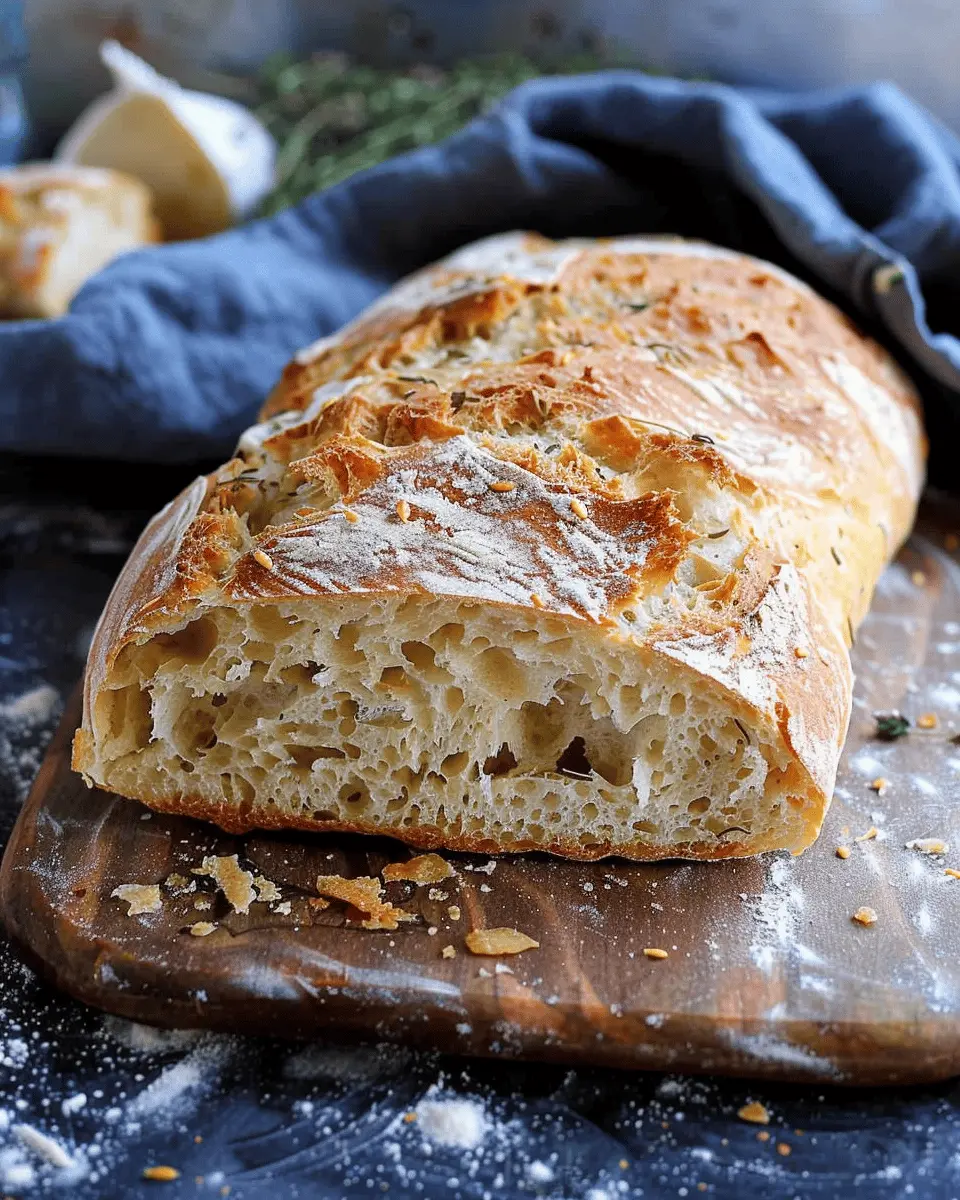
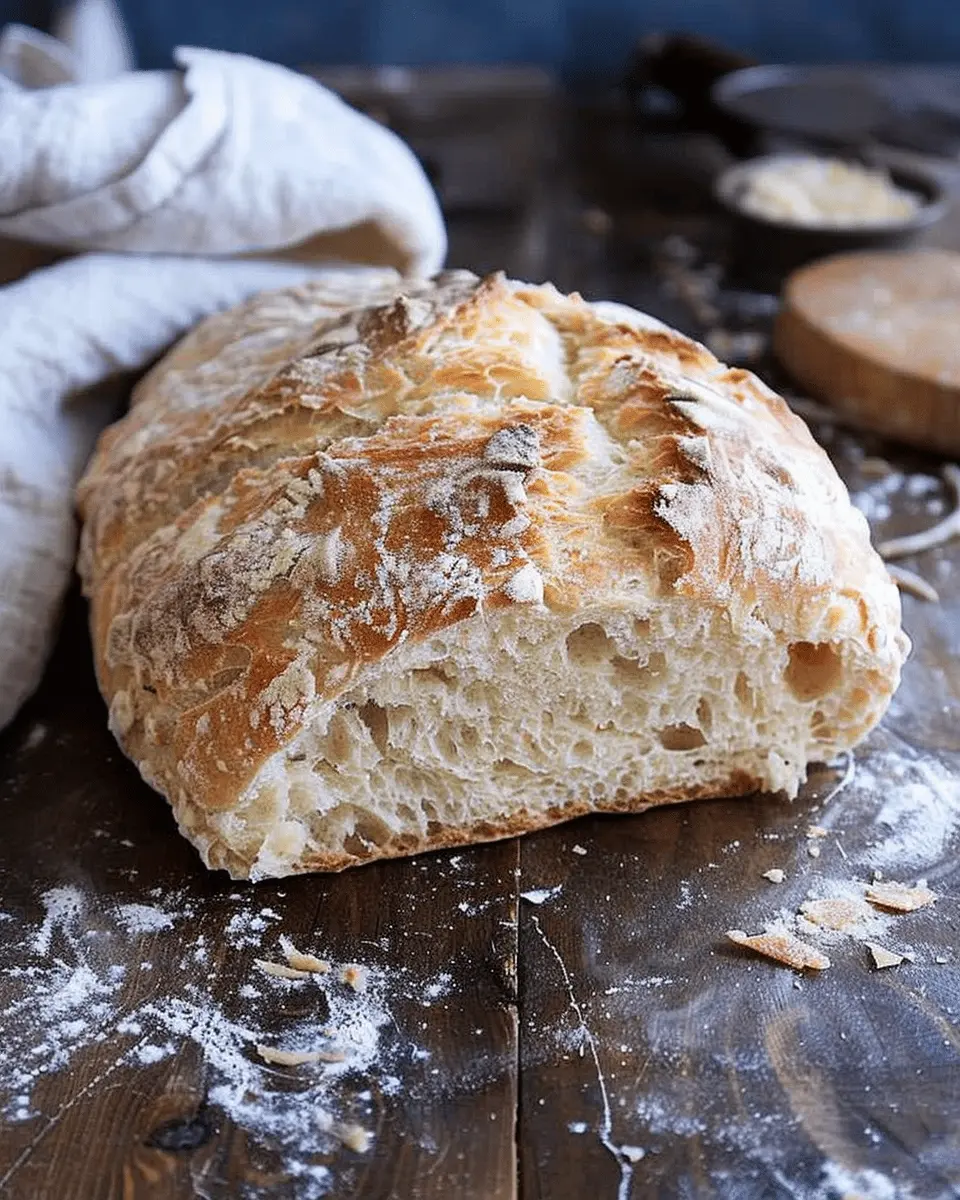
Finally, it’s time to bake! Preheat your oven to 450°F (232°C). To create a lovely crust, place a cast iron pot or a baking stone in the oven while it heats. Once ready, carefully transfer your dough into the heated pot. Cover it and bake for about 30 minutes. Then, remove the lid for the last 10–15 minutes to allow the crust to become beautifully golden and crisp.
The aroma filling your kitchen at this point is simply unmatched! You’ll know your rustic Italian crusty bread is done when it sounds hollow when tapped on the bottom. Allow it to cool on a wire rack, and then slice it up to enjoy.
Now, it’s time to enjoy your delicious creation! If you’re looking for pairing ideas, consider creamy spreads or a selection of cheeses to elevate your bread experience. Happy baking!
Variations on Rustic Italian Crusty Bread
Whole Wheat Rustic Bread
If you’re looking to give your rustic Italian crusty bread a hearty twist, try using whole wheat flour instead of the traditional white flour. Not only does whole wheat add a nutty flavor, but it’s also rich in fiber, making your bread a more nutritious option. To create a delightful loaf, combine whole wheat flour with a touch of all-purpose flour for a lighter texture while retaining the wholesome goodness. Mixing in some honey can help balance the earthiness and add a hint of sweetness.
Herb-Infused Rustic Bread
Imagine the aroma of freshly baked bread mingling with the herby scent of rosemary, thyme, or basil! Adding fresh or dried herbs to your dough can elevate the flavor profile of your rustic Italian crusty bread. Simply incorporate about 1–2 tablespoons of your favorite herbs into the mix. For something unique, consider pairing it with garlic for an aromatic experience that complements any spread. This herb-infused creation can be perfect for serving alongside a bowl of oil for dipping or as a standalone snack.
Rustic Bread with Olives or Sun-Dried Tomatoes
Want to add a Mediterranean flair? Folding in olives or sun-dried tomatoes is the way to go. Not only do they provide bursts of flavor and color, but they also enhance the texture. Use pitted Kalamata olives or savory sun-dried tomatoes for a delicious kick. Just chop them coarsely and add them to your dough during the final mixing stage. The result? A loaf that’s deliciously rustic and perfect for sandwiches or toasted with a drizzle of balsamic reduction!
For more delightful bread variations, check out this resource on artisan breads to inspire your next baking adventure!
Cooking tips and notes for Rustic Italian Crusty Bread
Using a baking stone for a crispy crust
If you want that classic rustic Italian crusty bread texture, investing in a baking stone is a game-changer. These stones help evenly distribute heat, ensuring a beautifully browned crust. Preheat your stone in the oven for at least 45 minutes before baking—trust me, it makes a noticeable difference. If you don’t have a baking stone, a heavy-duty baking sheet turned upside down can work in a pinch!
The importance of steam in baking
Now, let’s talk steam. Creating a steamy environment during baking is crucial for achieving that shiny, crisp crust we all crave. To do this, place a shallow pan filled with hot water at the bottom of your oven. Alternatively, spritz the bread with water right after you place it in the oven. A baker’s tip? Professional bakers often recommend this technique for enhancing crust formation, and it’s truly worth it.
For further reading on these techniques, check out resources from The Kitchn or King Arthur Baking for expert insights. Happy baking!
Serving suggestions for Rustic Italian Crusty Bread
Perfect Pairings with Dips and Spreads
There’s something truly delightful about enjoying rustic Italian crusty bread with a selection of dips and spreads. Consider these options to elevate your snacking game:
- Olive Oil & Balsamic Vinegar: A classic combo. Drizzling your bread with high-quality extra virgin olive oil mixed with a splash of balsamic can be divine.
- Hummus or Baba Ghanoush: These creamy spreads can contrast beautifully with the crunchy texture of your loaf, offering a nutritious option for any gathering.
- Artisan Cheese Spreads: Try goat cheese or even a spicy feta dip for a touch of gourmet flair.
For more ideas, check out this list of popular Italian spreads on Eataly.
Serving with Soups or Salads
Feeling cozy? Rustic Italian crusty bread is perfect for mopping up hearty soups or adding crunch to your salads. Here are some ways to serve it:
- Soup Dunks: Pair it with a classic minestrone or tomato basil soup. The crusty bread will soak up the flavors, ensuring you don’t miss a drop!
- Crunchy Salad Topping: Toasted pieces can add a satisfying crunch to leafy greens. Just toss some cubes with olive oil and herbs, then bake until golden.
Incorporating bread into your meals not only enhances the flavors but also brings a comforting, rustic approach to dining. Enjoy exploring these serving options, and let the natural flavors of your bread shine!
Time breakdown for Rustic Italian Crusty Bread
When it comes to mastering your rustic Italian crusty bread, understanding the time commitment is essential. Here’s a straightforward breakdown to help you plan your baking adventure:
Preparation time
Getting started with your dough requires about 20-30 minutes. This includes measuring your ingredients, mixing the dough, and kneading it gently until smooth and elastic.
Rising time
This is the exciting part where your dough comes to life! Allow it to rise for approximately 2 hours at room temperature. For deeper flavors, some bakers prefer letting it rise in the fridge overnight. If you’re interested in this method, you can check more about it here.
Baking time
Once your dough has risen beautifully, preheat your oven and bake the bread for about 30-35 minutes. You’ll know it’s done when it has a golden crust and sounds hollow when tapped.
Total time
In total, you’re looking at roughly 3 hours from start to finish—well worth the wait for that crusty, flavorful goodness!
This timing allows for flexibility, so go ahead and enjoy the process of creating your very own rustic Italian crusty bread. Trust me, the aroma alone will keep you coming back for more!
Nutritional facts for Rustic Italian Crusty Bread
When it comes to enjoying homemade rustic Italian crusty bread, understanding its nutritional profile can help you appreciate your creation even more. In just one slice of this delightful bread, you can expect:
Calories
- Approximately 80-100 calories per slice
Carbohydrates
- About 15-20 grams of carbohydrates, providing energy for your day
Protein
- Roughly 2-3 grams of protein per slice, great for a balanced diet
This bread is perfect for pairing with nutritious foods like avocado or hummus, making it not only versatile but also nourishing. If you’re looking for a deeper dive into food nutrition, websites like Healthline or MyFitnessPal offer excellent resources to guide your choices. Enjoy making your rustic Italian crusty bread and relish in its wholesome goodness!
FAQs about Rustic Italian Crusty Bread
How can I store leftover bread?
After enjoying your delicious rustic Italian crusty bread, you may wonder how to keep it fresh. The best way to store it is at room temperature in a paper bag to maintain its crusty exterior. Avoid plastic bags as they can make the bread soggy. If you want to extend its life, you can wrap it tightly in aluminum foil and store it in a cool, dark place.
Can I freeze rustic bread?
Absolutely! Freezing is a great option if you want to save your rustic Italian crusty bread for later. Slice the bread before freezing; this way, you can pull out just what you need without thawing the entire loaf. Wrap it in plastic wrap or foil and place it in an airtight freezer bag. It can last up to three months in the freezer. When you’re ready to enjoy it, let it thaw at room temperature, and pop it in the oven for a few minutes to refresh it.
What if my dough is too sticky?
Don’t worry! If your bread dough seems too sticky, this can happen to even the best home bakers. Try flouring your hands and the work surface while kneading. Most importantly, don’t add too much flour right away; just a little at a time. Remember that rustic Italian crusty bread dough is meant to be somewhat sticky, so give it a chance to rise and develop its structure.
For more tips on baking bread, consider checking out expert sources like the King Arthur Baking Company or Serious Eats for invaluable advice!
Conclusion on Rustic Italian Crusty Bread
The joy of baking bread at home
There’s something incredibly satisfying about pulling a loaf of rustic Italian crusty bread from your oven, golden-brown and fragrant. Baking at home not only fills your kitchen with delightful aromas but also offers a sense of accomplishment that store-bought bread simply can’t match. Plus, with every loaf, you can experiment with flavor and texture, making it uniquely yours.
Encouraging readers to share their experiences
I’d love to hear about your adventures in bread-making! Have you tried this recipe or put your twist on it? Sharing stories and tips creates a wonderful community. You can reference resources like King Arthur Baking for inspiration. So, grab your apron, and let’s keep this conversation going. What have you created? Your experience could inspire someone else to embark on their own baking journey!
PrintRustic Italian Crusty Bread Recipe Video: Easy Steps for Flavorful Loaf
Learn how to make a delicious Rustic Italian Crusty Bread with this easy video recipe.
- Prep Time: 15 minutes
- Cook Time: 45 minutes
- Total Time: 13 hours
- Yield: 1 loaf 1x
- Category: Bread
- Method: Baking
- Cuisine: Italian
- Diet: Vegetarian
Ingredients
- 3 cups all-purpose flour
- 1 1/2 cups warm water
- 1 teaspoon salt
- 1/2 teaspoon active dry yeast
Instructions
- In a large bowl, mix the flour, salt, and yeast.
- Add warm water and stir until a shaggy dough forms.
- Cover and let rise for 12-18 hours.
- Preheat the oven to 450°F (232°C).
- Shape the dough gently and let it rest for another hour.
- Bake in a preheated Dutch oven for 30 minutes.
- Remove the lid and bake for an additional 15 minutes until golden.
Notes
- For extra flavor, add herbs to the dough.
- Use a kitchen scale for precise measurements.
Nutrition
- Serving Size: 1 slice
- Calories: 120
- Sugar: 0g
- Sodium: 300mg
- Fat: 0.5g
- Saturated Fat: 0g
- Unsaturated Fat: 0.5g
- Trans Fat: 0g
- Carbohydrates: 25g
- Fiber: 1g
- Protein: 4g
- Cholesterol: 0mg
Keywords: Rustic Italian Crusty Bread, Homemade Bread, Bread Recipe