Introduction to Cheese Danish
If you’ve ever walked past a bakery, the enticing aroma of freshly baked goods can be hard to resist. Now, picture this: you can recreate that magic right in your kitchen. Understanding how to make a Cheese Danish not only brings that delightful experience home but can also be a game-changer for young professionals juggling busy schedules. Here’s why diving into the world of homemade pastries is worth your time.
Why Homemade Cheese Danish is a Game-Changer for Young Professionals?
For many of us in the 25 to 35 age range, life can feel like a whirlwind. Between career demands and personal commitments, finding time for culinary adventures might seem impossible. However, making your own Cheese Danish can simplify your mornings and elevate your breakfast routine.
- Cost-effective: Purchasing gourmet pastries daily can quickly add up. Did you know that investing in quality ingredients for homemade pastries can save you money in the long run?
- Flexible Schedule: Baking your own Cheese Danish allows you to customize the process. Whether you want to prepare them over the weekend or whip up a batch fresh on a weekday morning, the choice is yours!
- Healthier Options: You can control the ingredients! Opt for low-fat cheese, whole wheat dough, or even experiment with fillings like fruits or nuts. This gives you a chance to embrace a healthier breakfast that keeps you energized throughout your hectic day.
As you embark on crafting this delightful pastry, consider exploring some basic baking techniques or checking out resources like King Arthur Baking and Sally’s Baking Addiction. They provide fantastic insights that can give you a solid foundation in pastry-making fundamentals.
Imagine waking up to the smell of freshly baked Cheese Danish, paired with a cup of your favorite coffee or herbal tea. Not only will you treat yourself, but you’ll also have something delicious to share with friends, family, or colleagues. It’s all about creating those little moments of joy in our busy lives.
In conclusion, mastering homemade Cheese Danish isn’t just about the pastry itself—it’s about transforming your mornings into something truly special. With a bit of practice, you’ll have a go-to recipe that turns a chaotic morning into a comforting ritual, making your day just a bit brighter.

Ingredients for Cheese Danish
Creating a delightful Cheese Danish at home is not just about the end result; it’s about the joy of crafting something delicious. Let’s break down the ingredients you’ll need for this tasty treat.
Basic ingredients for the dough
To make a flaky, buttery dough, you’ll need:
- All-purpose flour: Essential for the structure.
- Butter: Use cold, unsalted butter for the best flake.
- Salt: A pinch to enhance the flavors.
- Sugar: For a hint of sweetness.
- Milk: Whole or 2% works perfectly here, adding moisture and richness.
Filling ingredients
The star of your Cheese Danish is, of course, the filling! Gather these ingredients:
- Cream cheese: Softened, for a smooth and creamy texture.
- Powdered sugar: Sweetens the filling without graininess.
- Vanilla extract: Just a splash adds aromatic depth.
- Egg yolk: This enriches the filling and gives it a beautiful color.
Optional toppings and extras
Elevate your Cheese Danish with these delightful options:
- Fresh fruit: Berries, sliced peaches, or even thin apple slices add a refreshing touch.
- Nuts: Chopped almonds or walnuts for a satisfying crunch.
- Glaze: A simple mixture of powdered sugar and milk will give your pastries that finishing touch.
Ready to bake? The rich ingredients paired with soft, flaky pastry make for a perfect morning treat! For more tips on pastry techniques, check out Taste of Home. Happy baking!
Preparing Cheese Danish
Making a Cheese Danish is a delightful culinary adventure that combines flaky pastry with a creamy filling. This treat is perfect for breakfast or a sweet afternoon snack. Let’s dive into how to prepare this delicious pastry step by step!
Gather and prepare your ingredients
Before embarking on your Cheese Danish journey, it’s essential to have all your ingredients lined up. Here’s what you need:
-
For the dough:
-
2 cups all-purpose flour
-
1/2 teaspoon salt
-
1 tablespoon sugar
-
1/4 cup cold unsalted butter, cut into cubes
-
1/2 cup sour cream or Greek yogurt
-
1/4 cup cold water
-
For the cheese filling:
-
1 cup cream cheese, softened
-
1/4 cup sugar
-
1 egg yolk
-
1 teaspoon vanilla extract
-
Optional: lemon zest for a refreshing twist
-
For topping:
-
1 egg (for egg wash)
-
Optional: powdered sugar for dusting
Gather your ingredients and make sure your cream cheese is at room temperature for easy blending. If you’re curious about ingredient substitutes or nutritional information, websites like Food Network have excellent tips and tricks!
Make the dough from scratch
Now that your ingredients are ready, let’s create the pastry dough. In a large bowl, mix the flour, salt, and sugar together.
- Cut in the butter: Add the cold, cubed butter. Using a pastry cutter or your fingers, blend until the mixture resembles coarse crumbs.
- Combine wet ingredients: In a separate bowl, stir the sour cream and cold water until smooth.
- Mix it all together: Gradually add the wet mixture to the dry, stirring gently until just combined. Be careful not to overmix! The goal is to have a loose dough that is easy to roll out.
Once mixed, wrap the dough in plastic wrap and refrigerate for about 30 minutes. This helps it to firm up, making it easier to roll out later.
Prepare the cheese filling
While the dough is chilling, it’s the perfect time to whip up your cheese filling. In a medium-sized bowl, mix the softened cream cheese, sugar, egg yolk, and vanilla extract until smooth. It should have a creamy texture with no lumps. For a refreshing flavor boost, consider adding some lemon zest! This adds a nice brightness to the filling that complements the richness of the cream cheese.
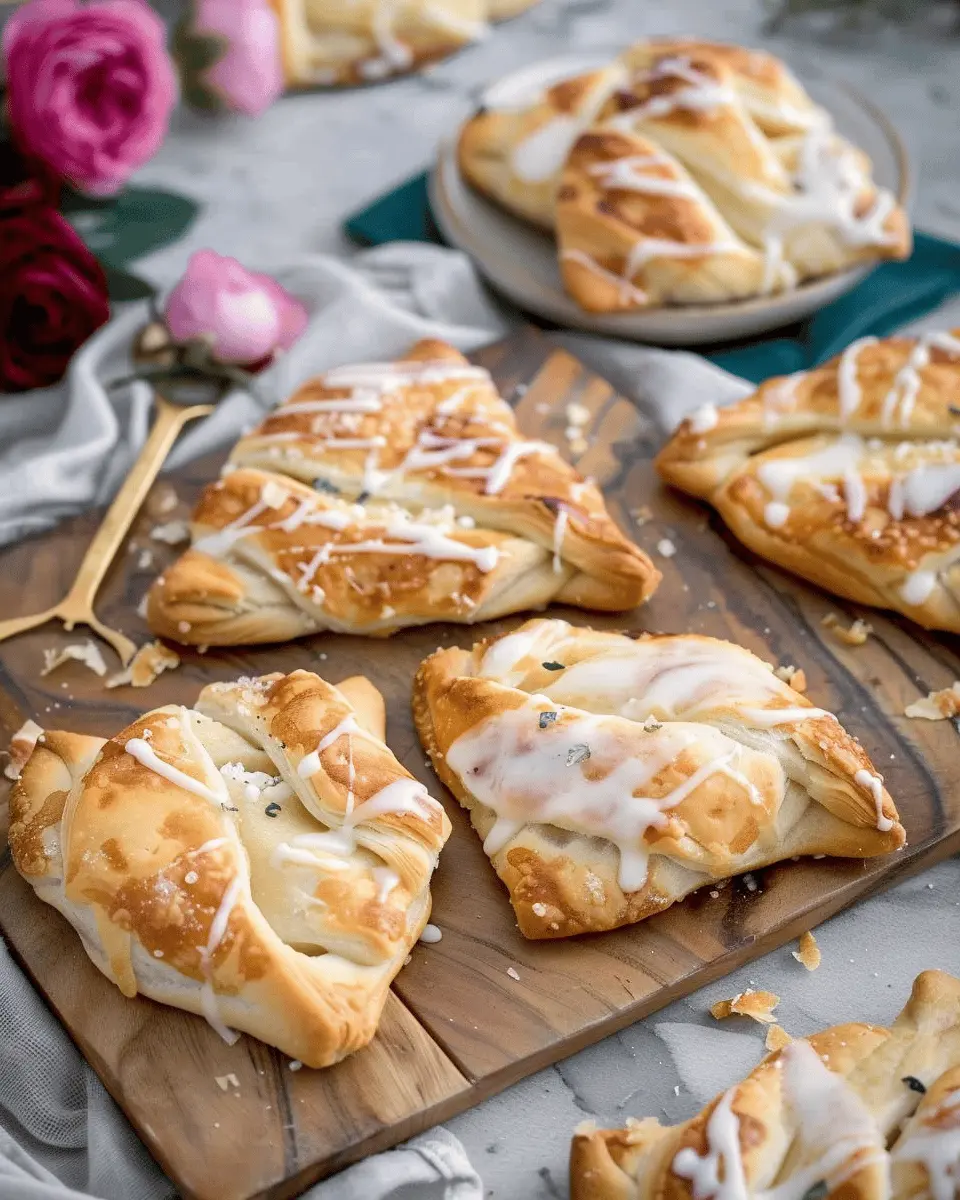
Assemble your Cheese Danish
After chilling, preheat your oven to 375°F (190°C). Roll out the dough on a lightly floured surface into a rectangle, about 1/4 inch thick. Cut it into squares (around 4×4 inches).
- Add filling: Place a spoonful of the cheese mixture in the center of each square. Remember not to overfill, or the cheese could ooze out during baking!
- Fold and seal: Fold the corners of the squares toward the center, pinching them together to create a beautiful little pouch. For extra flair, you can use a fork to crimp the edges.
Bake to golden perfection
Now comes the best part: baking! Place your assembled Cheese Danish on a lined baking sheet. Brush the tops with a beaten egg for that glorious golden finish.
Bake in the preheated oven for about 20-25 minutes, or until golden brown. Keep an eye on them; every oven varies!
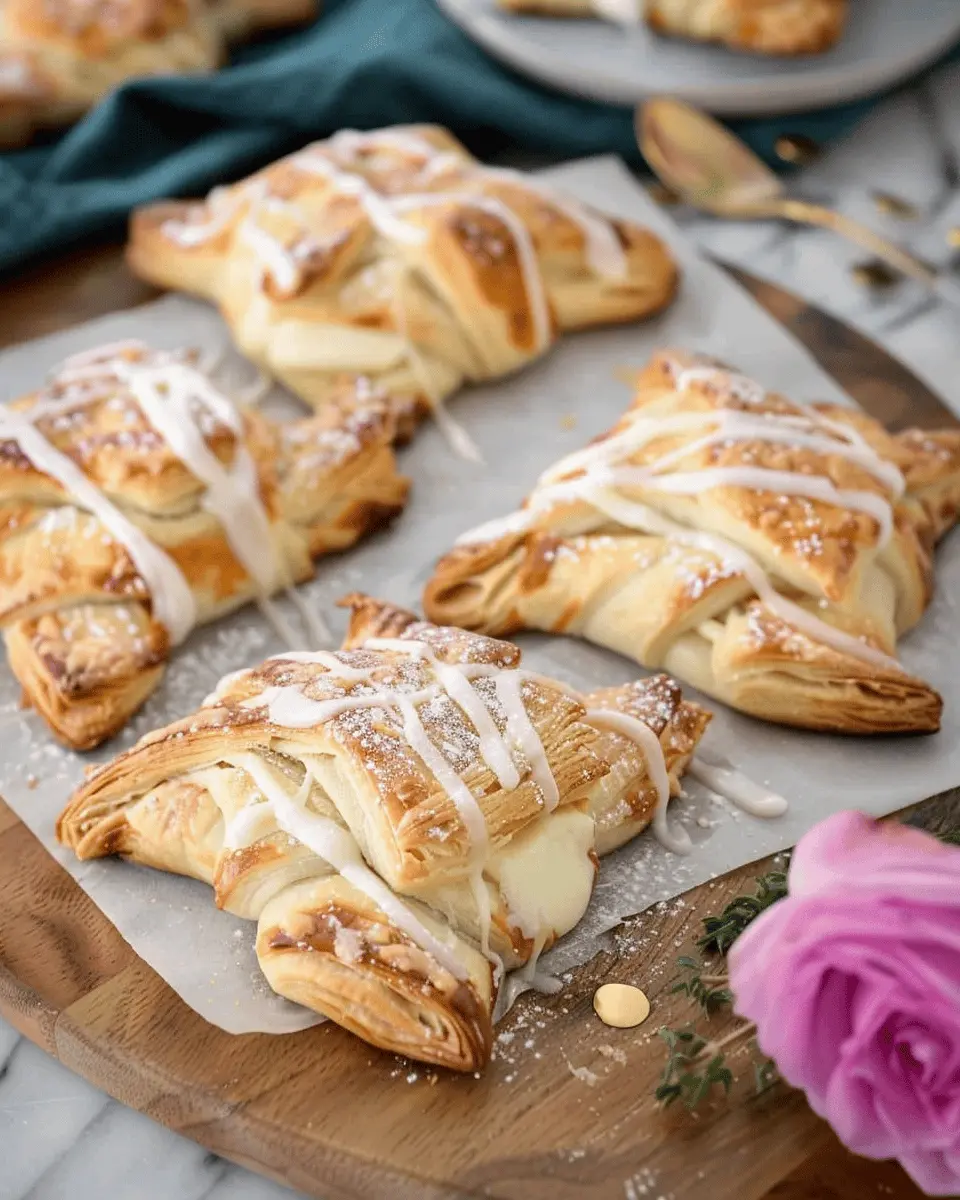
Once baked, you can drizzle with a simple icing made from powdered sugar and a splash of milk or even sprinkle with powdered sugar for extra sweetness.
Final thoughts
The final product will be warm, flaky, and utterly irresistible. Your Cheese Danish will impress friends and family alike and make any ordinary morning feel special. So, set your kitchen timer and get ready to enjoy a homemade delight that is sure to become a regular feature in your baking repertoire!
Curious about more variations? Check out Serious Eats for additional tips and ideas on enhancing your Cheese Danish further. Happy baking!
Variations on Cheese Danish
Sweet Fruit-Topped Cheese Danish
One of the most delightful ways to enjoy a Cheese Danish is by adding a fruity twist. Fresh fruits can elevate this pastry from delicious to downright divine. Consider these options:
- Berries: Top your Danish with blueberries, raspberries, or sliced strawberries for a burst of flavor and color. They not only taste great but also add a nice antioxidant boost.
- Stone Fruits: Cherries, peaches, or plums can be caramelized lightly and then set atop your cheese filling for a seasonal delight. Toss them in a bit of sugar and lemon juice to magnify their natural sweetness.
- Citrus Glaze: A simple glaze made of powdered sugar and citrus juice (think lemon or orange) drizzled over the top brings an irresistible zesty kick.
These sweet variations make for a perfect breakfast treat or a charming dessert. For more tips on fruit pairings, check out this article from Food & Wine.
Savory Cheese Danish with Herbs
If you’re leaning toward a savory take, a Cheese Danish can easily become a dinner-worthy snack. Here are some tasty ideas:
- Herb-Infused Cream Cheese: Blend cream cheese with fresh herbs like dill, chives, or thyme for an aromatic filling. This herbaceous twist pairs beautifully with a buttery crust.
- Meat Additions: Add ingredients like turkey bacon or chicken ham for a heartier option. Just sauté and chop them before mixing into your cheese filling.
- Vegetable Medley: Incorporate sautéed spinach, mushrooms, or even roasted bell peppers for a colorful and healthy touch. These veggies add texture and flavor, transforming your Danish into a gourmet experience.
Trying these variations allows you to explore new sides of a classic pastry while catering to different tastes. With a little creativity, your Cheese Danish can shine in any setting!
Cooking tips and notes for Cheese Danish
Common mistakes to avoid
When making Cheese Danish, there are a few common pitfalls to watch out for. Firstly, avoid using low-fat cream cheese. It can make your filling watery and affect the overall texture. Stick with full-fat cream cheese for that rich, creamy taste. Overworking the dough is another mistake. This can lead to a tough texture instead of the light, flaky pastry you want. Also, ensure your ingredients are at room temperature for the perfect blend of flavors.
For more insight into the Cheese Danish process, you can check out this comprehensive baking guide.
How to get that flaky texture
To achieve that much-desired flaky texture in your Cheese Danish, the key is to use cold butter and keep it in large chunks. As it bakes, the moisture from the butter will steam, creating those lovely layers. Try folding the dough rather than rolling it out excessively; this gentle touch will give your pastry its signature flakiness. Lastly, chilling the assembled pastries before baking for about 30 minutes can enhance texture and shine. Happy baking!
Serving suggestions for Cheese Danish
Perfect pairings for breakfast
Imagine waking up to the delightful aroma of a fresh Cheese Danish warming in your oven. For a well-rounded breakfast, pair it with:
- Turkey Bacon: Its savory crunch plays beautifully against the creamy cheese filling.
- Fresh fruit: Sliced strawberries, blueberries, or a citrus salad add a burst of freshness.
- Coffee or herbal tea: Brew your favorite blend for a cozy start to your day; the rich flavors complement the pastry perfectly.
Want to elevate your breakfast experience? Consider checking out The Kitchn for more breakfast pairings!
Ideas for snacks or dessert
Your Cheese Danish isn’t just reserved for breakfast; it’s an excellent choice for snacks or even dessert! Try these ideas to switch up its presentation:
- Serve warm with a drizzle of honey: This simple addition makes it feel indulgent.
- Top with a sprinkle of powdered sugar: For a sweet finish that’s sure to impress your guests.
- Create a fruit compote: Use seasonal fruits to make a vibrant topping.
The versatility of a Cheese Danish makes it a delightful treat at any time of the day. Whether you’re enjoying it solo or serving friends, it’s bound to be a hit!
Time breakdown for Cheese Danish
Preparation time
Getting started on your Cheese Danish is half the fun! You’ll need about 25 minutes for preparation. This includes making the dough, prepping your delightful cream cheese filling, and assembling the pastries. Feel free to put on your favorite playlist to make the process even more enjoyable. Need some tips on dough handling? Check out this guide on making pastry dough.
Baking time
Once you’ve rolled out your pastries and filled them with that luscious cheese mixture, it’s time to bake. Set your oven to 375°F and let those beauties bake for 20-25 minutes. You’ll know they’re ready when they’re golden brown and your kitchen smells heavenly.
Total time
In total, you’re looking at about 50-55 minutes from start to finish. So, in under an hour, you’ll have Cheese Danishes that will impress anyone lucky enough to snag one. Perfect for brunch or a cozy evening treat! Want to serve these with something special? Pair them with a nice cup of aromatic coffee or herbal tea for the ultimate experience.
Nutritional facts for Cheese Danish
When you’re indulging in a delightful Cheese Danish, it’s good to know what you’re enjoying. Here’s a breakdown of the essential nutritional facts to keep you informed.
Calories per serving
A typical serving of Cheese Danish ranges from 250 to 350 calories. This is largely influenced by the size and the ingredients used. If you’re keeping an eye on your daily calorie intake, it’s wise to enjoy these treats in moderation.
Protein content
On the protein front, each Cheese Danish usually contains around 6-8 grams. This can vary based on the cheese used. While it’s not a major source of protein, the creamy cheese filling adds a nice touch to your snack, keeping you satisfied for longer.
Sugar and sodium levels
Sugar content can be around 10-15 grams, depending on how sweet your recipe is. As for sodium, it typically clocks in at about 200-300 mg. For those watching their sugar and sodium intake, consider using less sugar in your filling or opting for lower-sodium cheese varieties.
Want to explore more about how cheese affects your diet? The USDA provides thorough nutritional data worth checking out!
Enjoying a Cheese Danish occasionally is a flavorful way to add a little delight to your culinary adventures!
FAQ about Cheese Danish
Can I freeze Cheese Danish?
Absolutely, you can freeze Cheese Danish! This is a fantastic option if you want to save some for later. Just ensure they’re completely cool before wrapping them tightly in plastic wrap and placing them in an airtight container. For best results, consume them within three months. When you’re ready to enjoy, simply thaw them in the fridge overnight or reheat them in the oven for a few minutes to regain that delicious flaky texture.
What’s the best way to store leftover Cheese Danish?
To keep your Cheese Danish fresh, store them in an airtight container at room temperature for up to three days. If you have a larger batch, put them in the fridge, where they can last for about a week. Just remember, the longer they sit, the more they may lose their wonderful texture and flavor. Pair them with a nice cup of coffee for breakfast or an afternoon snack, and you’ll elevate your treat experience!
Can I make Cheese Danish gluten-free?
Yes, you can definitely make a gluten-free Cheese Danish! Look for gluten-free puff pastry or dough, which you can find at many grocery stores or make at home using gluten-free flour blends. Many folks swear by a mix of almond flour and tapioca starch for a lovely texture. Just be mindful of the baking time, as gluten-free dough can behave a little differently. For more insights on gluten-free baking, you might find America’s Test Kitchen helpful.
Feeling adventurous in the kitchen? These simple adaptations can transform your Cheese Danish into a crowd-pleaser for all dietary needs! With a bit of creativity, you can savor this delightful pastry without worries.
Conclusion on Cheese Danish
Why you should start your homemade Cheese Danish journey today!
There’s something undeniably special about a Cheese Danish fresh from your oven—its flaky pastry, creamy filling, and golden crust can elevate any breakfast or snack time. By making these delightful pastries at home, you get to customize them to your taste.
Imagine the satisfaction of serving a warm Cheese Danish to family, paired perfectly with a cup of coffee or aromatic tea. Plus, it’s far simpler than you might think! With just a few basic ingredients, you can impress your friends and indulge your cravings without the bakery price tag.
Ready to kick off your Cheese Danish adventure? Trust me, you’ll wonder why you didn’t try it sooner! For additional tips and inspiration, check out resources like Serious Eats or Food Network. Happy baking!
PrintCheese Danish Bliss: Easy Recipe for a Delicious Homemade Treat

Discover the joy of making homemade Cheese Danish with this easy recipe that guarantees a delightful treat for any occasion.
- Prep Time: 15 minutes
- Cook Time: 20 minutes
- Total Time: 35 minutes
- Yield: 12 Danish 1x
- Category: Dessert
- Method: Baking
- Cuisine: American
- Diet: Vegetarian
Ingredients
- 1 package of puff pastry
- 8 ounces cream cheese, softened
- 1/4 cup granulated sugar
- 1/2 teaspoon vanilla extract
- 1 egg, beaten (for egg wash)
- 1 tablespoon powdered sugar (for dusting)
Instructions
- Preheat your oven to 400°F (200°C).
- Roll out the puff pastry on a floured surface and cut it into squares.
- In a bowl, mix the cream cheese, granulated sugar, and vanilla extract until smooth.
- Place a spoonful of the cream cheese mixture in the center of each square.
- Fold the corners of the pastry over the filling to seal it.
- Brush the tops with beaten egg.
- Bake for 15-20 minutes or until golden brown.
- Let cool and dust with powdered sugar before serving.
Notes
- For an extra flavor, consider adding a teaspoon of lemon zest to the cream cheese mixture.
- Feel free to top with fresh fruit or jam for added sweetness.
Nutrition
- Serving Size: 1 Danish
- Calories: 250
- Sugar: 5g
- Sodium: 150mg
- Fat: 15g
- Saturated Fat: 9g
- Unsaturated Fat: 5g
- Trans Fat: 0g
- Carbohydrates: 28g
- Fiber: 1g
- Protein: 4g
- Cholesterol: 45mg
Keywords: Cheese Danish, homemade treats, easy recipe