Introduction to Halloween Dirt Cups
If you’re looking for a delightful and spooky treat to bring some fun to your Halloween festivities, look no further than Halloween Dirt Cups. These creative desserts, resembling cups of dirt and worms, are sure to be a hit at any gathering, whether it’s a cozy night in with friends or a lively office party. The best part? They’re incredibly easy to make, requiring just a few simple ingredients that can be put together in no time!
What are Halloween Dirt Cups?
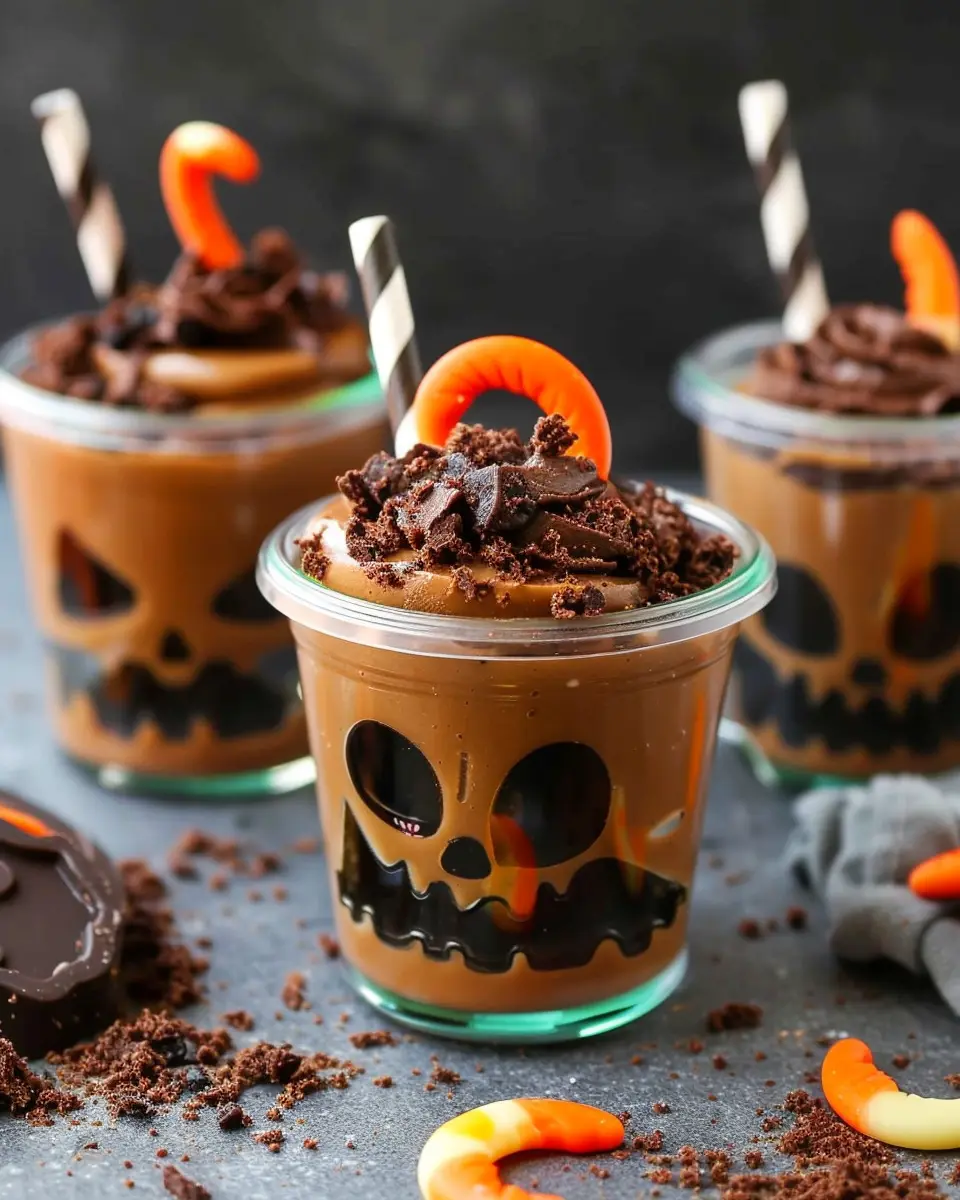
Halloween Dirt Cups are a whimsical dessert made with layers of chocolate pudding, crushed cookies, and gummy worms, all served in a cup. They’re not just delicious; they also double as a playful centerpiece that encapsulates the essence of Halloween. With a bit of creativity, you can decorate them with various toppings, making them an ideal project for young professionals looking to impress without breaking the bank or spending hours in the kitchen.
But why are Halloween Dirt Cups a must-try for young professionals? In our busy lives, we often overlook the joy of bringing a little fun into our routines. These cups are perfect for that! They require minimal prep time, allowing you to whip them up before heading out to a Halloween party or even just for a night in on the couch. Plus, they encourage a bit of nostalgia—who didn’t enjoy a good dirt cup as a kid? Reminiscing about those carefree days can be refreshing amid our hectic schedules.
A quick glance at popular cooking websites reveals that dessert-themed fun foods have gained traction recently, especially among millennials and Gen Z. Crafting unique and interactive treats like dirt cups not only provides a sense of accomplishment but also fosters a sense of community, whether by sharing recipes or enjoying these treats together.
So why not embrace the spirit of the season and give these Halloween Dirt Cups a shot? Your taste buds (and your friends) will thank you! If you’re eager to dive into making this spooky treat, let’s check out the full recipe to get you started!

Ingredients for Halloween Dirt Cups
Essential ingredients for a spooky twist
Creating Halloween Dirt Cups is a fun and simple way to treat your friends and family this spooky season. To start off, you’ll need the following essential ingredients that will give your dessert that unmistakable dirt-like appearance:
- Chocolate pudding: The foundation of your dirt cup, smooth and creamy.
- Crushed Oreo cookies: These bring the “dirt” texture and a delightful chocolate flavor.
- Gummy worms: These creepy crawlers add a fun touch and are always a hit with kids!
- Whipped topping: Light and fluffy, this adds a nice contrast to the pudding.
To make your cups extra memorable, consider using clear cups or jars to showcase those layers.
Optional toppings and garnishes to elevate your dirt cups
Want to take your Halloween Dirt Cups to the next level? Here are some optional toppings and garnishes to consider:
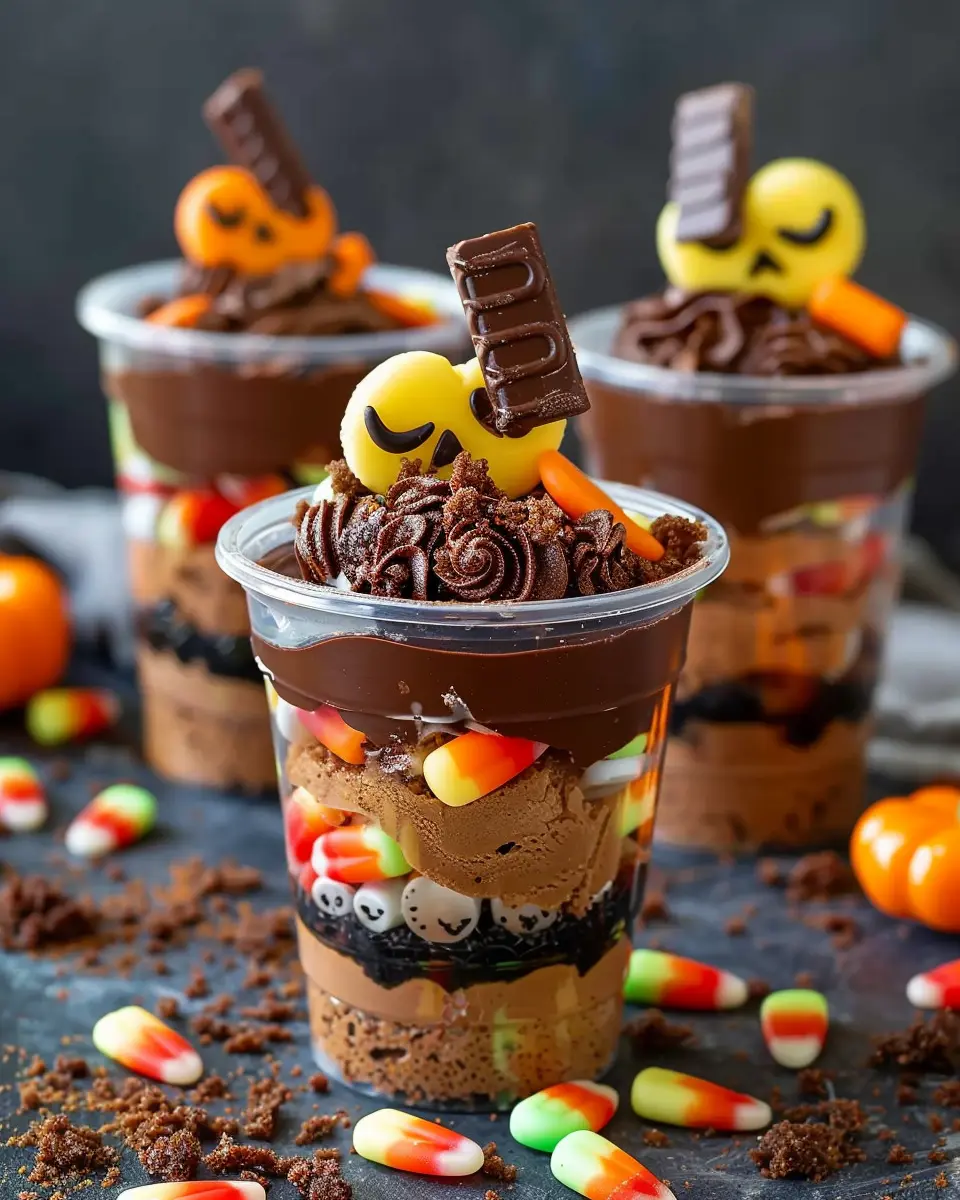
- Candy corn for a pop of color.
- Sprinkles or edible glitter for a festive flair.
- Chocolate spiders or skeletons for that creepy vibe.
Adding some of these elements not only enhances the visual appeal but makes the dessert even more engaging. This is your chance to get creative—what will you add? For more inspiration, check out expert dessert ideas on Food Network.
Step-by-Step Preparation of Halloween Dirt Cups
Creating Halloween Dirt Cups can be one of the most delightful activities leading up to All Hallows’ Eve. Not only are they scrumptiously easy to make, but they also provide an excellent opportunity for creativity. Whether you’re hosting a little gathering or just want to indulge in a spooky treat, follow this step-by-step guide to whip up a batch that will impress friends and family alike.
Gather Your Ingredients and Tools
Before diving into the fun of assembling, it’s essential to gather all your ingredients and tools. Here’s what you’ll need:
Ingredients:
- 2 cups of chocolate pudding (instant or homemade)
- 1 package of chocolate sandwich cookies (think classic Oreos)
- 1 cup of gummy worms or creepy candy (like gummy spiders)
- Optional: Whipped cream for extra flair
Tools:
- Mixing bowl
- Food processor or zip-top bag and rolling pin (for crushing cookies)
- Cup or small glass containers (for serving)
- Spoon or spatula (for layering)
Once you’ve rounded everything up, you’re ready to get started!
Prepare the Chocolate Pudding Mixture
The heart of your Halloween Dirt Cups is the chocolate pudding, which takes just a few minutes to prepare. If you’re going for convenience, pre-made instant pudding works great. Simply follow these steps:
- Mix the pudding powder: In a mixing bowl, whisk together the pudding mix with 2 cups of cold milk until it thickens—this usually takes about 2 minutes.
- Chill: For the best texture, let the pudding sit in the fridge for about 5 minutes while you prepare your cookies.
Did you know that making your own pudding can elevate your dessert game? Check out this DIY pudding recipe for a homemade version that dazzles.
Crush the Cookies for That Dirt-Like Texture
No Halloween Dirt Cup would be complete without that signature “dirt” look. It’s time to crush those cookies!
- Using a food processor: Simply place the cookies in the bowl and pulse until they resemble fine crumbs.
- Alternative method: If you don’t have a food processor, place the cookies in a zip-top bag, seal it tightly, and use a rolling pin to crush them.
Aim for different sizes in your cookie crumbs to replicate the look of actual dirt (some coarse bits add to the ambiance!).
Layering the Dirt Cups with Pudding and Cookies
Now comes the fun part—layering! Grab your cups or containers and let’s create some spooky layers.
- Start with chocolate pudding: Use a spoon or spatula to add a generous layer of pudding to the bottom of each cup.
- Next, sprinkle the cookie crumbs: Add a layer of crushed cookies over the pudding. This not only adds flavor but creates that memorable dirt effect.
- Repeat: Continue layering pudding and cookie crumbs until you reach the top of the cup. Aim for at least two layers of each.
Each cup will look unique, just like the magical Halloween night you’re celebrating!
Add the Fun Toppings to Create a Halloween Vibe
With your layers neatly in place, it’s time to bring your Halloween Dirt Cups to life!
- Gummy worms: Drape a few gummy worms over the top of the cups for that eerie effect.
- Optional whipped cream: A dollop of whipped cream can create a perfect “graveyard” feel.
- Extra embellishments: Consider adding edible decorations like candy bones or sprinkles to make the dessert seasonally festive.
Consider serving these treats alongside something refreshing like apple cider or a non-alcoholic pumpkin spice latte.
With just a little effort, you’ve created delightful Halloween Dirt Cups that are sure to make any gathering festive. Plus, the beauty of these cups is that they can be made ahead of time. So why not treat yourself to a little spooky indulgence? Enjoy your Halloween!
Variations on Halloween Dirt Cups
Looking to mix up your Halloween Dirt Cups this spooky season? These delightful cups are not just a one-size-fits-all treat; they can be dressed up in way that suits any palate! Let’s explore some fun variations that will have your guests asking for seconds.
Pumpkin Spice Dirt Cups for a Seasonal Touch
Nothing says autumn quite like pumpkin spice, right? For a festive twist, consider infusing your Halloween Dirt Cups with this beloved flavor. You can do this by:
- Swapping the Chocolate Pudding: Use pumpkin pudding instead for that rich fall flavor. Some brands offer ready-made or you can easily make your own from scratch.
- Adding Pumpkin Spice Whipped Cream: Whip up some heavy cream and mix in pumpkin spice for a topping that’s both delicious and decorative.
- Crushed Gingersnap Cookies: Instead of traditional chocolate cookies, try crushed gingersnap cookies as your ‘dirt.’ It adds a unique flavor and a nice crunch.
Fruity Dirt Cups with Berry Toppings for a Refreshing Twist
If your guests are craving something lighter, opt for Halloween Dirt Cups adorned with fresh berries. Here’s how to elevate this classic:
- Start with Vanilla Pudding: Use vanilla pudding as a base and layer it beneath vibrant berries like strawberries, blueberries, and raspberries.
- Garnish with Mint: A sprig of fresh mint on top not only adds a pop of color but also introduces a refreshing taste.
- Entice with Granola: For a touch of crunch, sprinkle some granola between the layers. It adds texture and a hint of nuttiness that complements the fruit beautifully.
Diving into these variations not only brings excitement to your Halloween gatherings, but they also cater to various tastes. Want more inspiration? Check out resources like Food Network or Bon Appétit for additional twists on classic desserts. Happy Halloween baking!
Cooking Tips and Notes for Halloween Dirt Cups
Tips to Make Your Pudding Ultra Creamy
Who doesn’t love a decadently creamy pudding in their Halloween Dirt Cups? Here’s how to achieve that silky texture:
- Start with room temperature ingredients: Bringing your milk and cream to room temperature before mixing helps create a smoother consistency.
- Whisk patiently: Avoid clumps by whisking thoroughly while gradually adding your dry ingredients. Consider using a hand mixer for an airy finish.
- Incorporate whipped cream: For that fluffy texture, fold in some freshly whipped cream after your pudding has cooled fully. The added air will make a delightful difference!
Notes on Substituting Ingredients Without Losing Flavor
Feeling adventurous with your Halloween Dirt Cups? You can easily swap certain ingredients without sacrificing deliciousness:
- Chocolate pudding: Use a chocolate almond milk for a dairy-free option that adds a lovely, nutty note.
- Top it off: Instead of crumbled cookies, try using granola or crushed rice cereal for a crunchy twist, adding a new texture that kids love.
- Flavor additions: A dash of vanilla extract can elevate the taste. For those who prefer a bit more zing, add a hint of orange zest to celebrate the Halloween season.
To dive deeper into ingredient substitutions, check out this helpful guide from Food Network. Happy cooking!

Serving Suggestions for Halloween Dirt Cups
Creative Ways to Present Your Dirt Cups for Parties
When it comes to Halloween Dirt Cups, presentation is everything! Consider using clear plastic cups to showcase the delicious layers of chocolate pudding, crumbled cookies, and gummy worms. For a spookier vibe, you could opt for mini cauldrons or pumpkin-shaped containers. Adding a sprig of mint can also provide a pop of color that looks fabulous against the darker hues of your dessert.
If you’re feeling crafty, glue googly eyes to your cups for a fun, whimsical touch! These simple additions can transform your dessert into an eye-catching centerpiece that sparks conversations among your guests.
How to Incorporate Dirt Cups into a Larger Halloween Dessert Table
To make your Halloween dessert table truly spectacular, arrange your Halloween Dirt Cups alongside themed treats like spider web cupcakes and candy corn bark. A clutter-free table helps your dirt cups shine.
Consider creating distinct sections: one for candy, another for baked goods, and dedicated space for your dirt cups. Layer texture by using various platters, mixing heights, and decorative items like faux spider webs or mini pumpkins.
For more inspiration, check out some creative Halloween dessert table ideas on sites like Martha Stewart or Taste of Home. When you integrate your dirt cups into a well-thought-out display, you’ll have a dessert table that everyone will remember!
Time Breakdown for Halloween Dirt Cups
Preparation time
Creating these Halloween Dirt Cups is a breeze! You’ll need about 20 minutes to gather your ingredients and whip up the pudding mixture. It’s the perfect opportunity to set the mood with some spooky music or even your favorite Halloween flick playing in the background. If you want to go the extra mile, consider making your own whipped cream for a homemade touch.
Layering and assembly time
Once your pudding is ready and chilled, assembling the cups should take another 15 minutes. Make sure to have your gummy worms and chocolate cookie crumbs handy for that delightful topping. As you layer each ingredient, imagine the ghoulish delight on your friends’ faces!
Total time to enjoy your spooky treat
In total, you’re looking at about 35 minutes from start to finish—quick enough to ensure you can enjoy these delicious Halloween Dirt Cups and still have time to carve a pumpkin or two! So why wait? Get started and treat yourself to an unforgettable Halloween dessert!
For more fantastic Halloween ideas, check out Food Network for creative recipes and decorating tips.
Nutritional Facts for Halloween Dirt Cups
Calories per serving
If you’re wondering about the caloric content of these delightful treats, each serving of Halloween Dirt Cups typically racks up around 300 calories. While this may fluctuate slightly based on your specific ingredients, it’s a reasonable indulgence for a festive treat. Plus, considering you’ll likely be sharing them, you can spread out the caloric impact!
Key nutrients and considerations
When digging into the nutritional profile of your Halloween Dirt Cups, you’ll find a mix of essential nutrients, including:
- Calcium: Thanks to the dairy elements, these cups can contribute to your daily calcium needs.
- Fiber: If you’re using pudding made with whole grains or added fruits, you’ll boost your fiber content.
It’s also important to balance enjoyment with moderation. As these are often rich in sugar, consider complementing them with healthier options throughout your Halloween celebrations. For more insights into sugar content and its effects, check out the resources at Healthline.
Your Halloween Dirt Cups can be a delightful whimsy this season, combining fun and nutrition effortlessly!
FAQs about Halloween Dirt Cups
Can I make Halloween Dirt Cups ahead of time?
Absolutely! One of the best things about Halloween Dirt Cups is their convenience. You can prepare them a day in advance and store them covered in the fridge until you’re ready to serve. Just layer the ingredients as instructed, pop a lid on, and voilà! This is perfect for parties where you need to free up time for other activities. Just remember to add any decorations, like gummy worms or spooky sprinkles, right before serving to maintain their festive flair.
What are some fun variations for different holidays?
While Halloween Dirt Cups are a hit in October, you can easily adapt the concept for other festive celebrations.
- Valentine’s Day: Use red and pink candies, and swap in strawberry or raspberry pudding for a romantic twist.
- Easter: Replace gummy worms with chocolate eggs and add pastel sprinkles.
- Independence Day: Layer strawberries, blueberries, and whipped cream for a patriotic look.
These variations not only keep things interesting but also encourage creativity in the kitchen. Be sure to check out themed Pudding Recipes for additional inspiration!
How can I make these dirt cups healthier?
If you’re looking to lighten up your Halloween Dirt Cups, there are several easy tweaks to consider:
- Use low-fat or Greek yogurt instead of pudding. It’s creamy and adds protein.
- Opt for healthier granola or crushed whole-grain cookies rather than traditional chocolate cookie crumbles.
- Add fruits like bananas or strawberries to provide natural sweetness and fiber.
Making these adjustments allows you to indulge without derailing your healthy eating goals. The key is to have fun with it and experiment! After all, cooking should be about enjoyment and creativity, not just calories.
Conclusion on Halloween Dirt Cups
Why you should try making Halloween Dirt Cups this season
Halloween Dirt Cups are a wonderfully festive treat that combines simplicity with creativity. Not only are they visually captivating, but they also allow you to unleash your inner artist. Imagine layering rich chocolate pudding, crushed cookies, and vibrant gummy candies—it’s a treat that appeals to both taste buds and the eyes!
By trying out these fun dessert cups, you’ll be sure to impress guests at your next Halloween gathering. Plus, they’re a fantastic activity for families, making memories in the kitchen together. Curious for inspiration? Check out some ideas on creative Halloween desserts here.
Embrace the spirit of the season with Halloween Dirt Cups and watch them become a cherished tradition in your home!
PrintHalloween Dirt Cups: Easy and Fun Treats for Spooky Delights
These Halloween Dirt Cups are a fun and easy treat perfect for any spooky celebration. Layered with chocolate pudding, crushed cookies, and gummy worms, they’re sure to delight kids and adults alike!
- Prep Time: 15 minutes
- Total Time: 15 minutes
- Yield: 4 servings 1x
- Category: Dessert
- Method: No-bake
- Cuisine: American
- Diet: Vegetarian
Ingredients
- 1 package chocolate pudding mix
- 2 cups milk
- 1 cup crushed chocolate sandwich cookies
- 1 cup gummy worms
- 1 cup whipped cream
Instructions
- In a bowl, whisk together the chocolate pudding mix and milk until smooth.
- Let it sit for a couple of minutes until it thickens.
- In serving cups, layer the pudding, whipped cream, and crushed cookies to create the ‘dirt’ effect.
- Top with gummy worms for a spooky touch.
Notes
- For added crunch, consider adding chopped nuts.
- You can substitute vanilla pudding for a different flavor.
Nutrition
- Serving Size: 1 cup
- Calories: 250
- Sugar: 20g
- Sodium: 150mg
- Fat: 10g
- Saturated Fat: 5g
- Carbohydrates: 36g
- Fiber: 1g
- Protein: 3g
- Cholesterol: 15mg
Keywords: Halloween Dirt Cups, spooky treats, dessert recipes